How to create a Decor Product Blank
Before You Start: Setup Checklist
Please review the following points to ensure a smooth and efficient product setup process:
Mask Images
For simple products (posters, prints), masks can be created during setup.
For complex products (e.g., photobooks, frames), create masks in advance. View Mask Guidelines
Occasions
If your required occasion isn’t listed, add it here: Add Occasion
Subcategories
For custom subcategories, use this link: Manage Subcategories
Review Steps
Go through the setup steps once to know what resources you'll need.
Once ready, start the product setup process.
Glossary:
Product Blank is a basic product setup used to define how a product works in the design and order system, before adding visuals or final templates.
Product Code This is a unique code that needs to be added for every definition.
SKU ID a unique id assigned to each product or product variant in the product fulfillment process.
Safe Area This is the outline marking on the product designer to let the customer know which part on the page may get cropped/cut while product fulfillment.
Bleed Area Bleed area is a portion of a design that extends beyond the final trim size of a printed product.
Trim Area The trim area refers to the space around the product where excess material is cut away during the final cutting process.
Substrate / Attributes It is the paper used for a product. Ie. Artpaper, Silky, Lustre etc.
Lamination It is the layers of material to the surface of a product, often a printed material, to enhance its durability, visual appeal, or specific properties.
Image Size Is the size of the image used in the designer.
Photo width Photo width is the size of the photo set to the full designer area.
Binding Is to securely attach the pages together and create a book structure. This involves various techniques, such as imagewrap binding, stitch binding, perfect binding etc.
Display Mask Image Is the overlay mask to be displayed in the designer.
Clippath Mask Image Is the mask area set for designing purposes by the designer.
Offset Value Are used to set the mask on the designer.
Category Is used to organise products under certain sections
Sub Category Is used to organise multiple types of products under specific sections
App name It refers to the type of the designer to be used for the configured product ie. prints products designer, photobook products designer, calendar designer, decor products designer.
Printable surfaces It refers to the designer surface where the designing will be done. Of which the product specification to be added.
Output type It refers to the output file type required to be generated after the order is processed ie. jpeg format or pdf format.
Min pages It refers to the minimum number of pages with which a product will open
Max page It refers to the maximum number of pages a product will have an option to add up to.
Steps:
Step 1. Open the website link Enter valid login details and click on login button
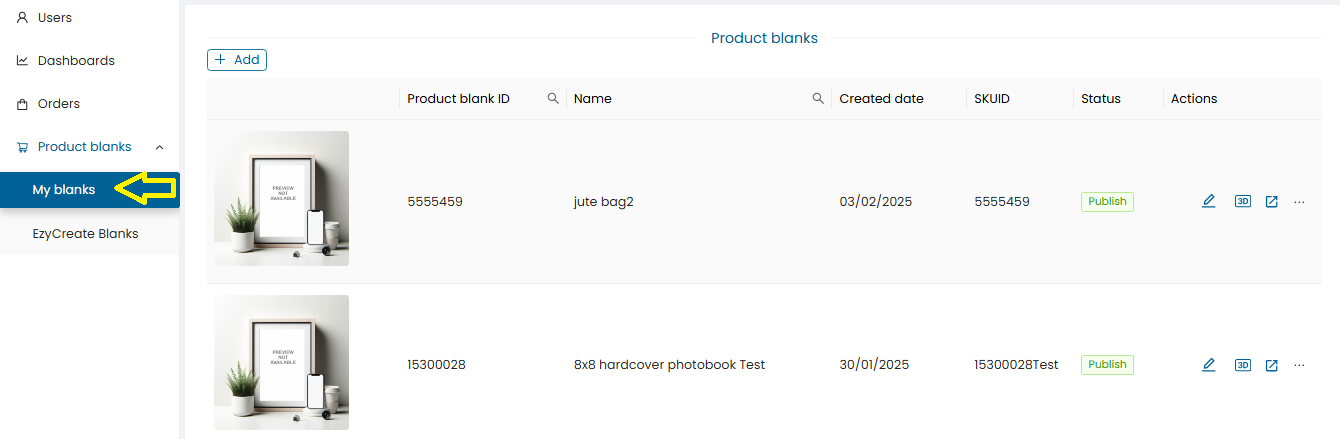
Step 2. Click on “Product blanks” and then click on My Blanks. It will display the list of defined product Blanks.
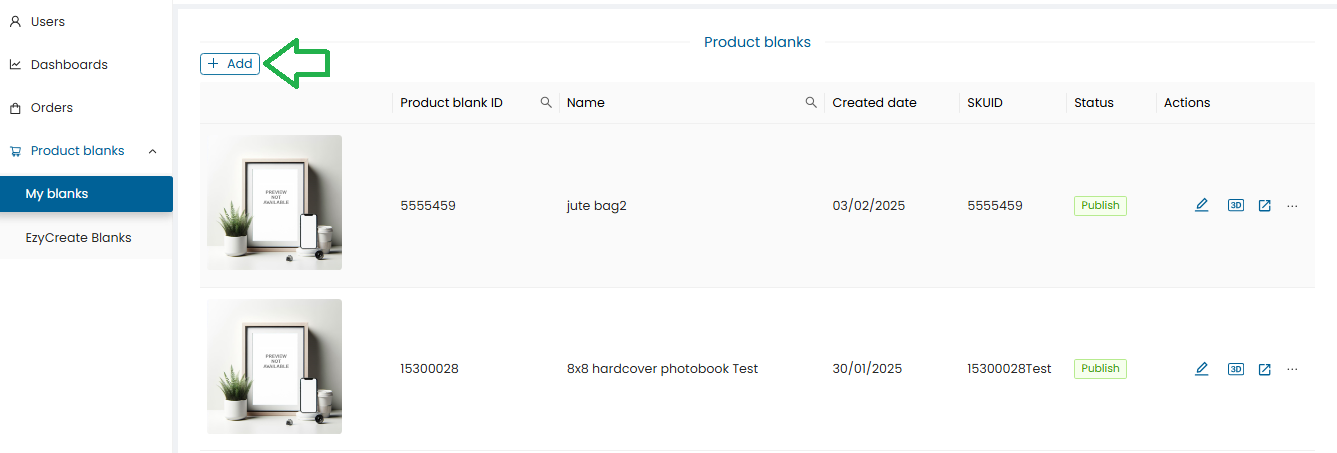
Step 3. To create a new product Blank click on the “Add” button.
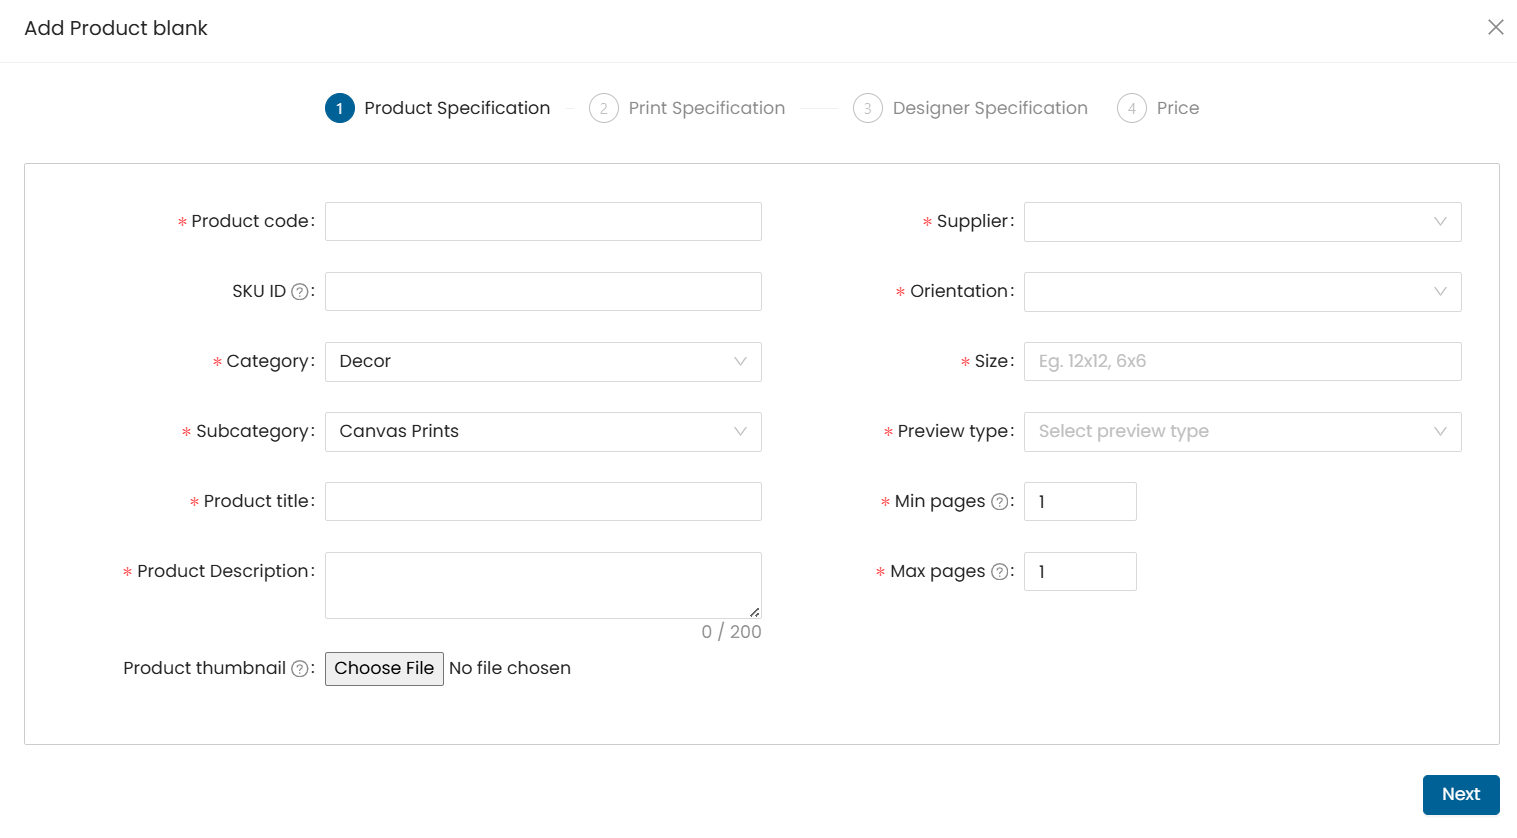
Step 4.
-
Product code : Enter the unique product code.
-
SKU ID : Enter SKU id is the same as product code or if it is different then enter accordingly.
A product code, also known as a product number, SKU (Stock Keeping Unit), or UPC (Universal Product Code), is a unique identifier assigned to a particular product or item. .
-
Category : Select Product Category, from the drop-down under which the product needs to be defined.
How to Add a category & Sub-category
Subcategory : select product & Select Subcategory under which the product needs to be defined.How to Add a category & Sub-category
Product title : Enter product title
Product Description : Enter Product Description not more than 200 chars. This description is used for internal definition.
Product thumbnail : select and upload the product thumbnail. (.jpg format only). This thumbnail image will be displayed in EzyAdmin for that Product.
Supplier : select the supplier under which the product will be listed.
Orientation: select the product orientation ie. portrait, landscape, square.
Size : select product size. Eg, 12x12, 6x6 This size is used for internal definition.
Preview type : select the product preview type from the given drop-down.This option is used for internal definition.
Note: Preview needs to be selected as per the product type.
Products Preview type
Photobooks 3D
Mini book 2D
Calendar 2D
Canvas prints 3D
Mounted prints 3D
Frames 3D
Mug 3D
- Min pages: Enter min page count. Eg. for single surface product the page count is 1
- Max pages : Enter min page count. Eg. for single surface product the page count is 1 These details will be as per the product specs.
Click on the next button to continue.
Step 5
Output type : select the output type for the product ie. .JPG / PDF Click on the add printable surfaces button.
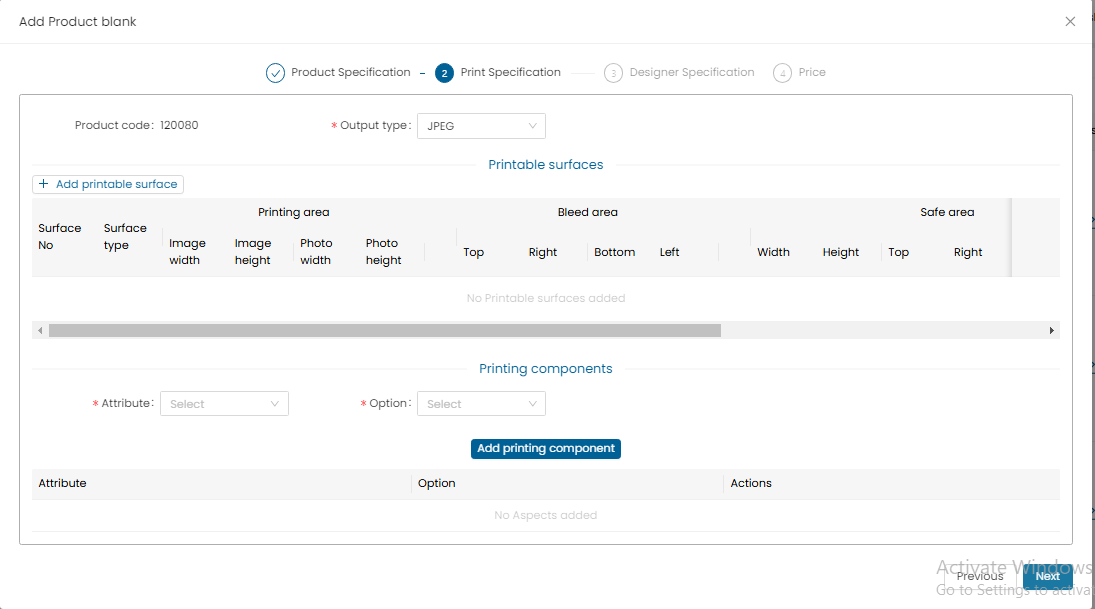
Step 6

Select surface type: from the given drop-down.
Note : All specs and sizes to be entered are in inches.
Image size : Enter image size specs .This image size is the printable image size of the product. Printable output image size.
Note : under Image size : as per the image width & height is entered and photo width & height the photo holder will be displayed in the designer.
for product config : specs of : image width & height, photo width & height and the mask offsets specs are compulsory
Safe area : Enter Safe area specs.
Bleed area : Enter Bleed area specs.
The bleed is the area to be trimmed off.
The bleed exists to prevent the possibility of a small white gap at the edge of the finished job where a design object is required to go all the way to the edge of the paper.
Trim area : Enter Trim area specs. (corner radius to be entered only in case if the product has rounded corners on the design area) eg. magnet product having rounded corners. Click on the add button to save the entered details.
Step 7

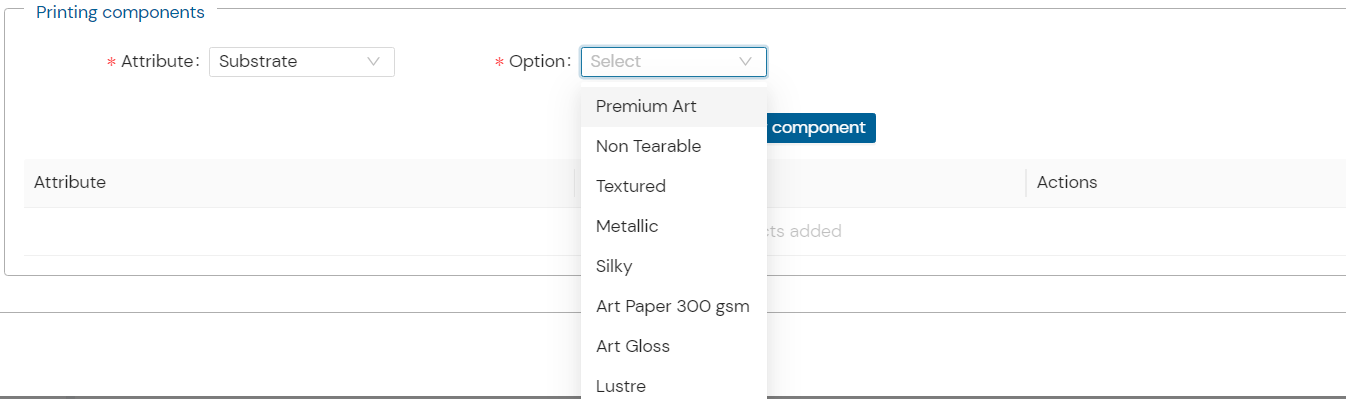
Printing components :
-
under printing components, add substrate, Lamination, binding, cover etc for the product.
-
If there is a new substrate/lamination to be added in the list,then it has to be defined under the admin module under Attributes->laminations.
-
Under options : select and set an option as per the substrate/lamination etc selected. Eg. if ‘artpaper’ substrates is selected then the lamination type ie. ‘matte’/’gloss’ applicable is also to be set.
Designer specs: Please note designer specs need to be in inches.
Step 8

- Select “App name” from the drop-down for example. for the decor type product the app name is “Ezydesigner”. According to this selection the product will open in that respective designer.
- Default template : select from the drop down if you want to setup a customized template (Template created through template creator) as default template or keep it as none.
- To add the designer specs click on the "Add designer specs" button.
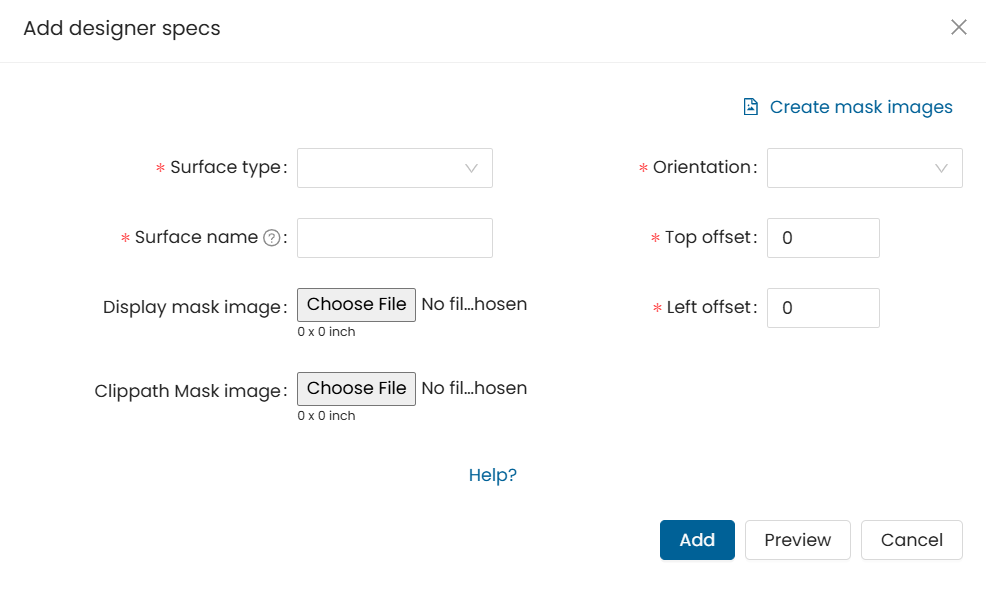
-
Surface Type : Select the surface type from the drop-down for which the mask and specs will be added. Surface name : Enter a surface name based on the surface type selected.
-
Display mask image : Select and upload the Display mask image of the product.
Note :
-
The mask image file format should be in .png
-
To display a product in the designer we require 2 images so one is Display mask image and other is clippath mask image.
-
The product specs and both the mask images specs need to be maintained the same. .
-
There is no recommended size as such as it is dependent on the product specs.
-
Orientation : select orientation for the added images as per the uploaded mask. Enter Mask offsets (in inches) : Top offset, Left offset Offset - this is for the additional properties of the mask to be set in terms of the offsets.
-
Preview : you can click on the preview button to view the added mask image preview display.
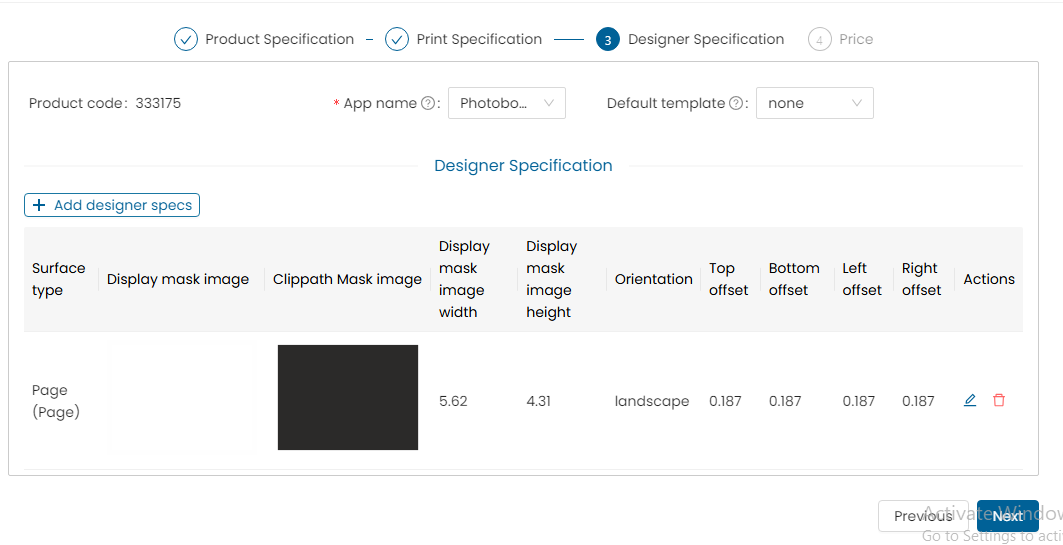
- Once all the required details are entered then to save these details click on the “Add” button.
- Click the “Next” button to go to the Pricing Section.
*Note : In case of products accepting both landscape & portrait orientation, both orientation masks have to be added. In case of square orientation only square mask to be updated.*
Step 9
Price type : Select Price type as single qty pricing.
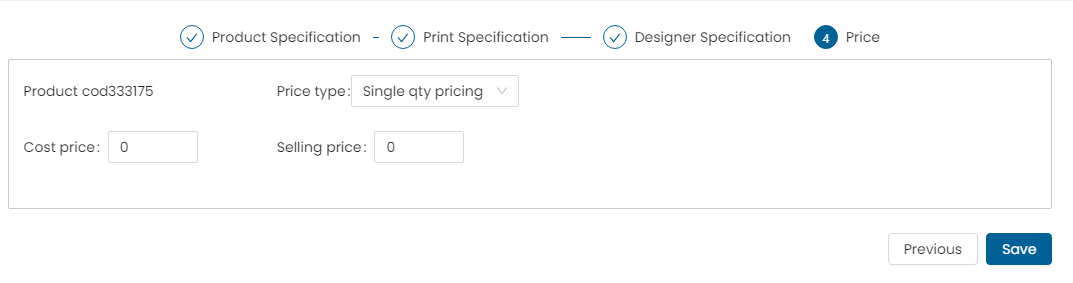
- Enter Cost price & Selling price values.
- Click on the add price button to save the details.
- Click on save button to save the add product form.
Price type : Select Price type as Volume Pricing.
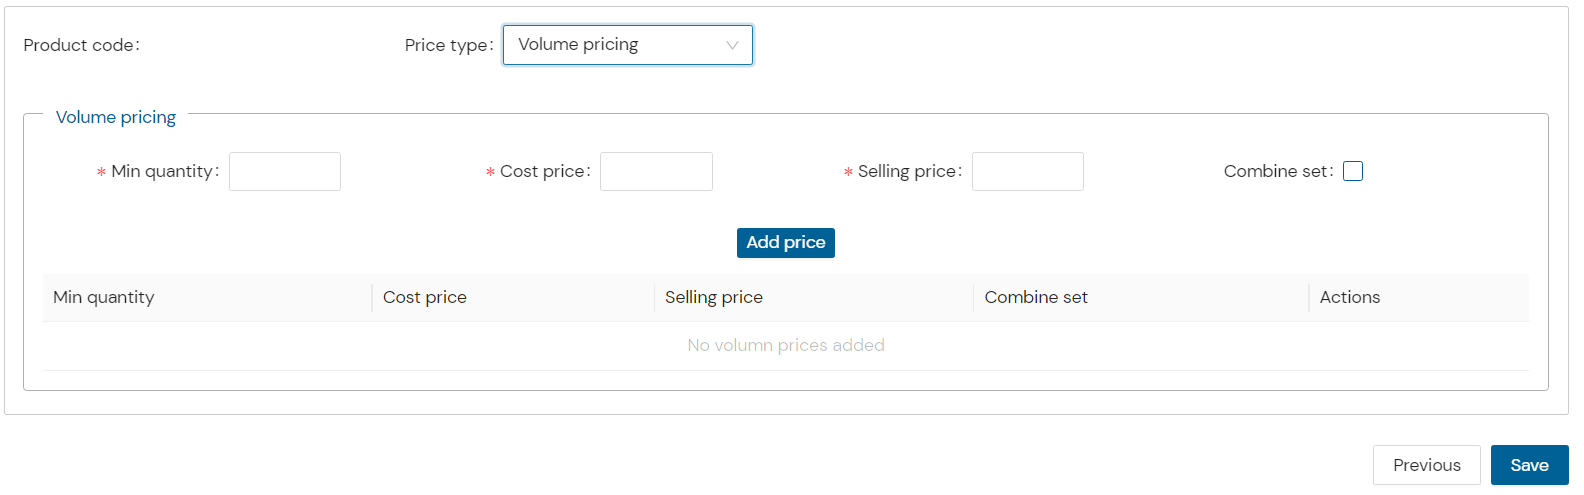
Note : in case of product to be ordered in bulk quantities the volume pricing option to be added.
- Min quantity : enter min quantity.
- Cost price : enter Cost price & Selling price
- Combine set : select the checkbox if the quantity sets are to be combined
- Click on the add price button to save the details.
- Click on save button to save the add product form.
Price type : Select Price type as Attribute level pricing
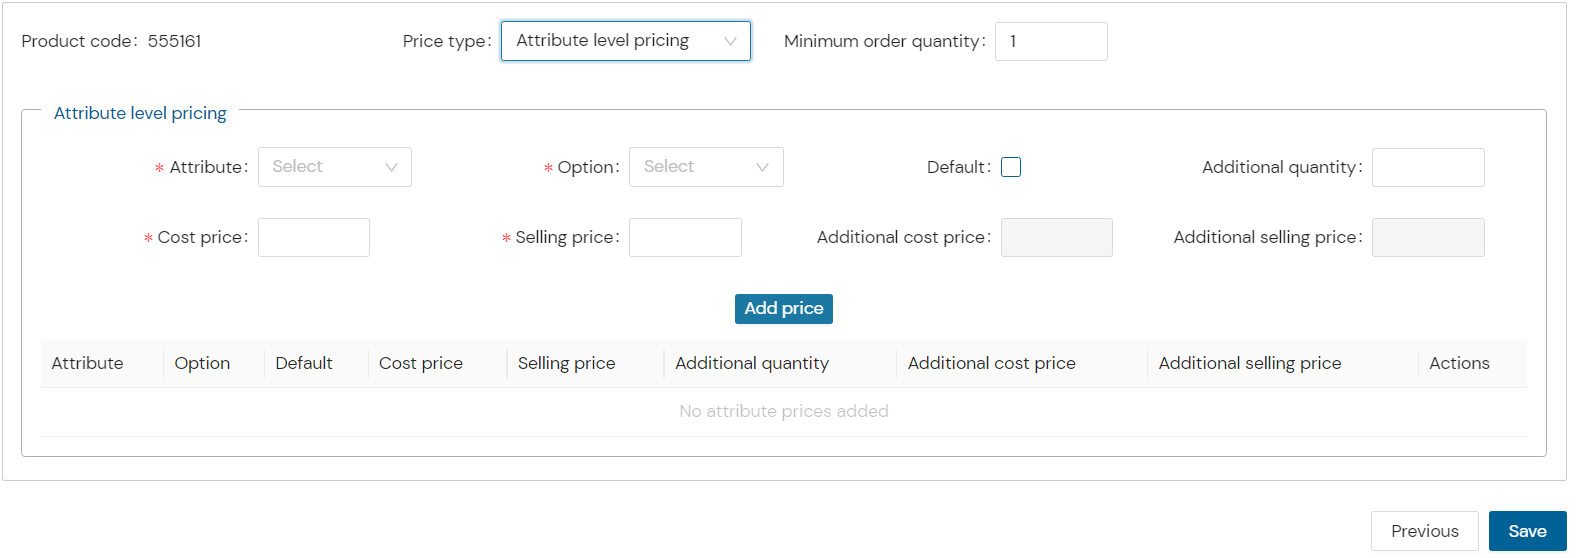
In case of a product where multiple attributes to be set the attribute level pricing can be used.
-
Any surface or material on which printing is done. Art paper, Synthetic Paper, Metal, Acrylic
-
Select & set pricing for each attribute individually.
-
Click on the add price button to save the details.
-
Click on save button to save the add product form.
Note:
-
a product having no attribute for such a product you'll can use single qty pricing.
-
a volume pricing is used for a product having min order qty. or to be ordered in bulk.
-
a product having multiple attributes with pricing as per the attribute selected. In this case attribute pricing will be used.
Step 11
- Once the product is saved, open the product wizard list and it will display the created product.
- Click on the “View in designer” button to preview the created product in the designer.

Step 12
- The designer will open the defined product.
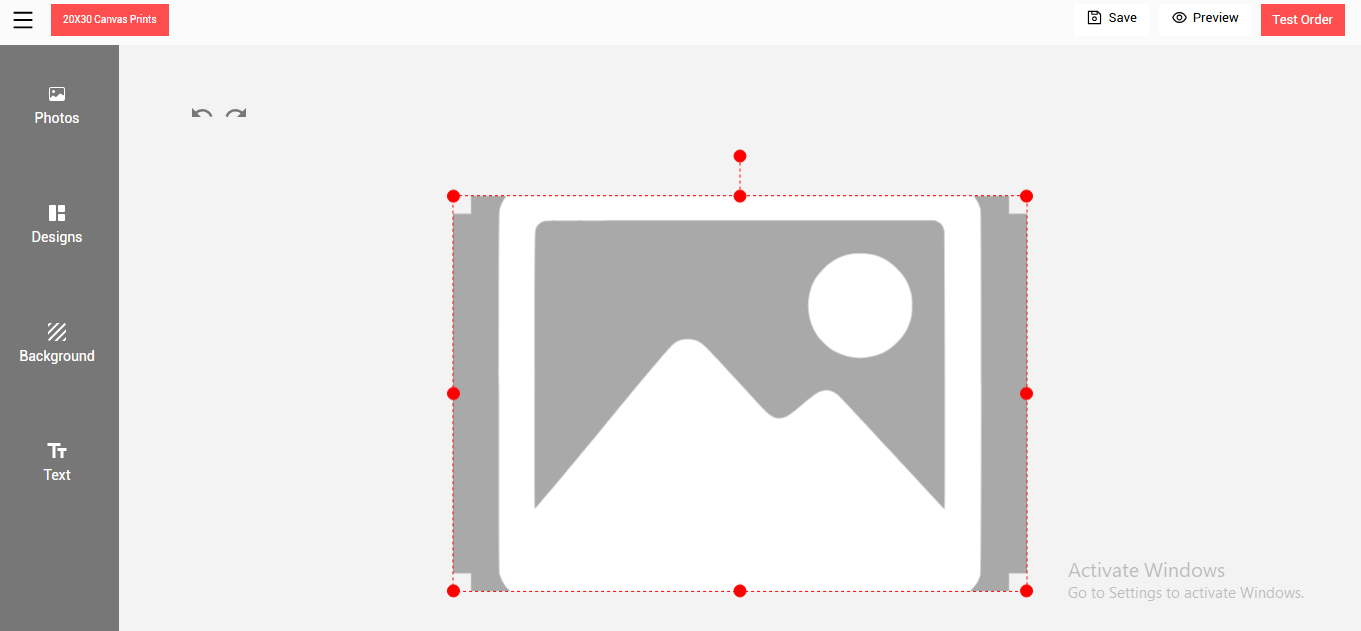
Step 13
- Click on the upload photo button.
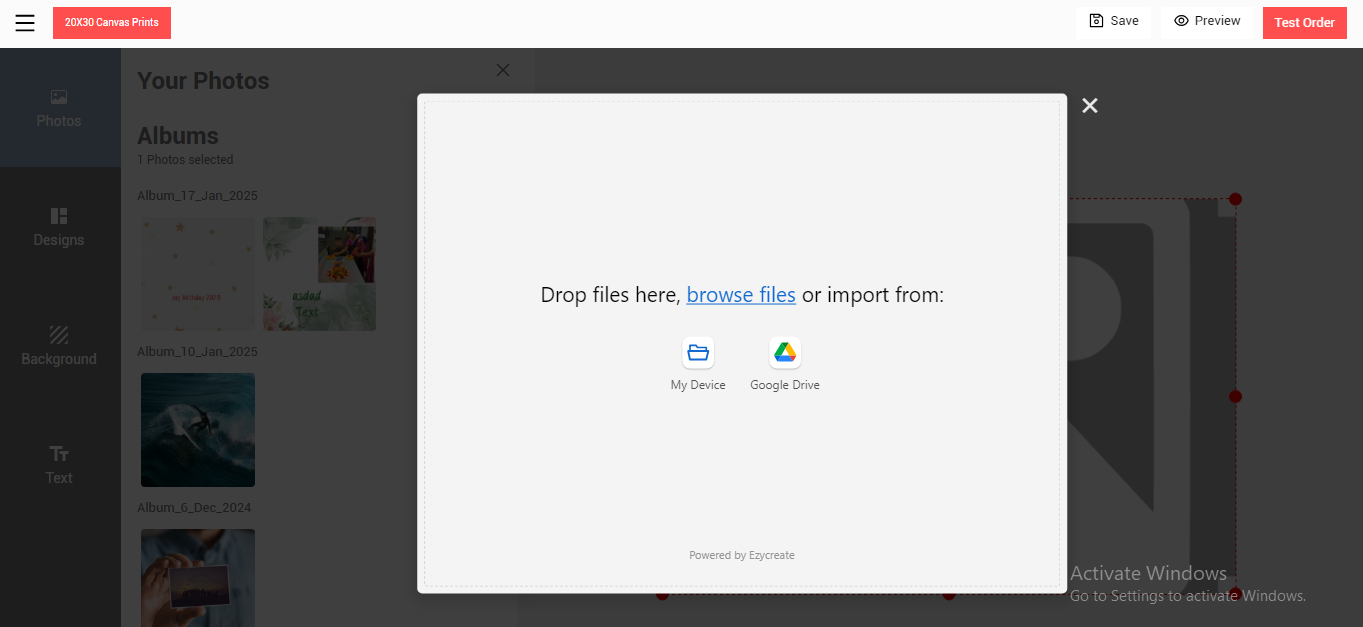
Step 14
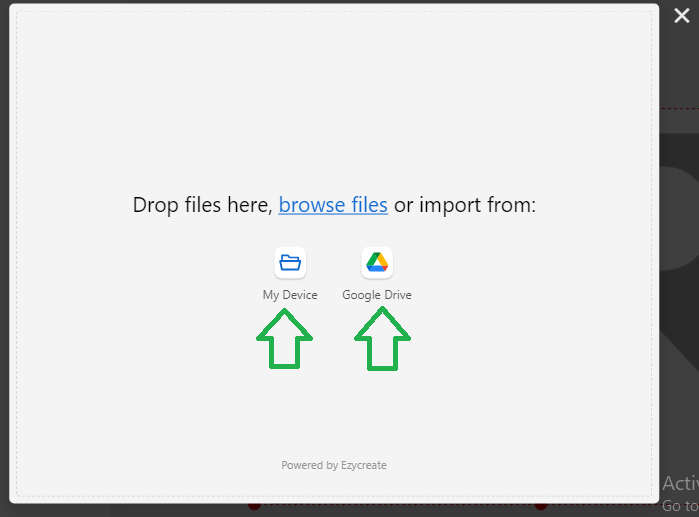
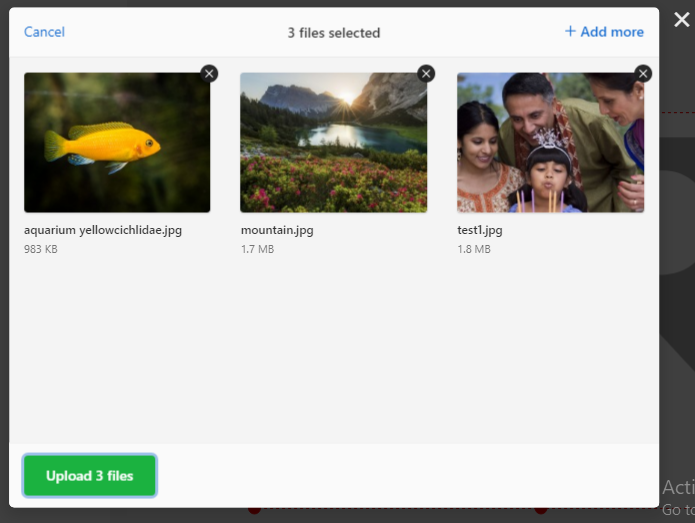
- Click to select files or drag and drop photos onto the uploader.
- Click on upload button to upload the added photos
- Once the photos are uploaded, click on the photo to add it to the designer.
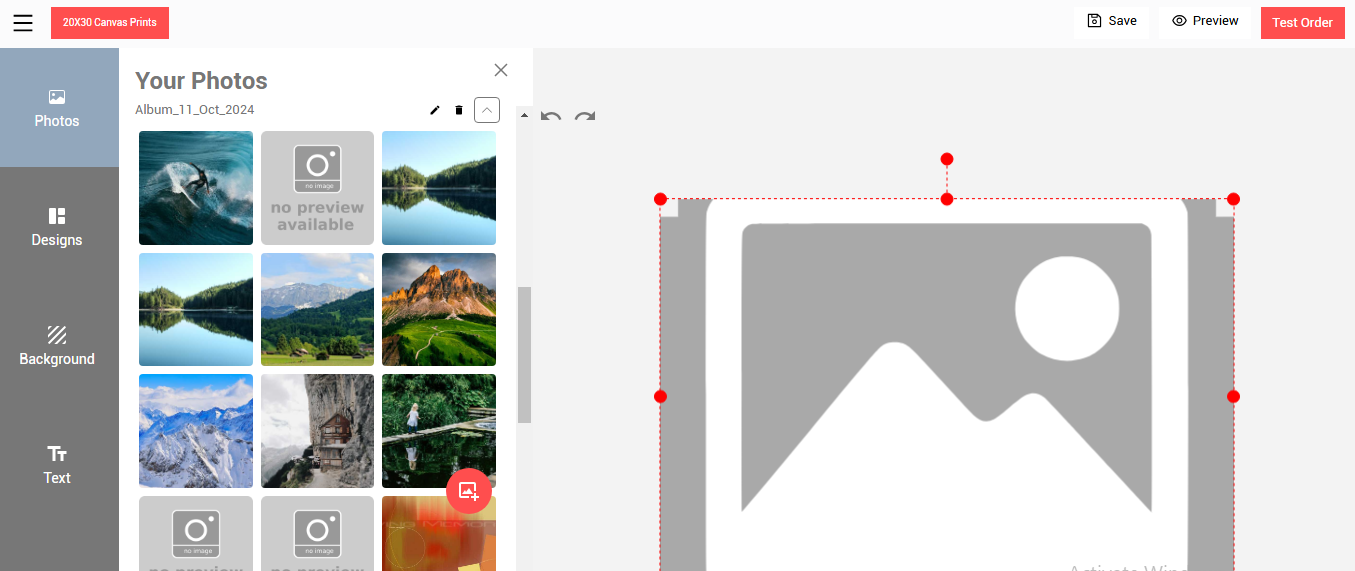
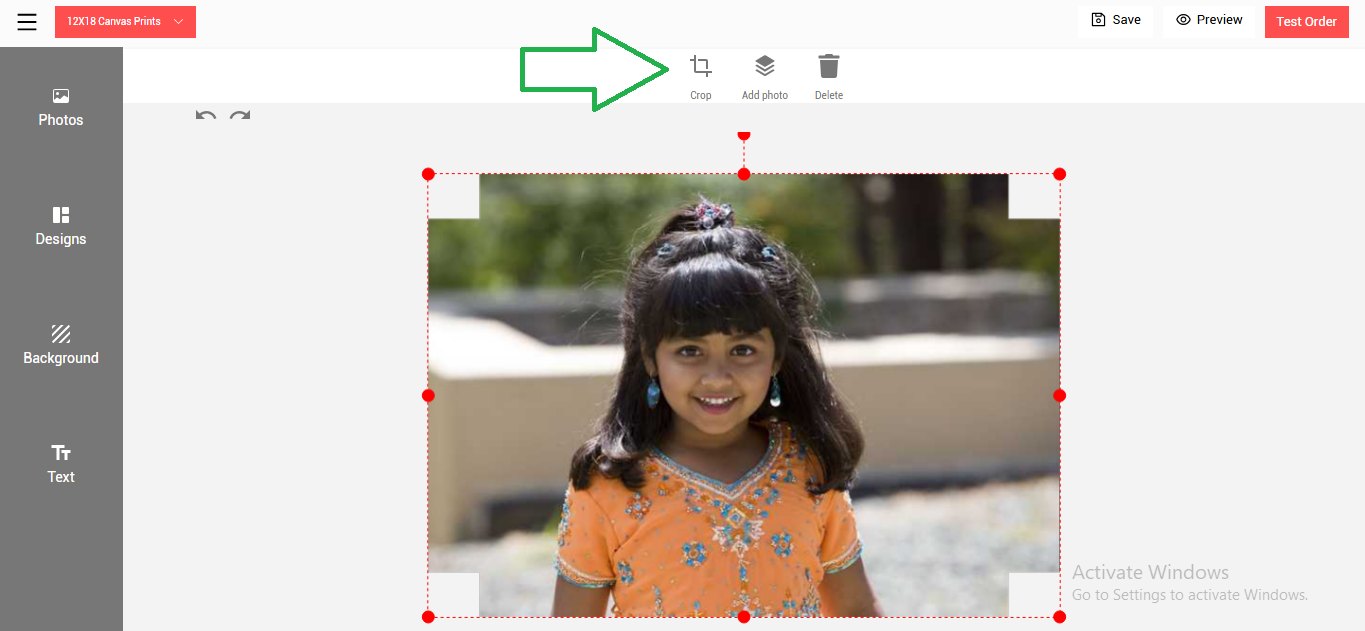
- Photo preview will be displayed, now click on the photo to edit
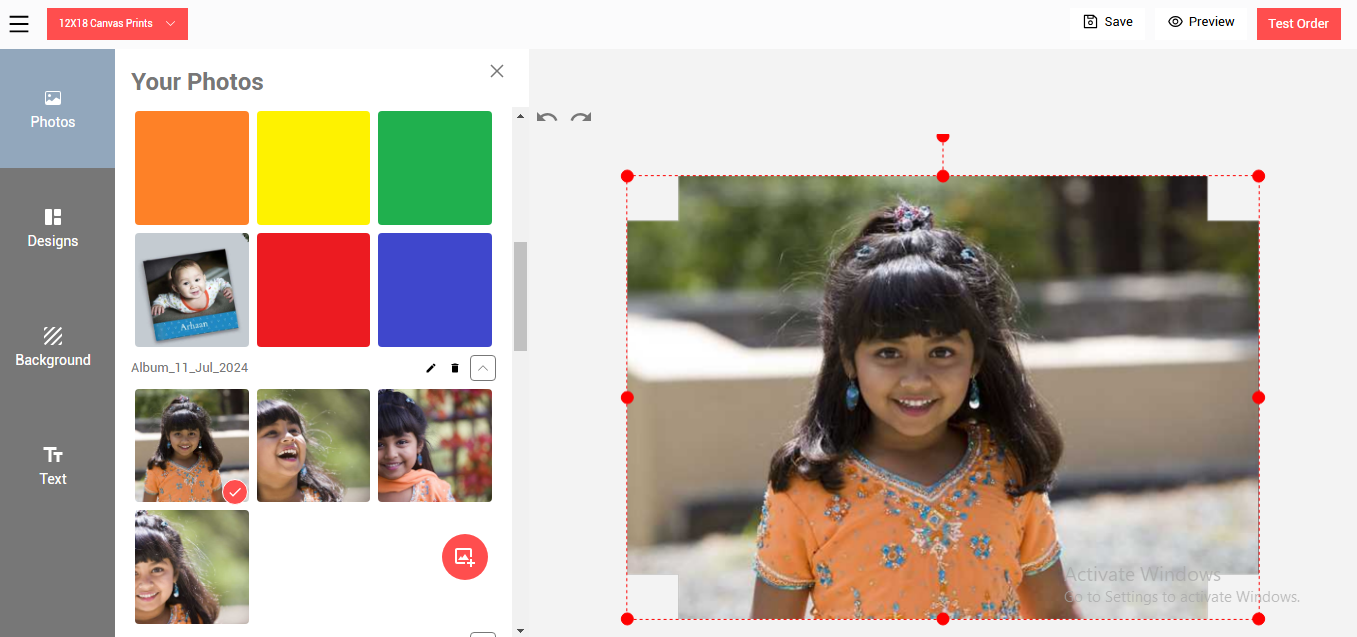
- The photo edit menu will be displayed.
- Once the editing is done click on the “Test Order” button.
Step 15
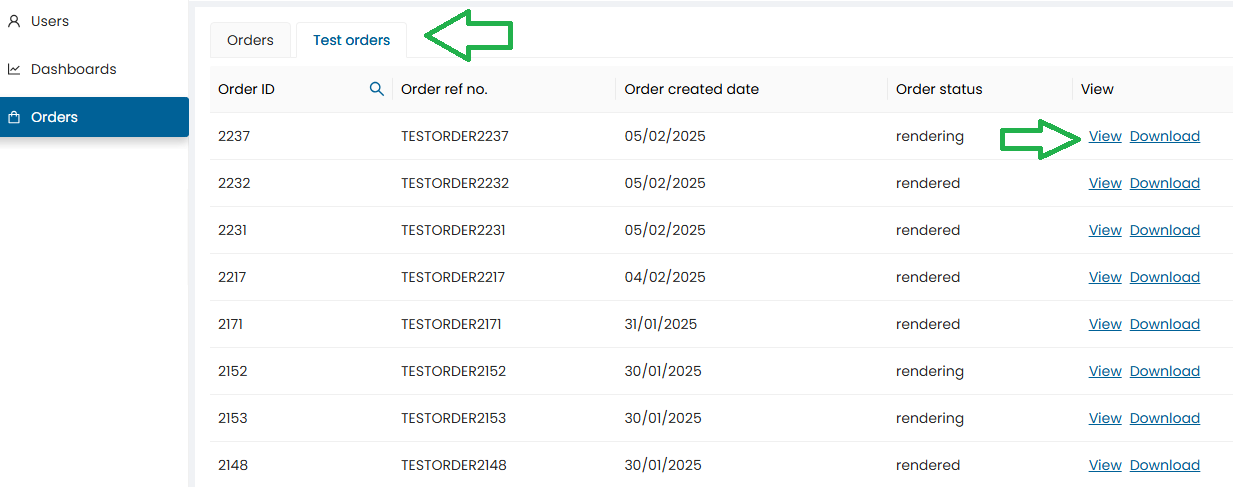
- Will display a message as “Order placed successfully”.
- The order tab will open displaying the recent order placed
- Click on the ‘view” order details option
Step 16
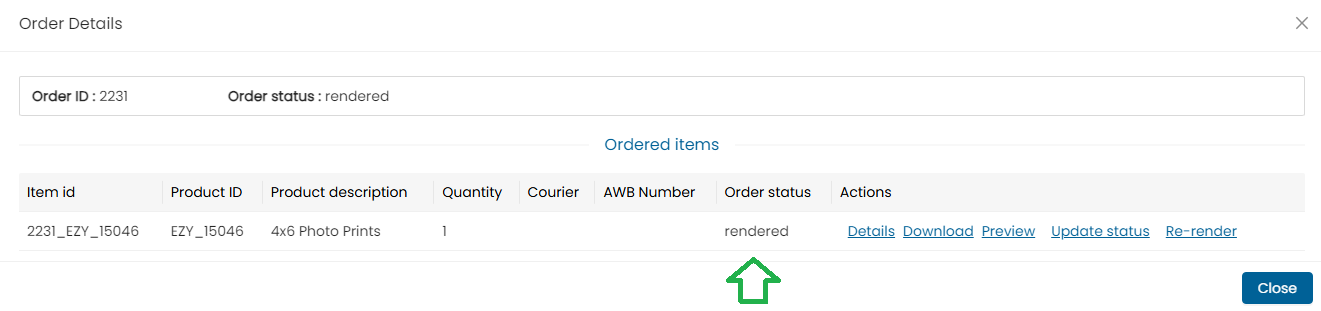
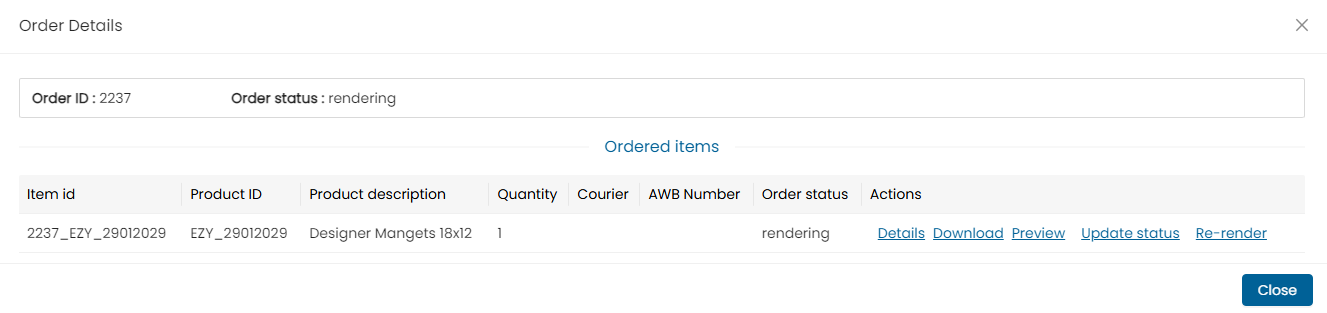
- Once the test order is placed the order will be rendered by the renderer application, and it will be available in the order screen
- Check the order status. Once the status is shown as rendered, you can download the order images.
- Orders can be downloaded using the “Download all” button or you can individually also download single images.
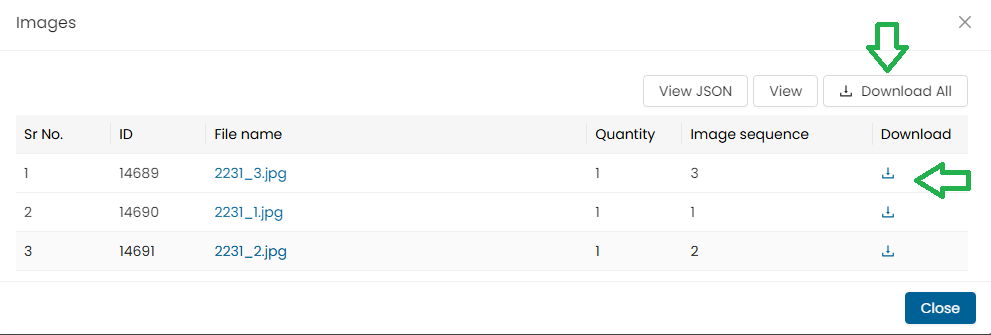
Note : In case of multiple images, users can either download a single image or click on the “Download All” button to download all the images at once.
Step 17
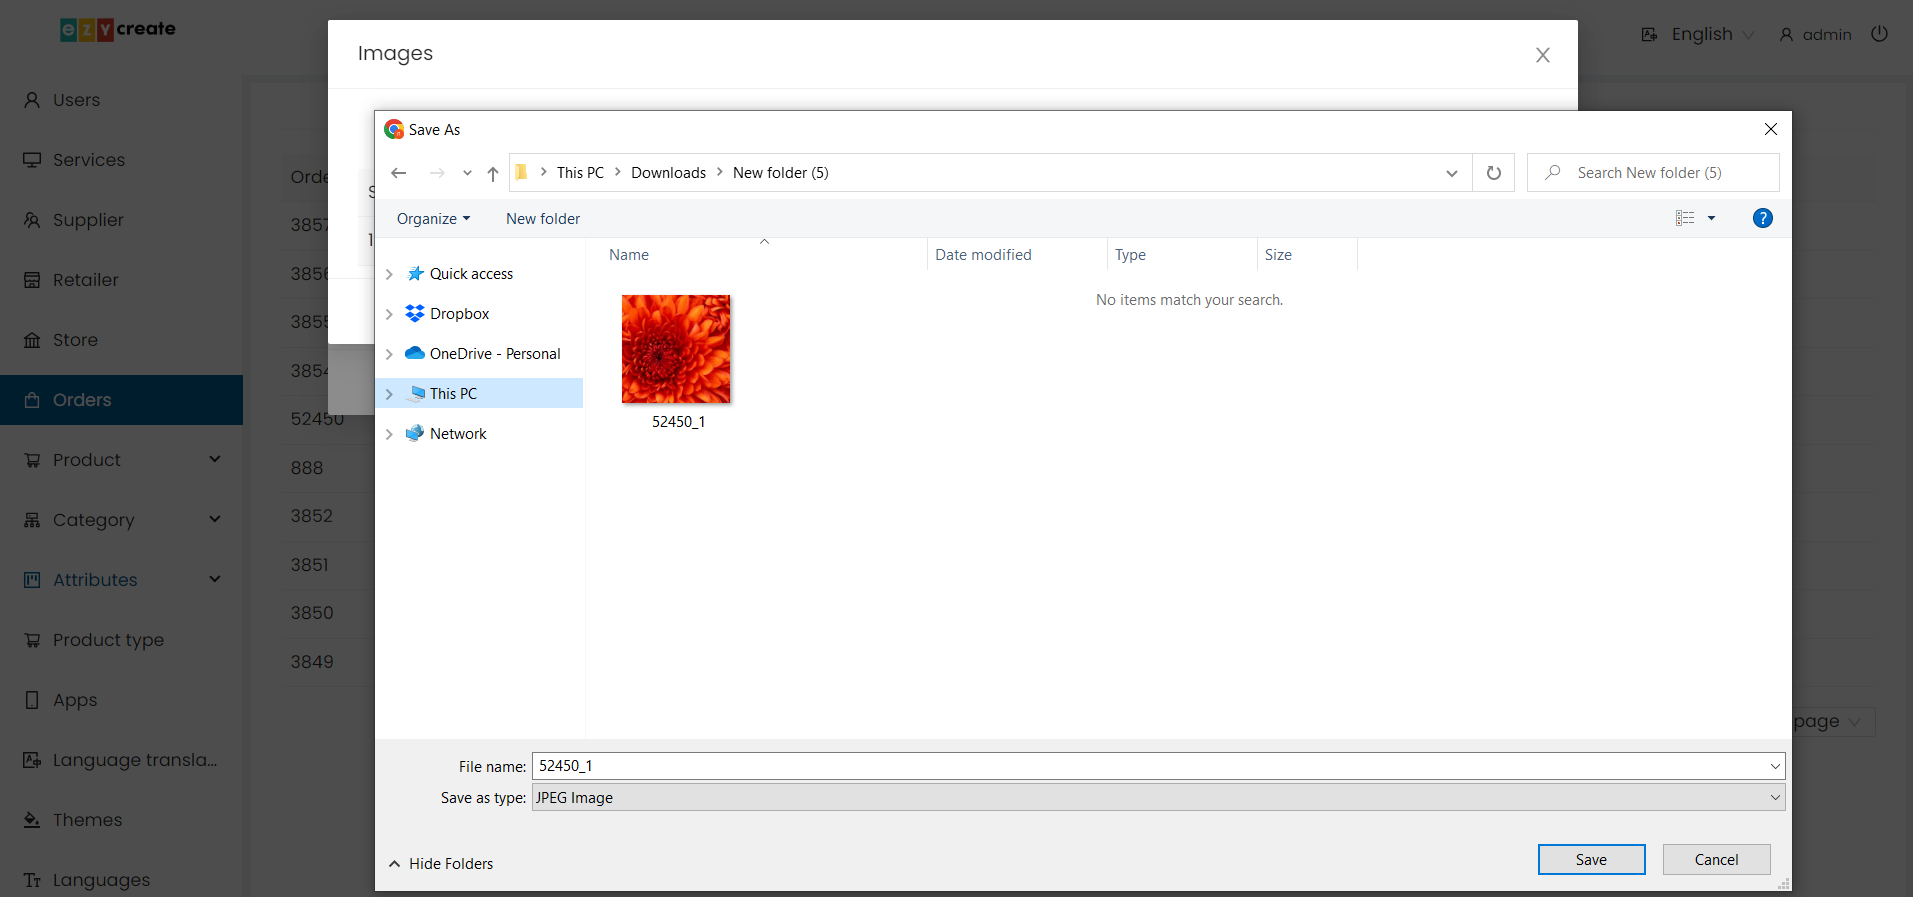
- Select a path to save the test order image.
- Click on the save button.
- The image will get downloaded to the selected location.
- If the order is downloaded using the “Download all” button than a zip file will be downloaded.
The downloaded image can be either sent to the printer for printing or it can be mailed to anyone who can print it.
Step 18
- Once the order test is passed and the product is ready to be published.
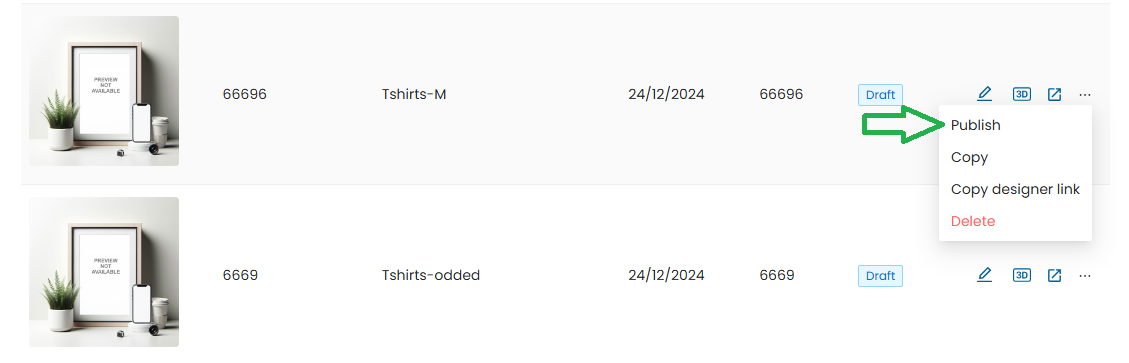
- Go to the product blank dashboard.
- Click on the product setting button from the product blank dashboard.
- Click on the “Publish” button.
Step 19
- The product status will be updated as “Publish”.

- Once the Product is Published & the product Templates are Published, Product Blank Specs Cannot be Changed. Only need formatting dnt change the text, dnt short , dnt do any thing on text keep it as it just make step by step