Print Designer
How to Create a Print Product
📩 Feedback Email: support@ezycreate.com
Glossary
- Product Blank: A basic product setup used to define how a product works in the design and order system, before adding visuals or final templates.
- Product Code: A unique code required for every product definition.
- SKU ID: A unique ID assigned to each product or product variant in the product fulfillment process.
- Safe Area: An outline marking on the product designer indicating the area that may get cropped/cut during fulfillment.
- Bleed Area: A portion of a design that extends beyond the final trim size to prevent white edges.
- Trim Area: The space around the product where excess material is cut away.
- Substrate / Attributes: The paper or material used for a product (e.g., Artpaper, Silky, Lustre).
- Lamination: A surface layer added to enhance durability or visual appeal.
- Image Size: Size of the image used in the designer.
- Photo Width: The size of the photo set to fill the designer area.
- Binding: The process to attach pages and create a book structure.
- Display Mask Image: An overlay mask displayed in the designer.
- Clippath Mask Image: The mask area used for designing.
- Offset Value: Used to set mask position in the designer.
- Category / Sub Category: Used to organize products under specific sections.
- App Name: Type of designer used (e.g., prints designer, photobook designer).
- Printable Surfaces: Designer surface where designing is done.
- Output Type: Output file format generated post-order (JPEG or PDF).
- Min Pages / Max Pages: Minimum and maximum number of pages a product can have.
Steps
Step 1: Login
- Open: EC admin
- Enter login details and submit.
Step 2: Navigate to "My Blanks"
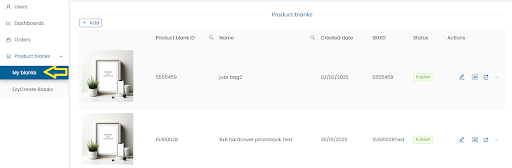
- Click on My Blanks to see defined product blanks.
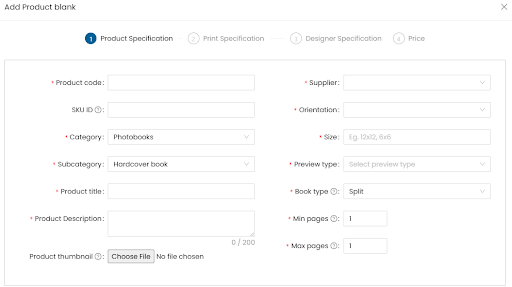
Step 3: Create a New Product Blank

-
Click on Add.
-
Product Code: Enter unique code.
-
SKU ID: Same as Product Code or enter different ID.
-
Product Type: Choose from the dropdown.
-
Category / Subcategory: Select as required.
-
Product Title: Enter name.
-
Product Description: Max 200 characters, internal use.
-
Thumbnail: Upload JPG image.
-
Supplier: Select supplier.
-
Orientation: Portrait, Landscape, or Square.
-
Size: e.g., 4x6, 5x7.
-
Preview Type:
- Photobooks: 3D
- Mini book: 2D
- Calendar: 2D
- Canvas prints: 3D
- Mounted prints: 3D
- Frames: 3D
- Mug: 3D
- Prints: Image
-
Min / Max Pages: As per product specs.
-
Click Next.
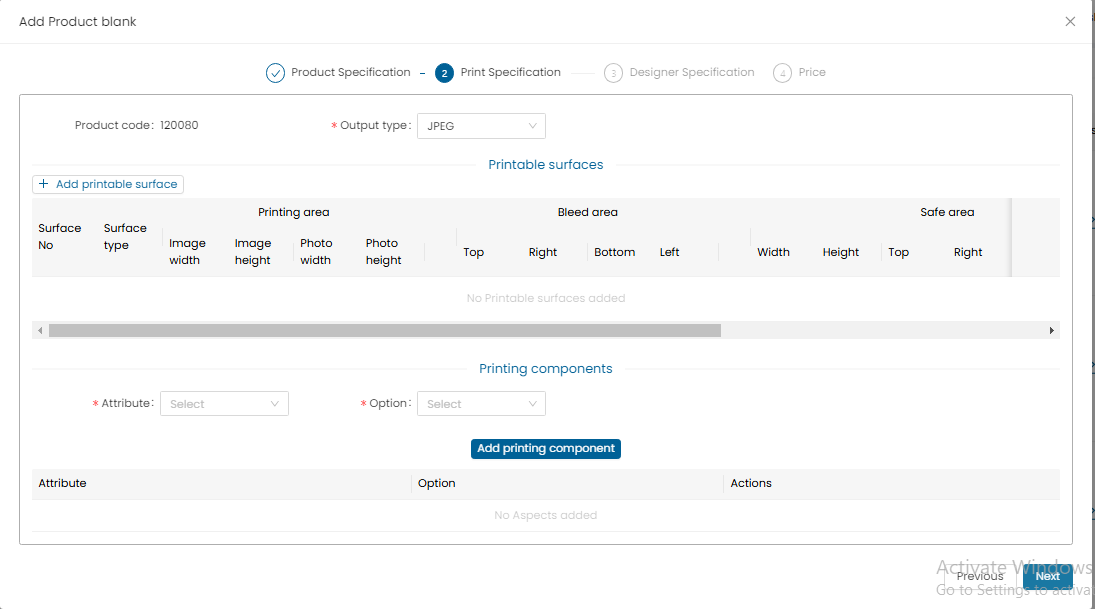
Step 4: Set Output Type & Printable Surface
-
Output Type: JPEG or PDF
-
Click Add Printable Surfaces
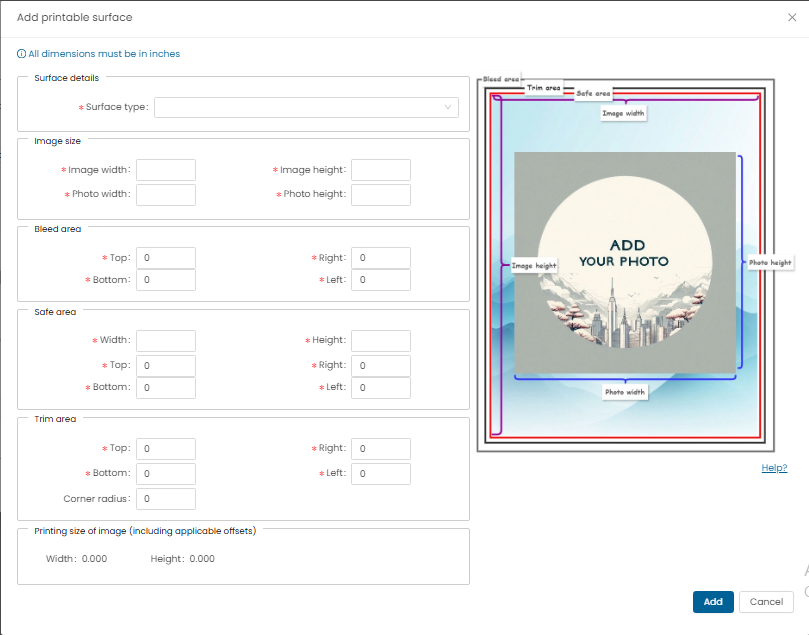
-
Enter all specs in inches:
- Surface Type: Choose from dropdown
- Image Size: Printable output image size
- Photo Width / Height
- Bleed Area
- Safe Area
- Trim Area (enter corner radius if rounded corners)
-
Click Add.
Step 5: Add Printing Components

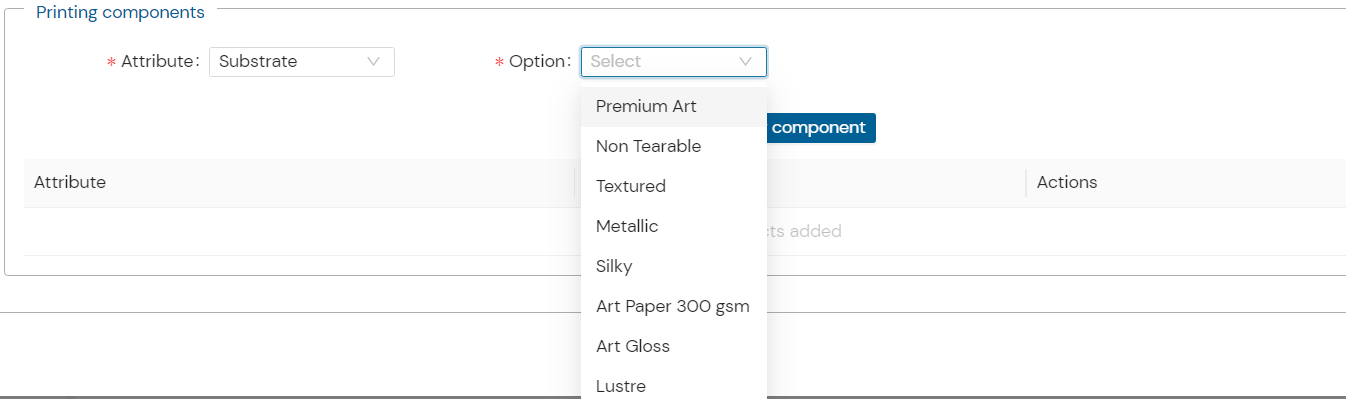
- Define Substrate, Lamination, Binding, Cover etc.
- If needed, add new attributes under Admin > Attributes > Laminations
- Select and set corresponding options for lamination/substrate.
Step 6: Designer Specs
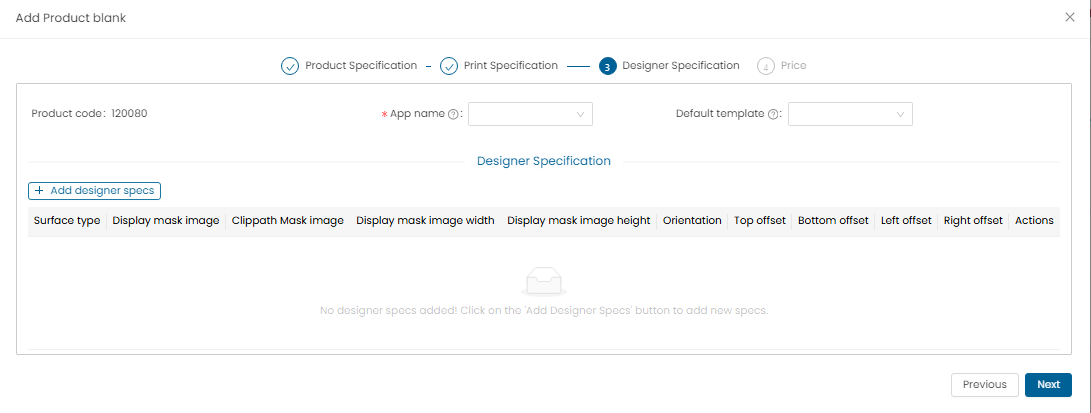
- All specs in inches.
- App Name: Select ezyprints product.
- Default Template: Optional customized template.
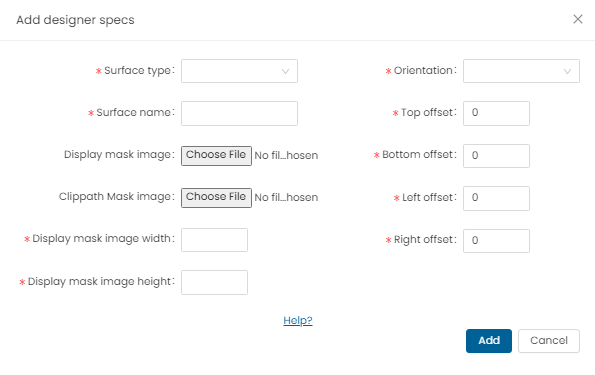
- Click Add Designer Specs
- Surface Type / Name: Select and name
- Display Mask Image: PNG format only
- Clippath Mask Image: PNG format only
- Display Mask Dimensions: Width and Height in inches
- Orientation: Select accordingly
- Mask Offsets: Top, Bottom, Left, Right (in inches)
- Important: Add both orientations (Portrait/Landscape) for print products
- In case of square orientation only square mask to be updated.
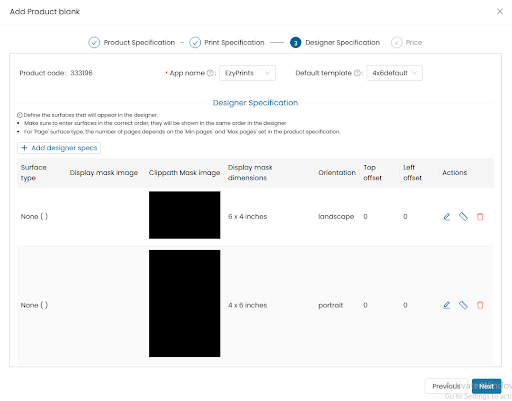
- Click Add, then Next
Step 7: Pricing
Option 1: Single Quantity Pricing
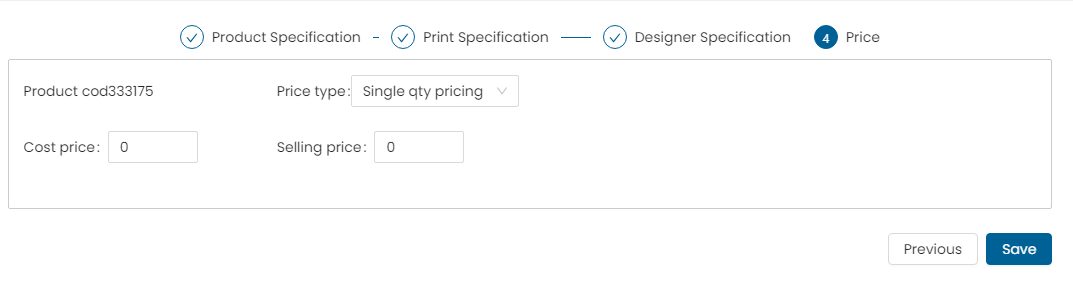
- Price Type: Single Qty
- Cost Price / Selling Price
- Click Add Price, then Save
Option 2: Volume Pricing
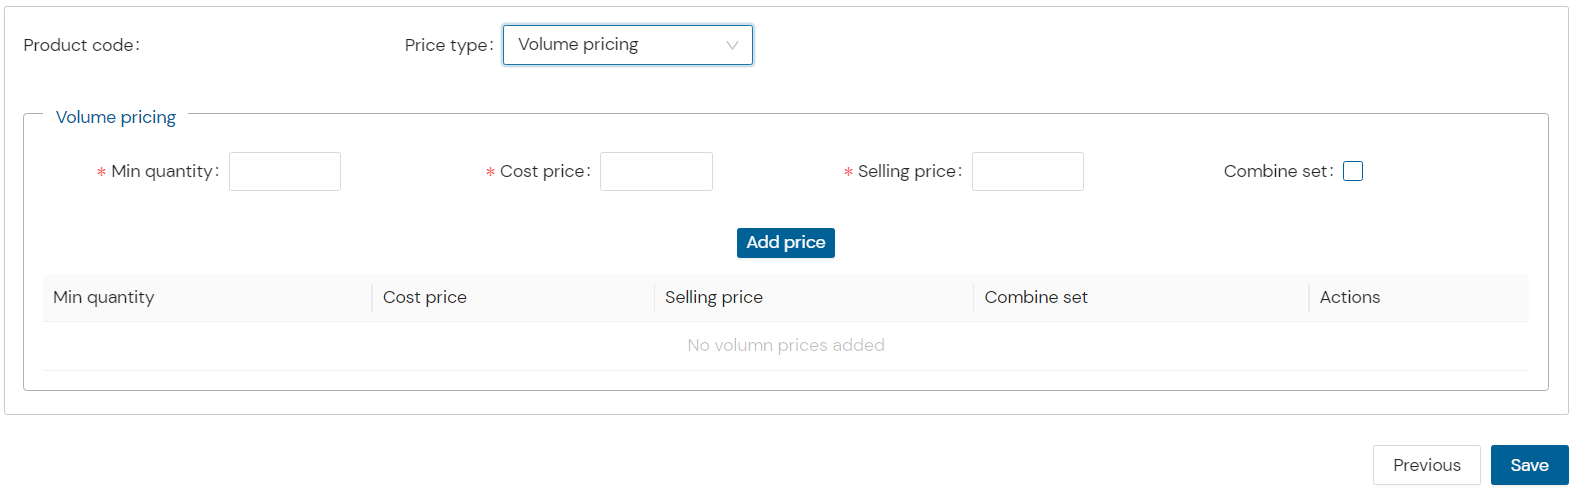
- Min Quantity
- Cost / Selling Price
- Combine Set (if required)
- Click Add Price, then Save
Option 3: Attribute Level Pricing
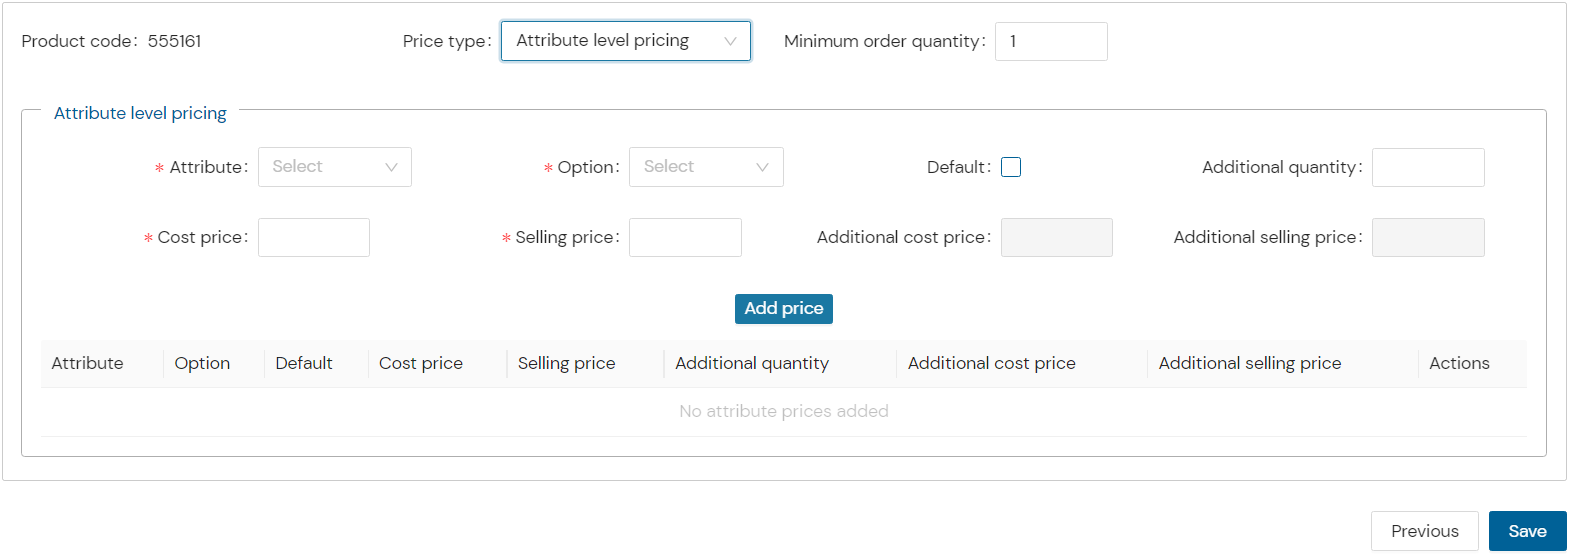
- Set pricing for each attribute (e.g., substrate)
- Click Add Price, then Save
Note:
- No attribute: Use Single Qty
- Bulk orders: Use Volume Pricing
- Attribute-specific rates: Use Attribute Pricing
Step 8: View Created Product
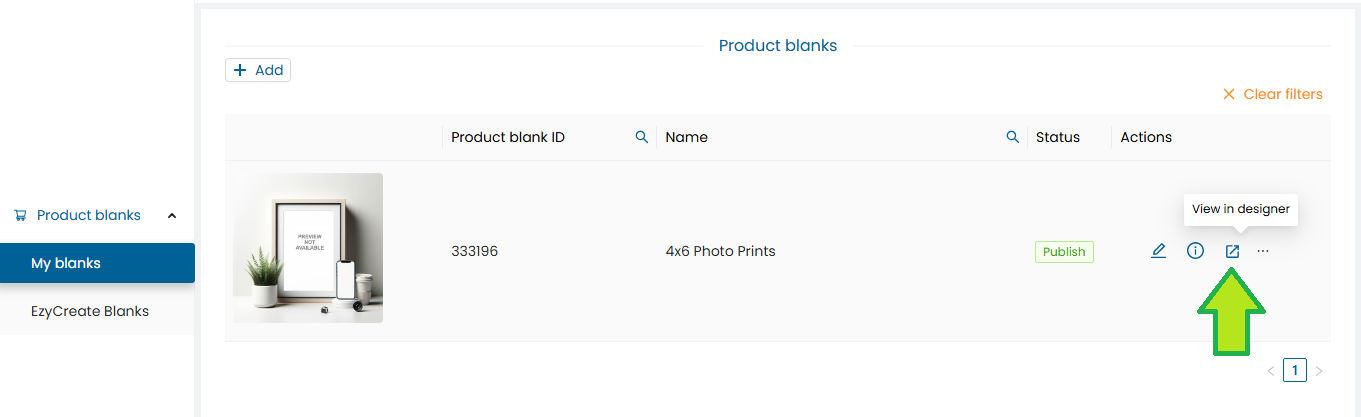
- Go to Product Wizard List
- Click View in Designer
Step 9: Upload & Edit Photos
-
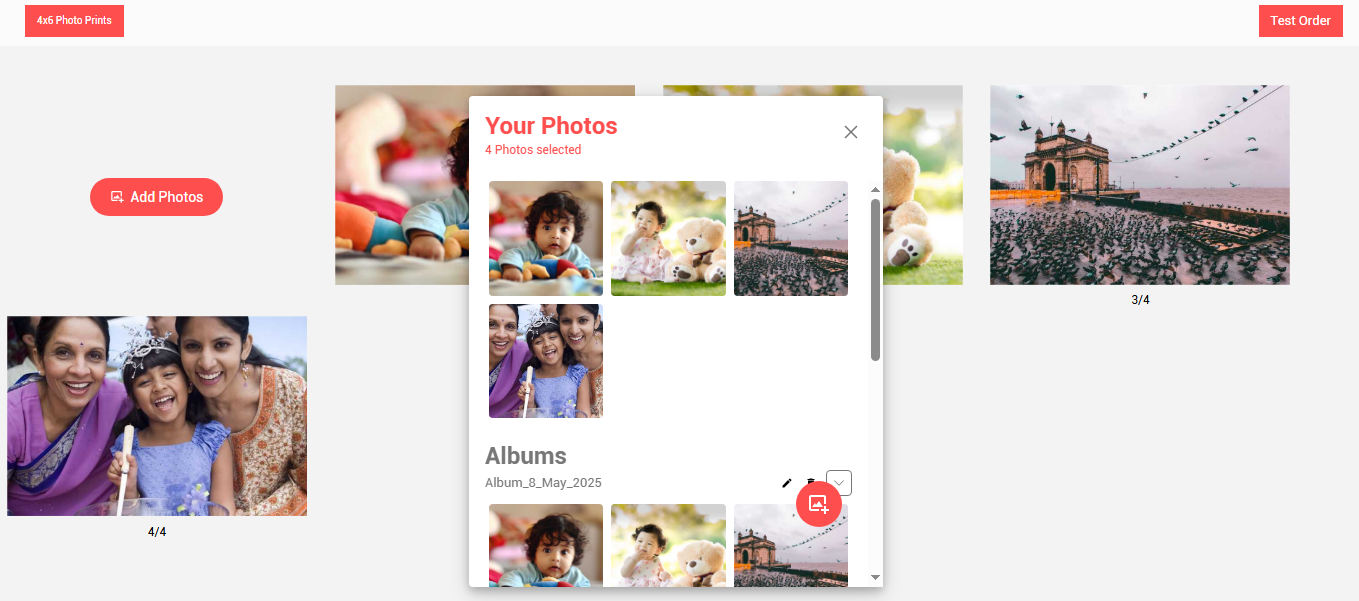
Click Add Photo
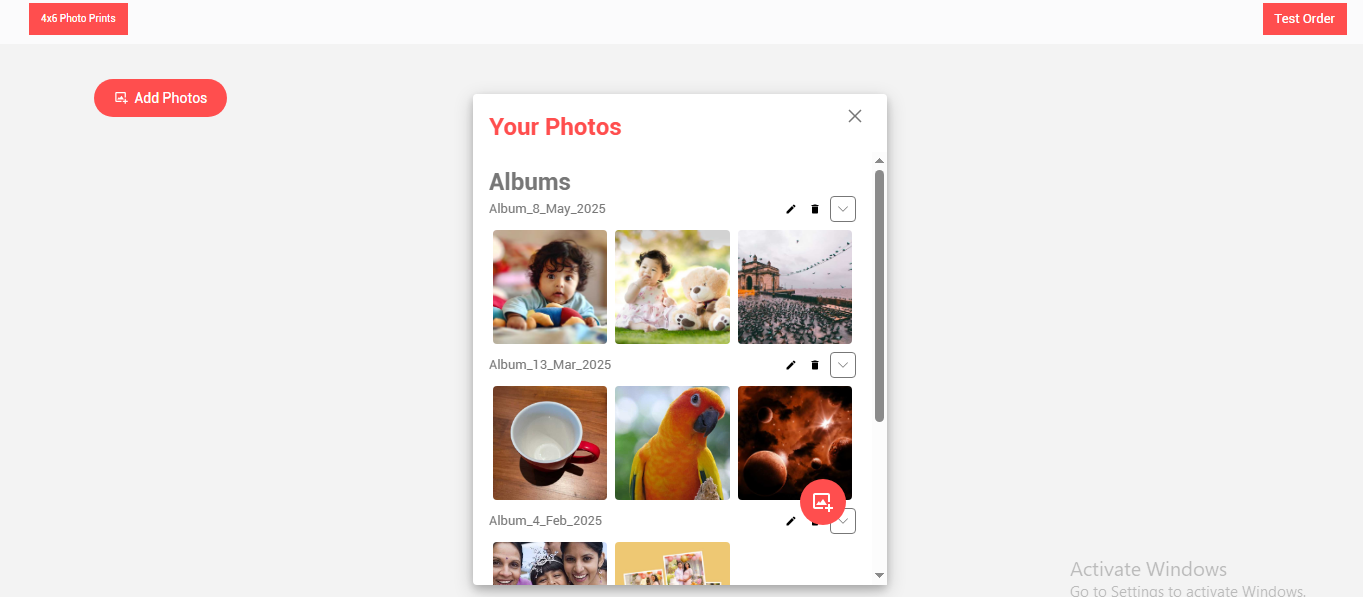
-
Upload via Upload Photos

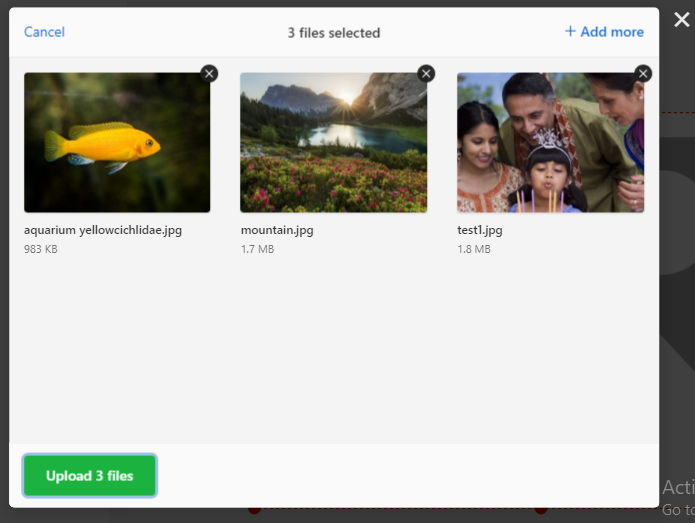
-
Select files or drag-and-drop
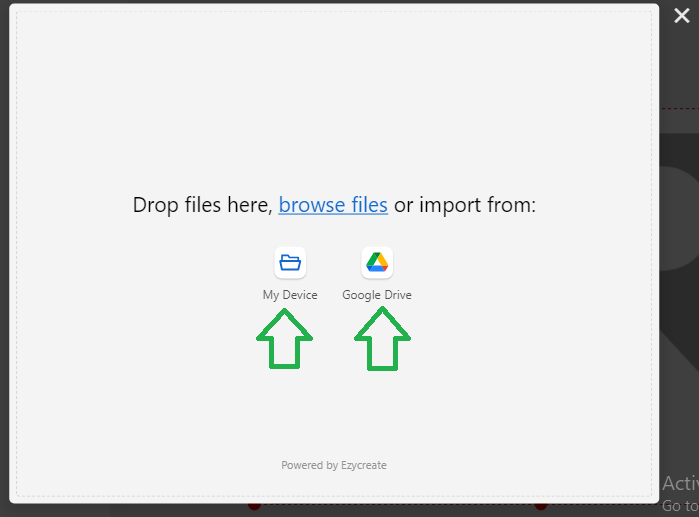
-
Click Upload
-
Select uploaded photo to open in designer
-
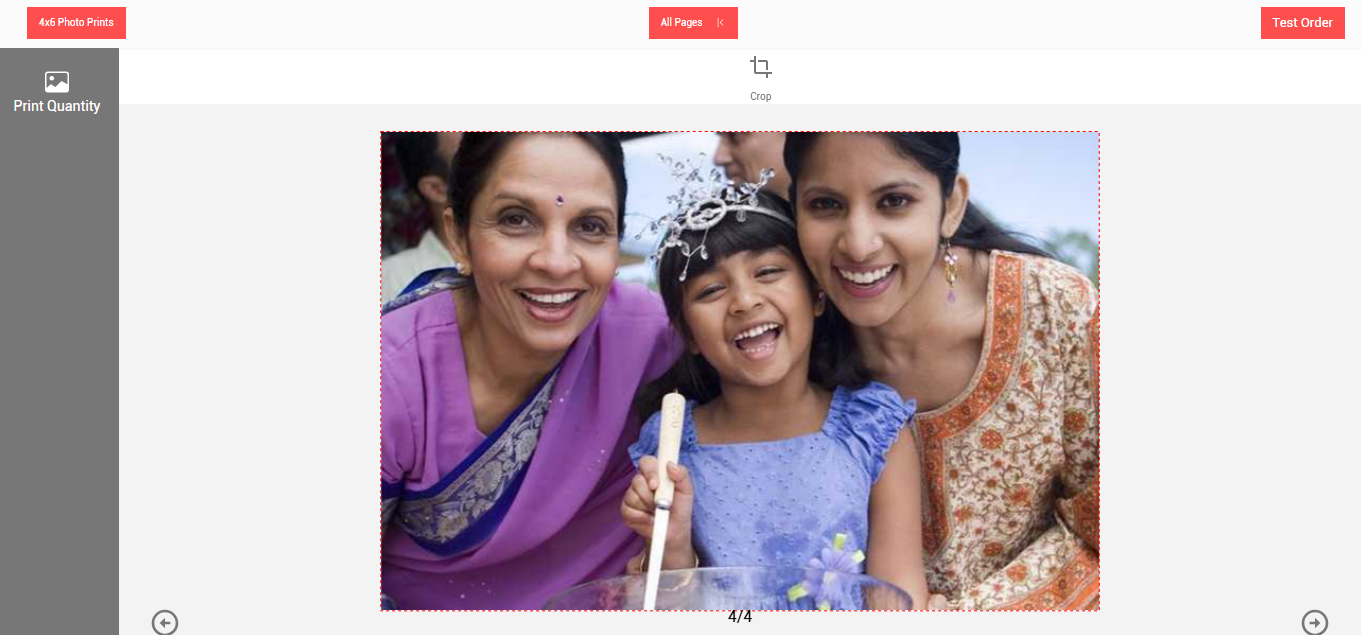
Photo preview will be displayed, now click on the photo to edit
-
-
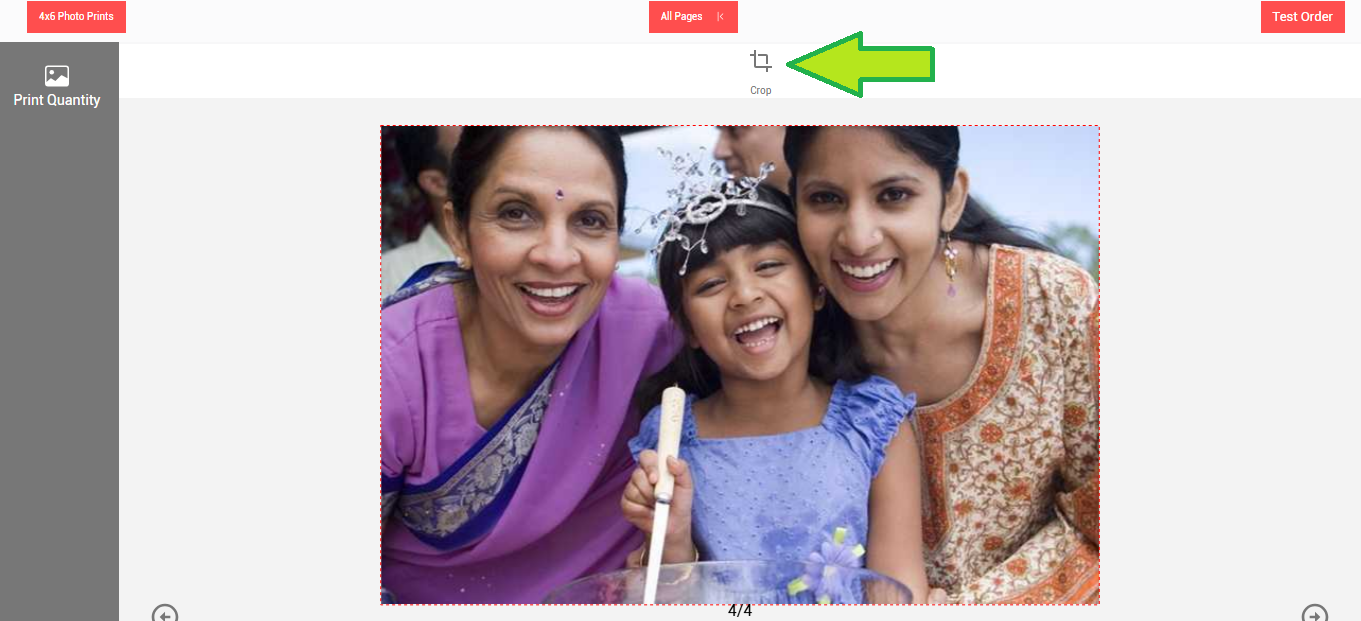
The photo edit menu will be displayed.
-
Click on the crop button to crop the image if required.
-
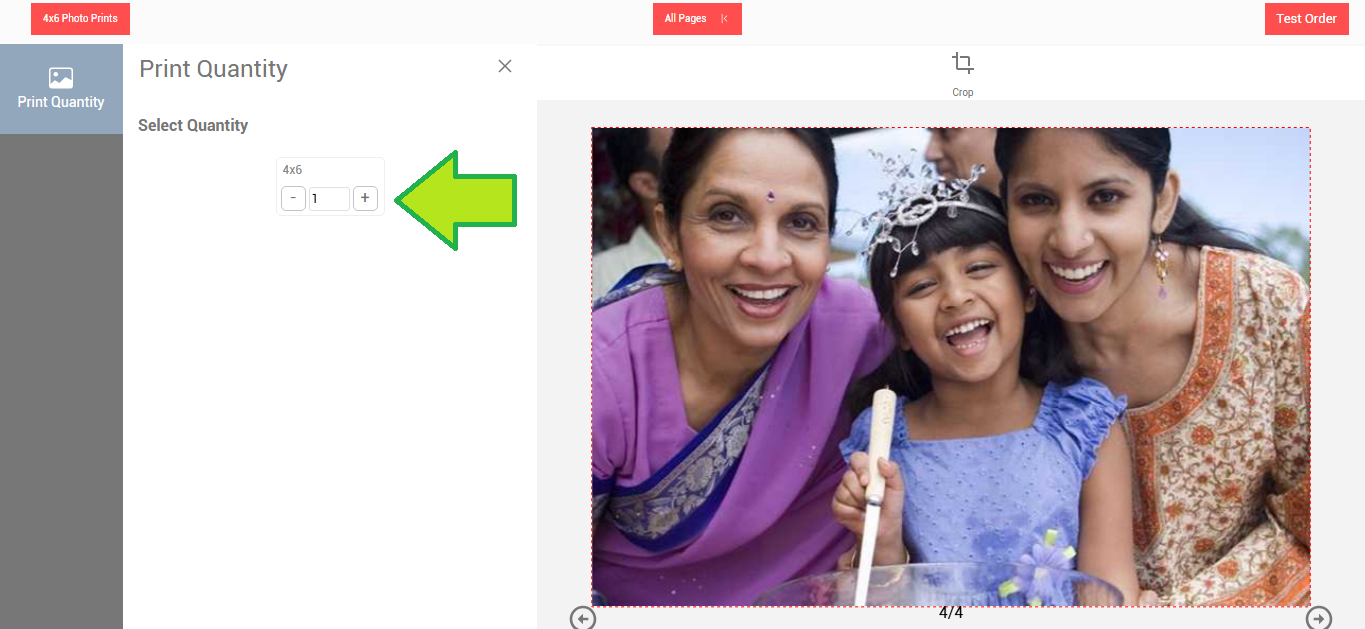
Increase the photo quantity if required
-
Once the editing is done click on the “Test Order” button.
Step 10: Confirm Test Order
-
Message: “Order placed successfully”
-
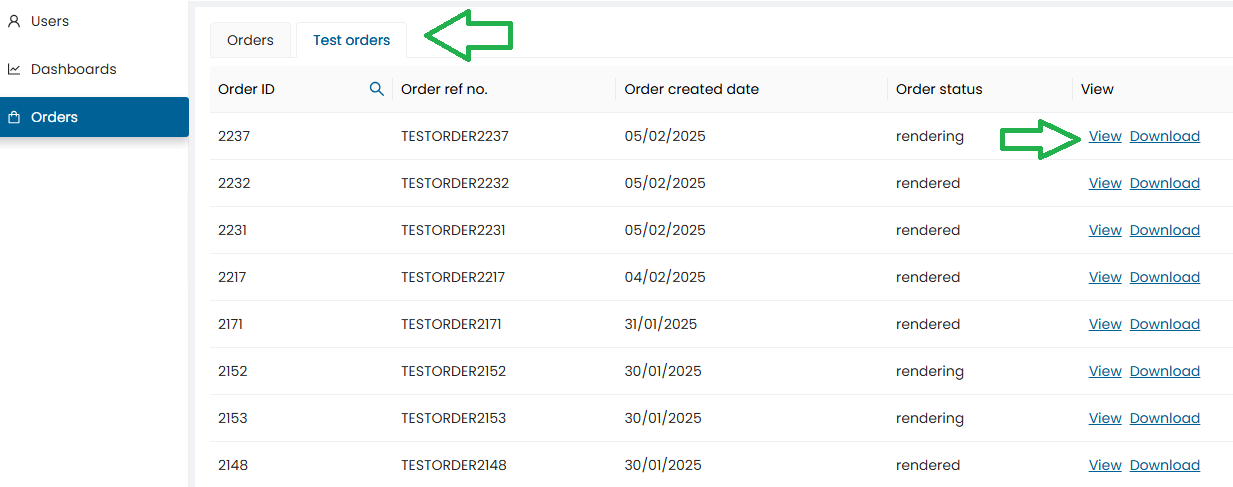
Navigate to Order Tab
-
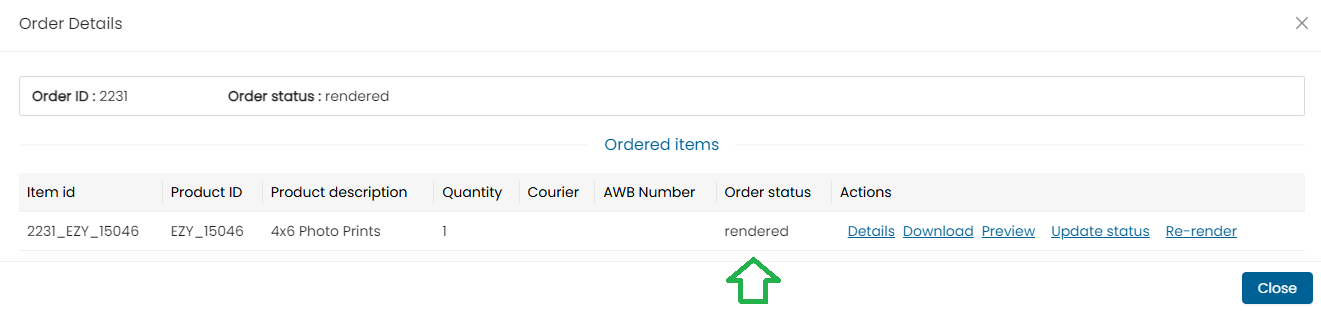
Click View to see order details

-
Wait for status to show Rendered
-
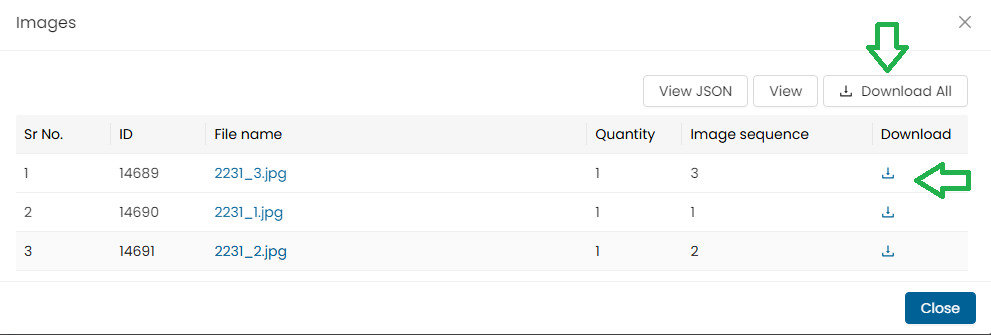
Orders can be downloaded using the “Download all” button or you can individually also download single images.
-
Note : In case of multiple images, users can either download a single image or click on the “Download All” button to download all the images at once.
Step 11: Download Test Output
-
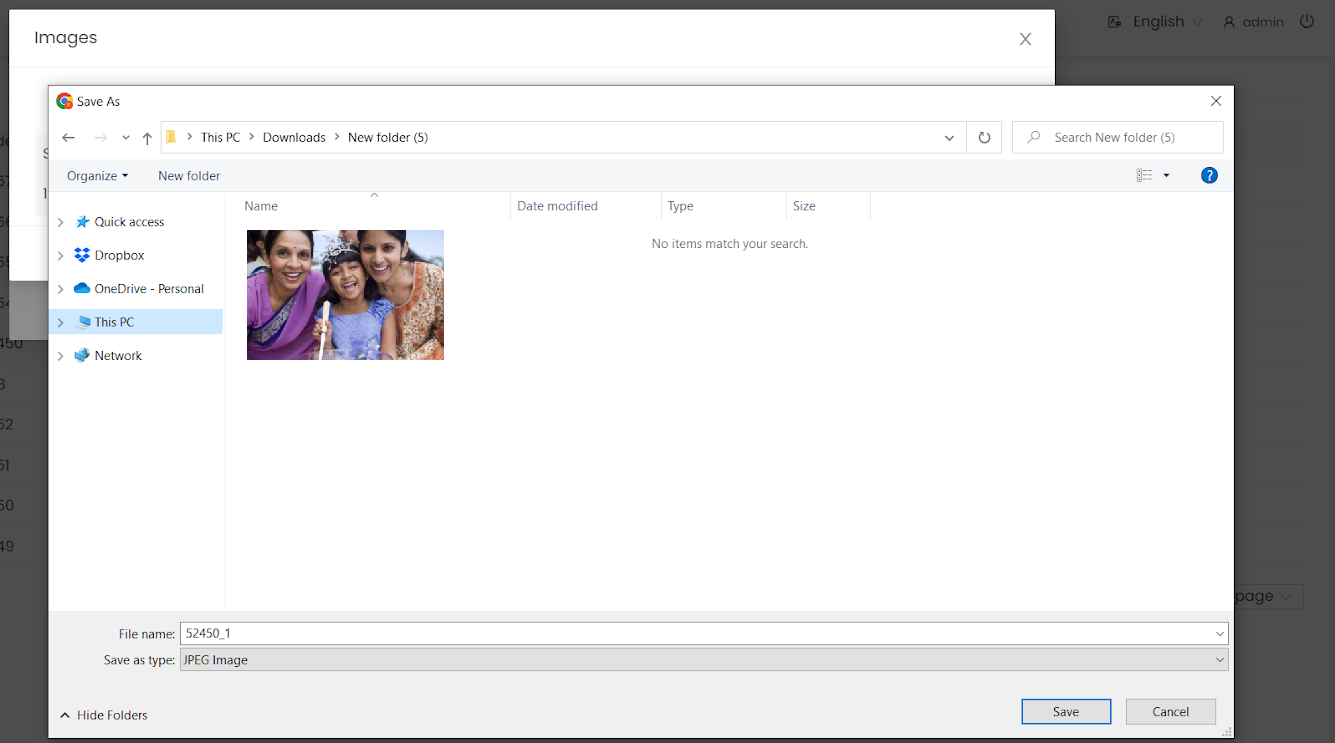
Use Download All for ZIP or download images individually
-
Select path and click Save
Step 12: Publish the Product
-
Go to Product Blank Dashboard
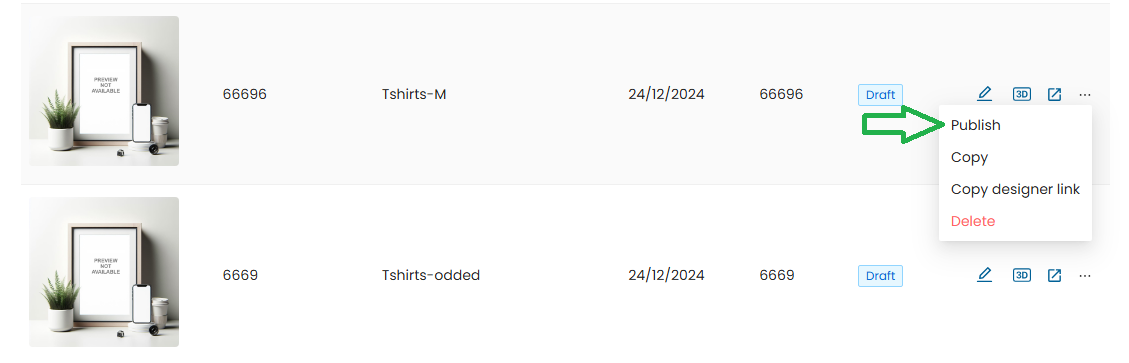
-
Click Product Settings
-
Click Publish

-
Status will update to Publish
Once Published, the Product Blank Specs Cannot Be Changed.