Ready Product Flow
How to create a Ready Product & Add to a Store
Step 1: Open “My Products” tab and click on “create new product” button.
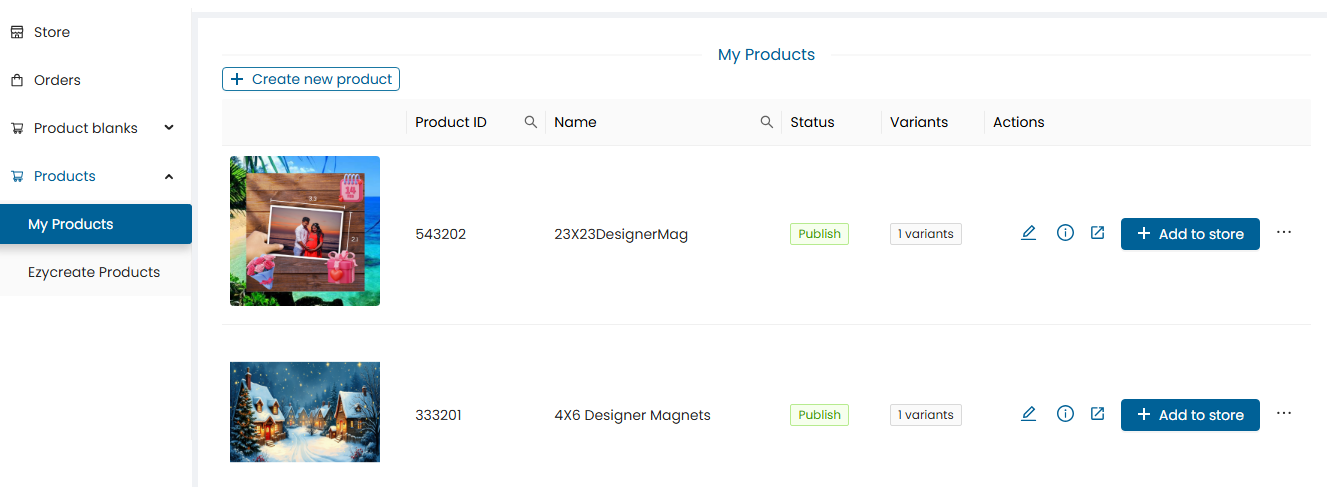
- My products allow you to create products on website with content, images, similar to a product page on website.
Step 2: Click on the “Select product blank” option.
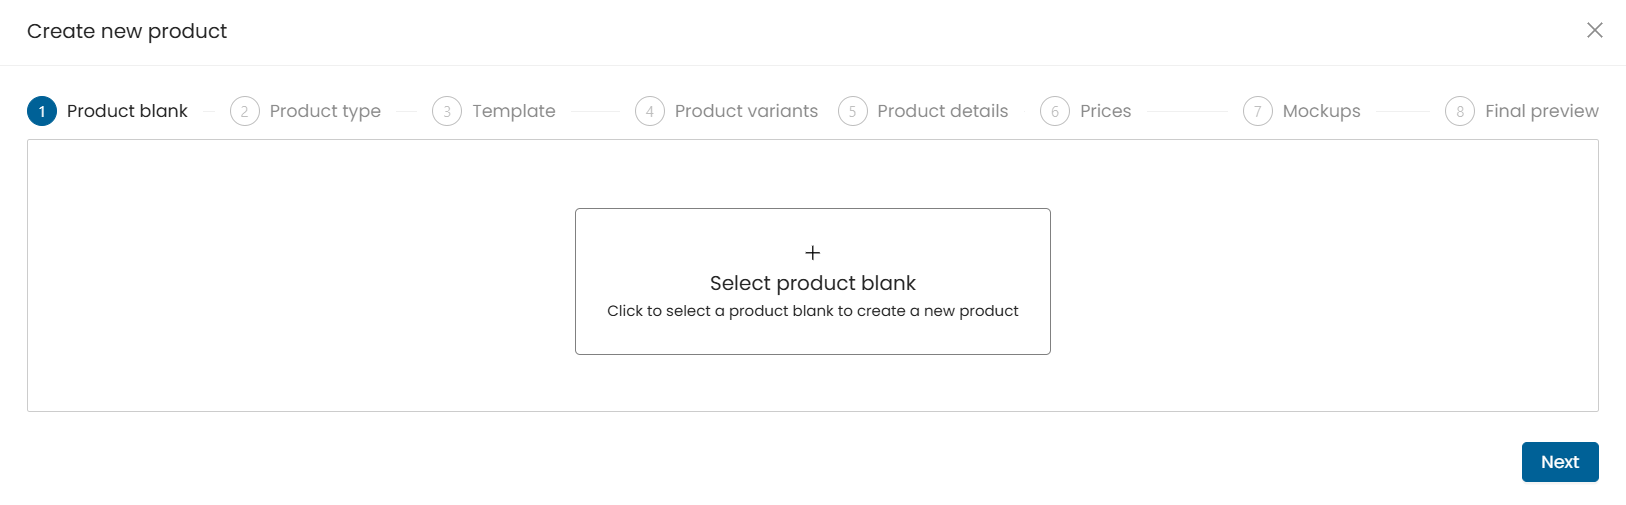
- Click on the next button to continue.
Step 3: Select a product from the list of product blanks.
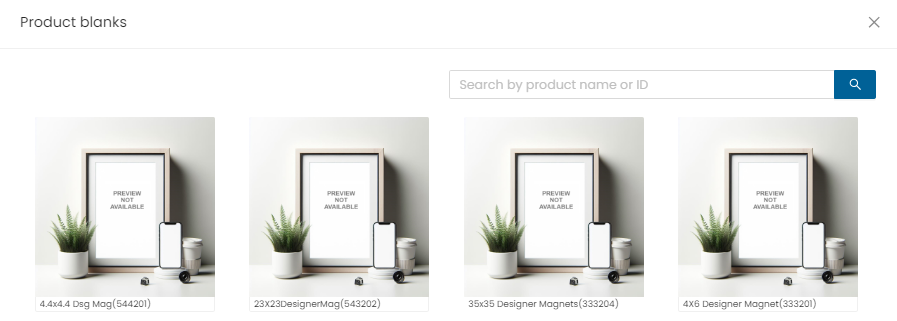
- As per the product type, select the “Ready Product” option.
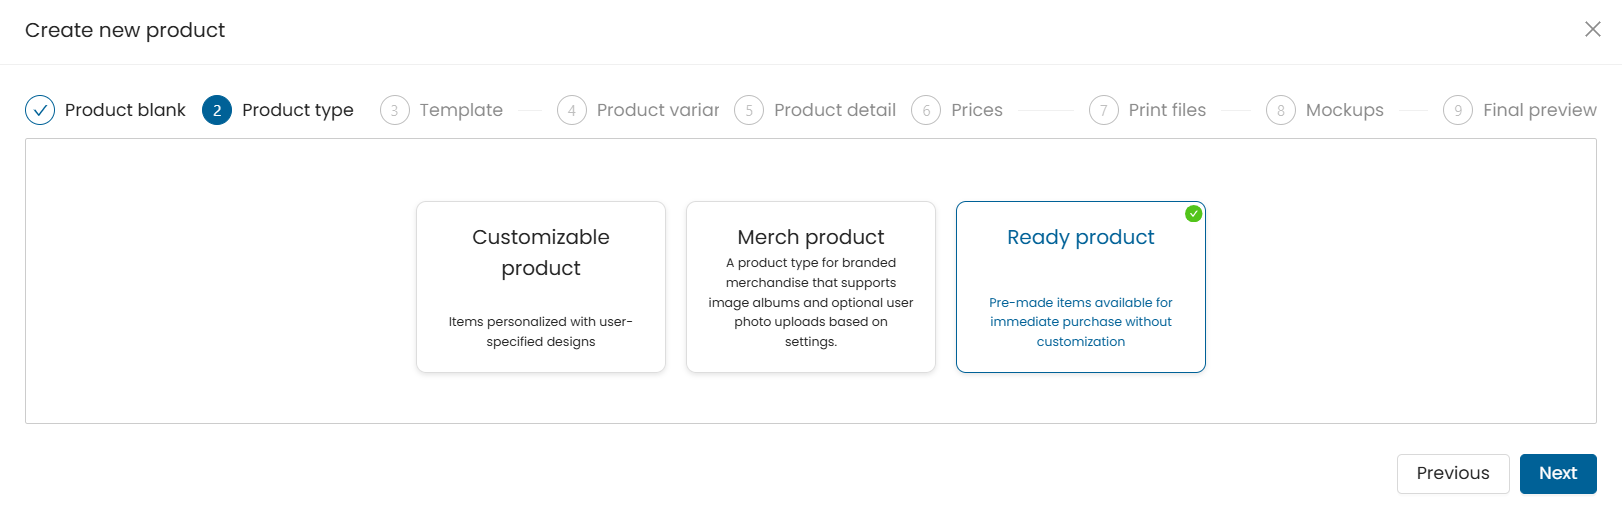
- Click on the next button to continue.
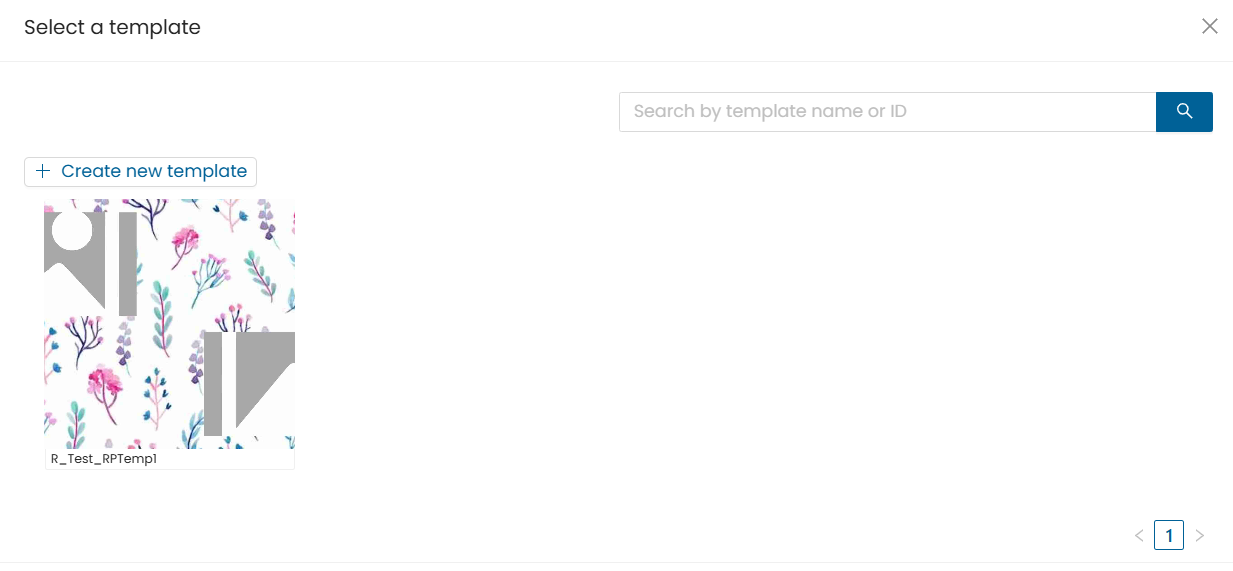
Step 4: Select a template for the product.
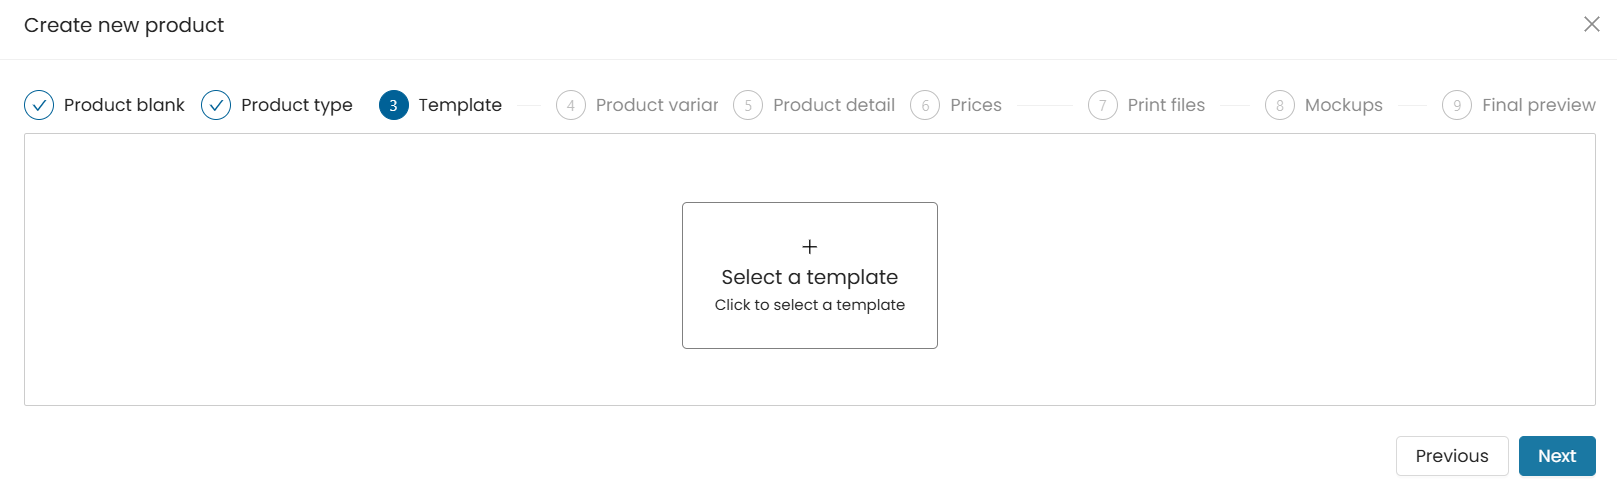
- Note: If the product template is already created and published, then it will appear here. You can also click on “Create new template” button to create one.
- If you want to know how to create a template please refer: EzyDesigner Template Creator
Step 5: Once the template is selected.
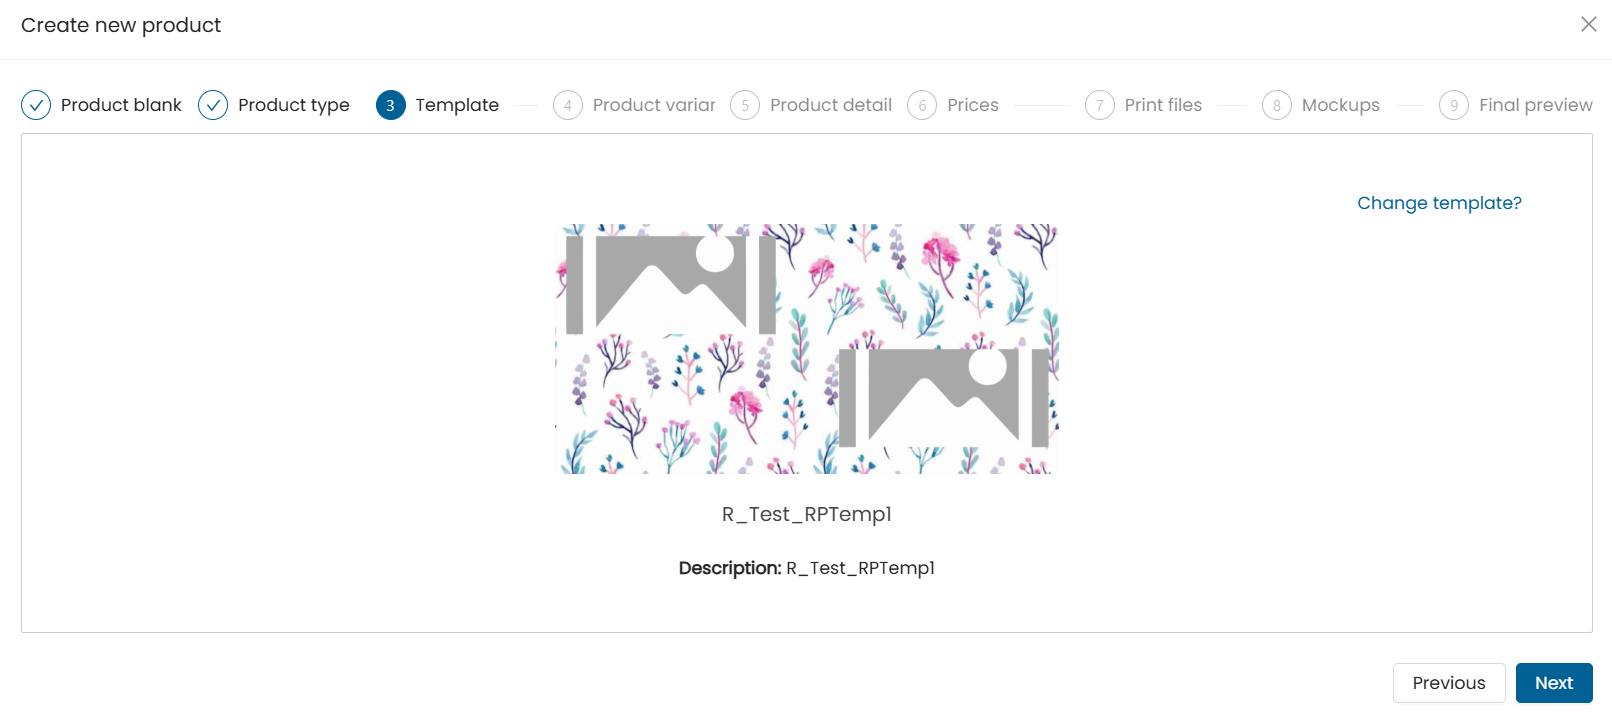
- Click on the next button to continue.
Step 6: If the template has other size variants (similar product blanks) created, then you can add variants here using the “Add variants” button.
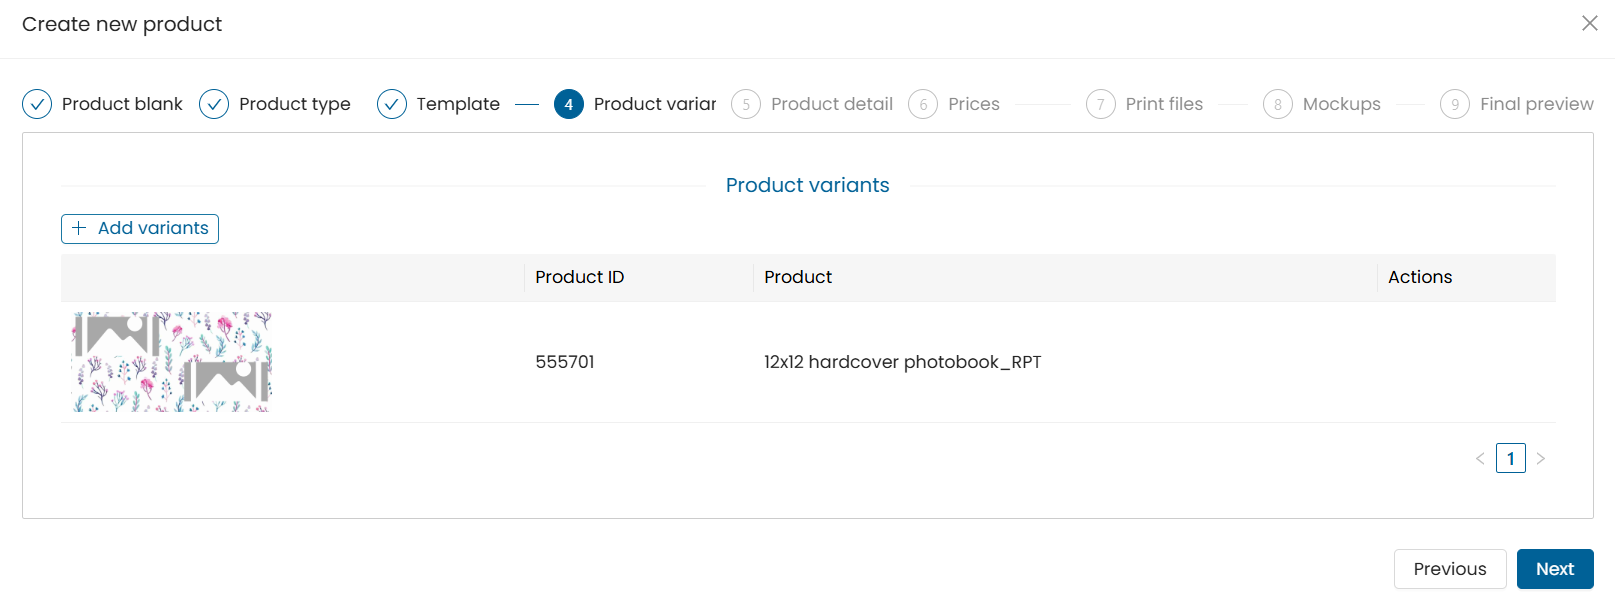
- It refers to the multiple sizes for the same product.
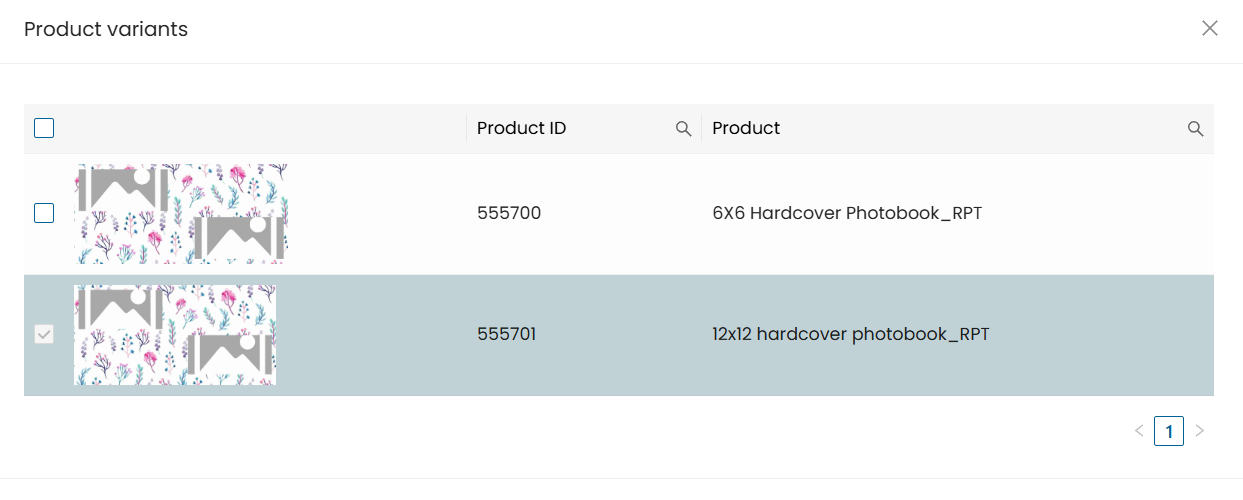
- Click on the next button to continue.
Step 7: Enter all the required details given here to be displayed on the product page.
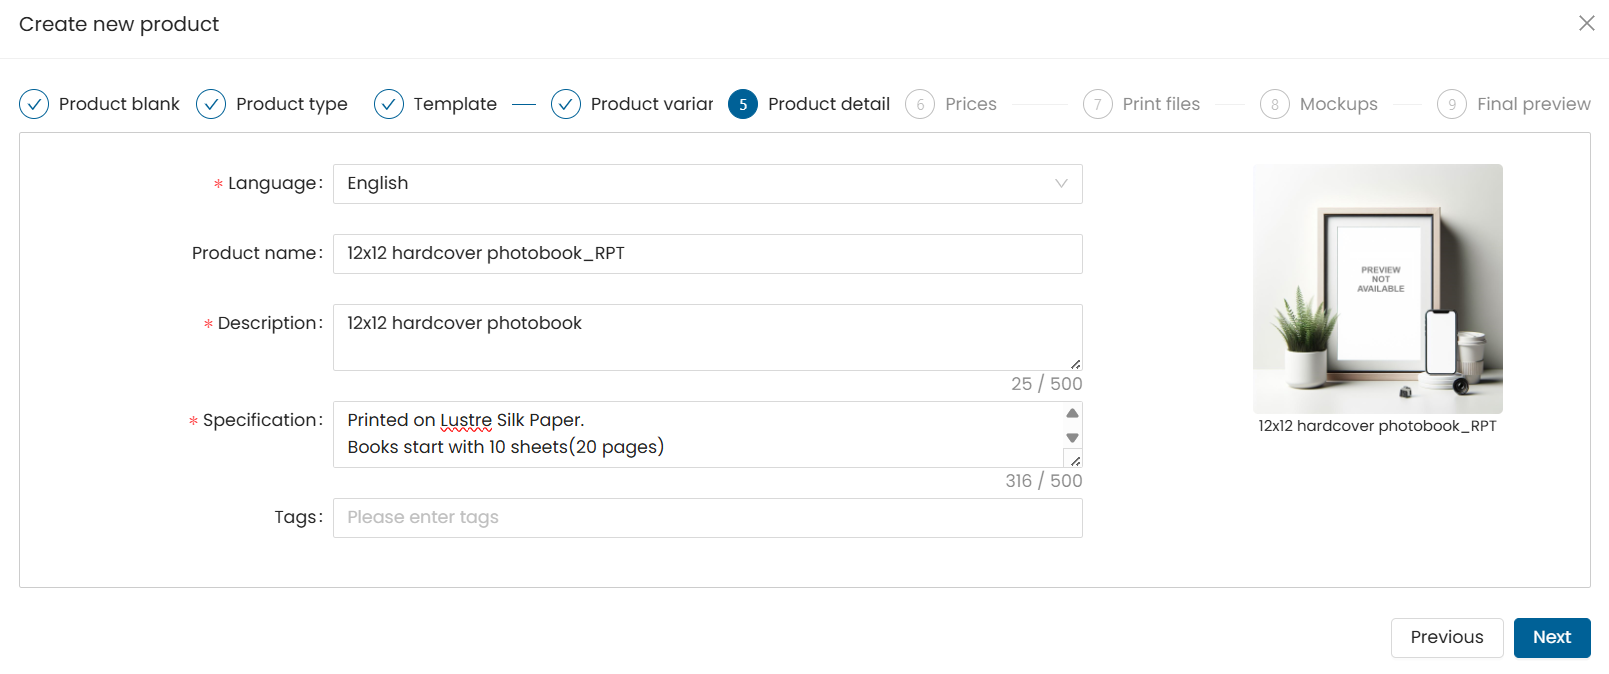
- Click on the next button to continue.
Step 8: Click on the

button under actions to update the SKU ID for the product.
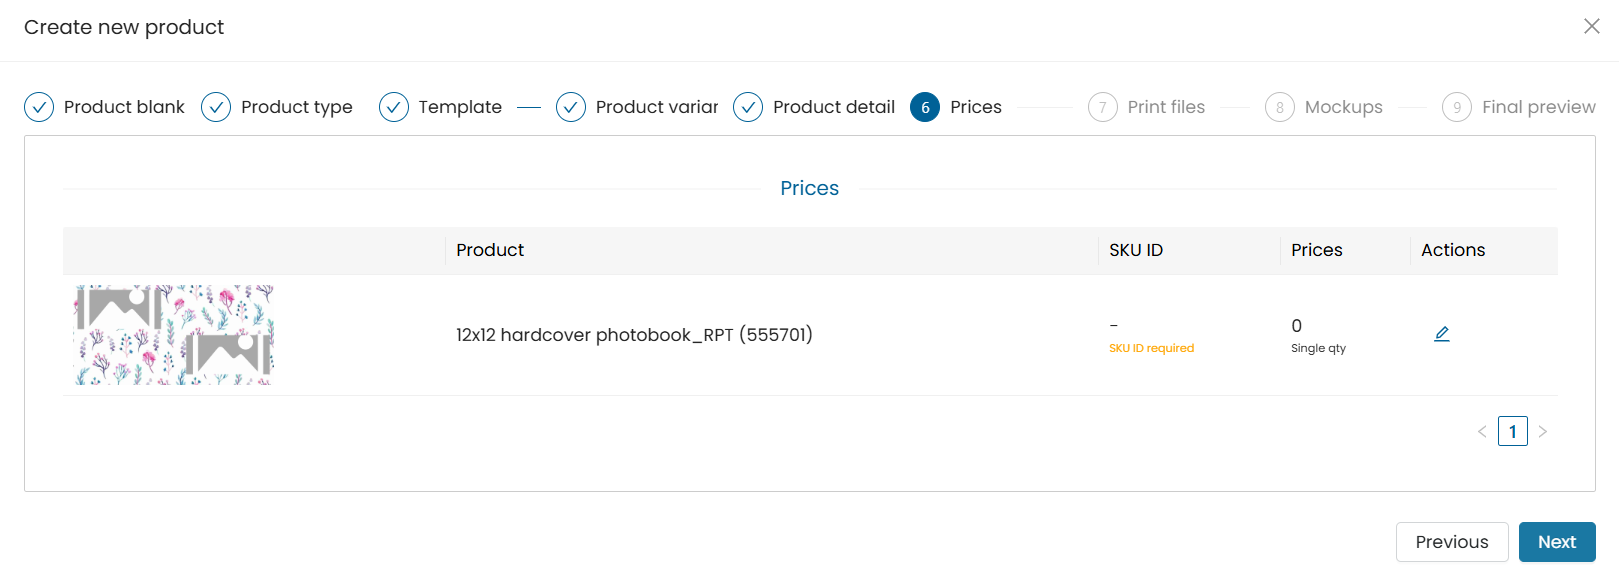
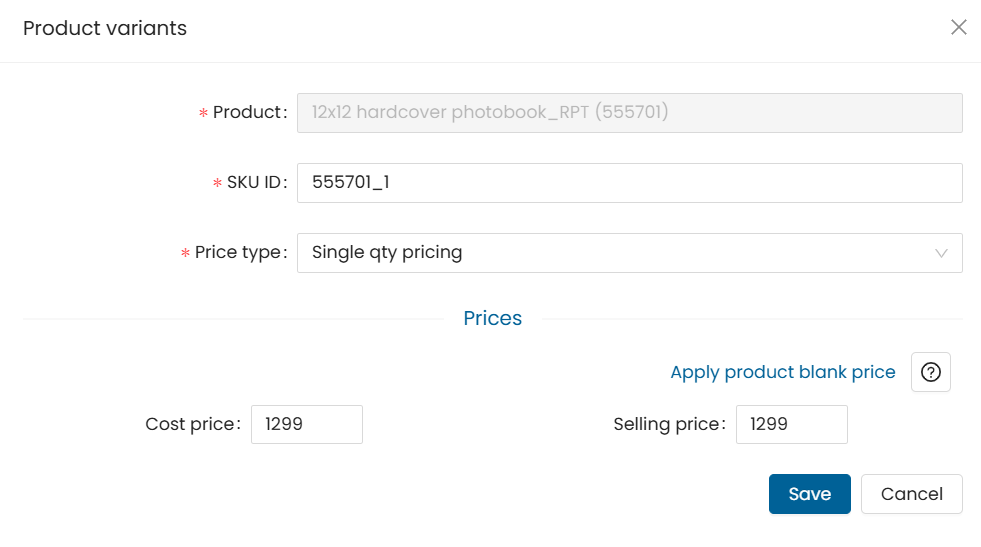
- Click on the next button to continue.
Step 9: On the “Print files” step, click on the “Select print ready files” button.
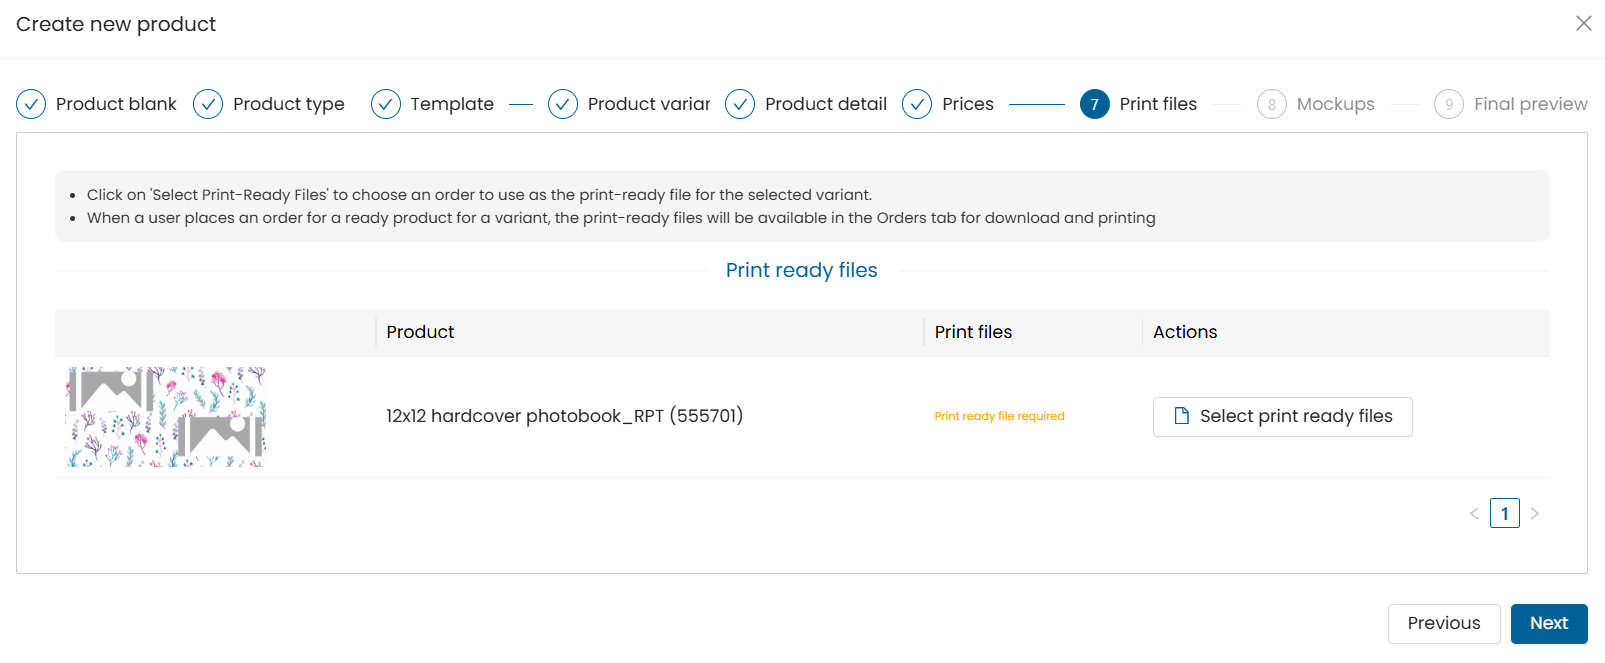
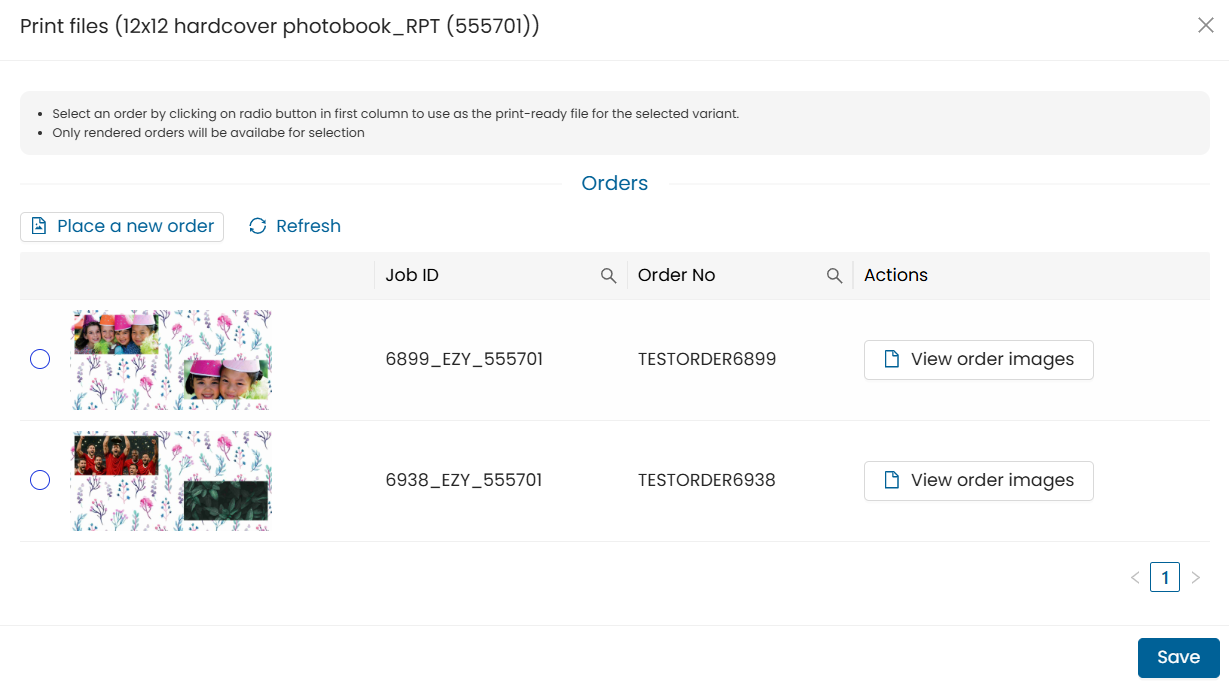
- It will display the orders placed for this product. Only orders whose status is rendered will be displayed here.
- If no orders were placed for this product then it will not show any orders here and you can place an order for your product by using the “Place a new order” button.
- Once you click on the “Place a new order” button, it will open the product designer in a new tab and you can create and place your order.
- Once the order status is updated to “rendered,” click the refresh button here and your order will get displayed here.
- To view your order images click on the “view order images” button.
- Once you have viewed your order you can then select your order and click on the save button.
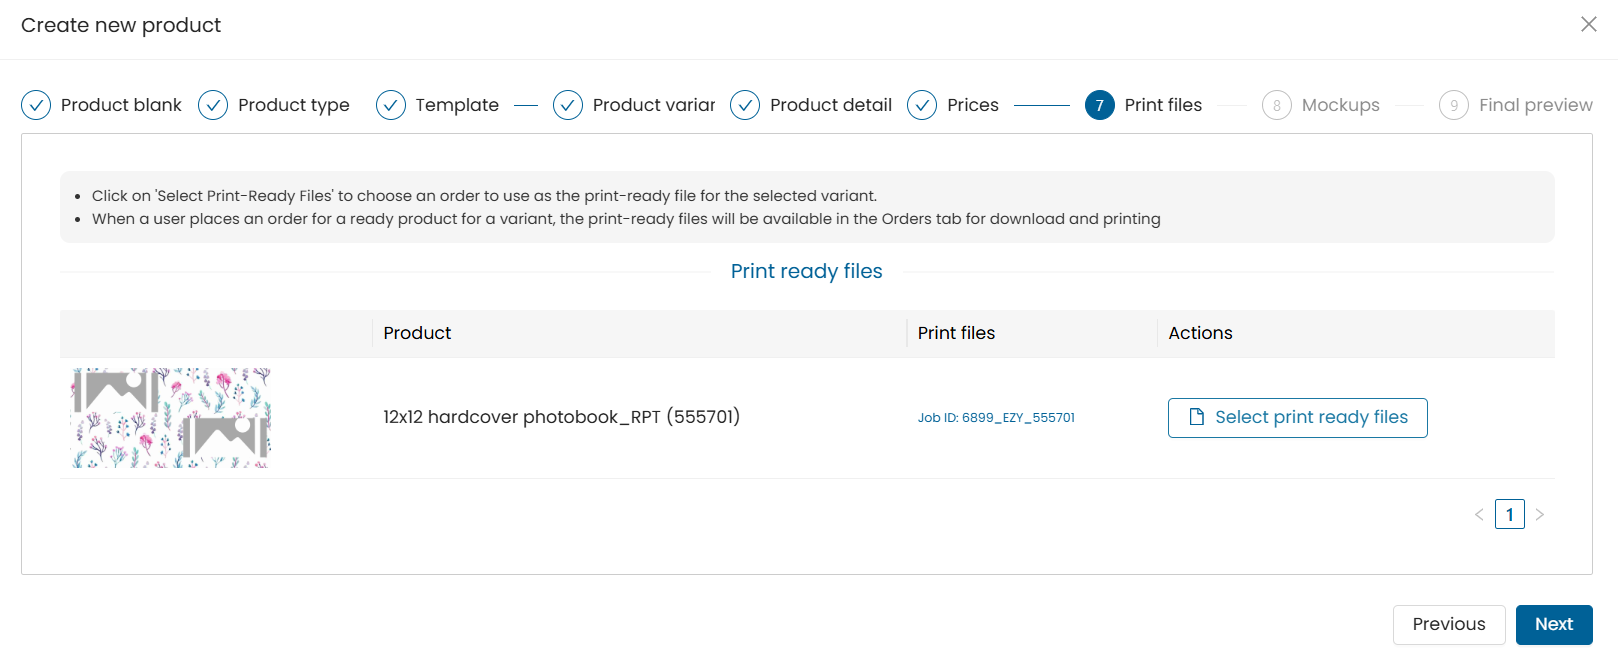
- Click on the “Next” button to continue.
Step 10: To upload the ready product mockup images click on the “Upload Product Mockup” button.
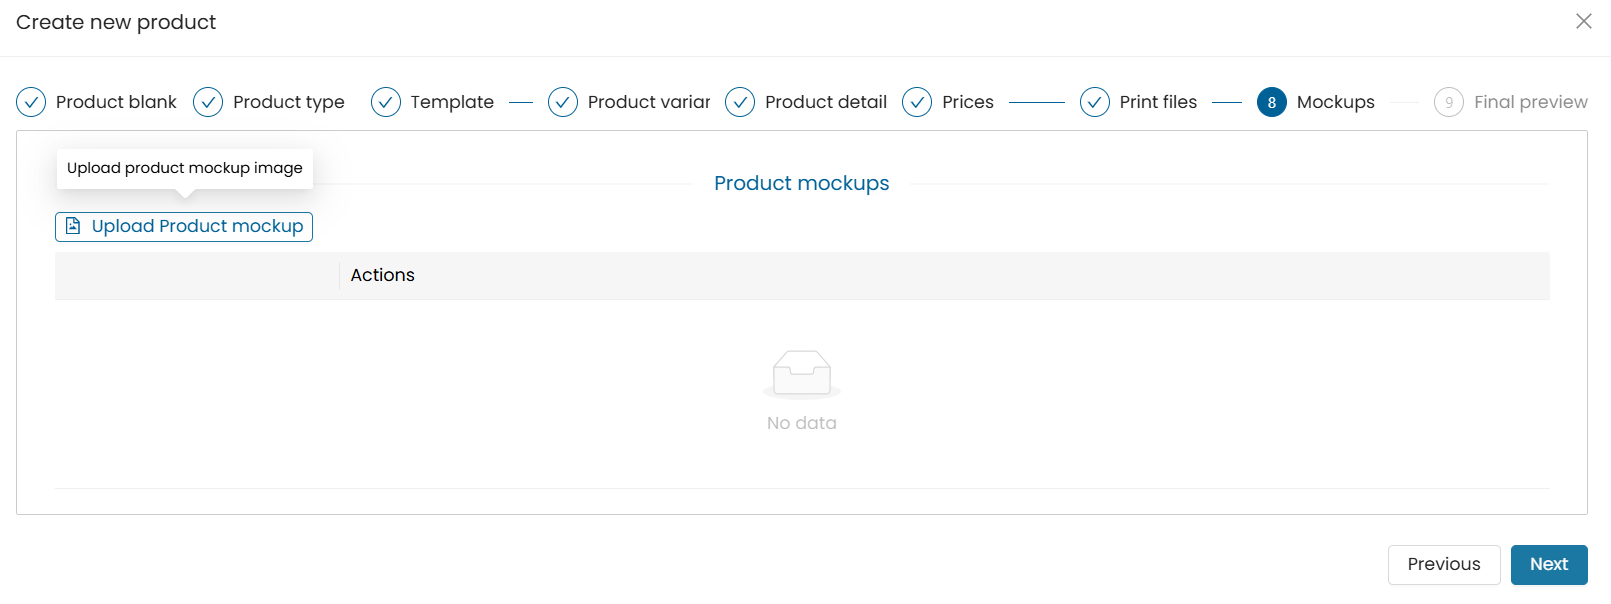
- Click on the "choose files” button.
- Choose image files from your device.
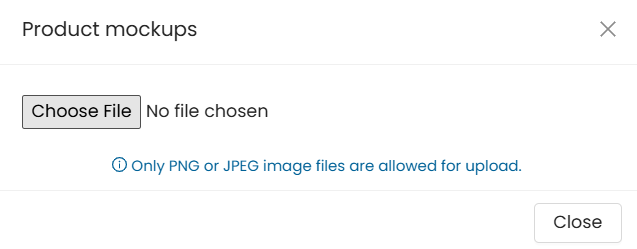
- Note: Only PNG or JPEG image files are allowed for upload.
Step 11: Once the images are uploaded.
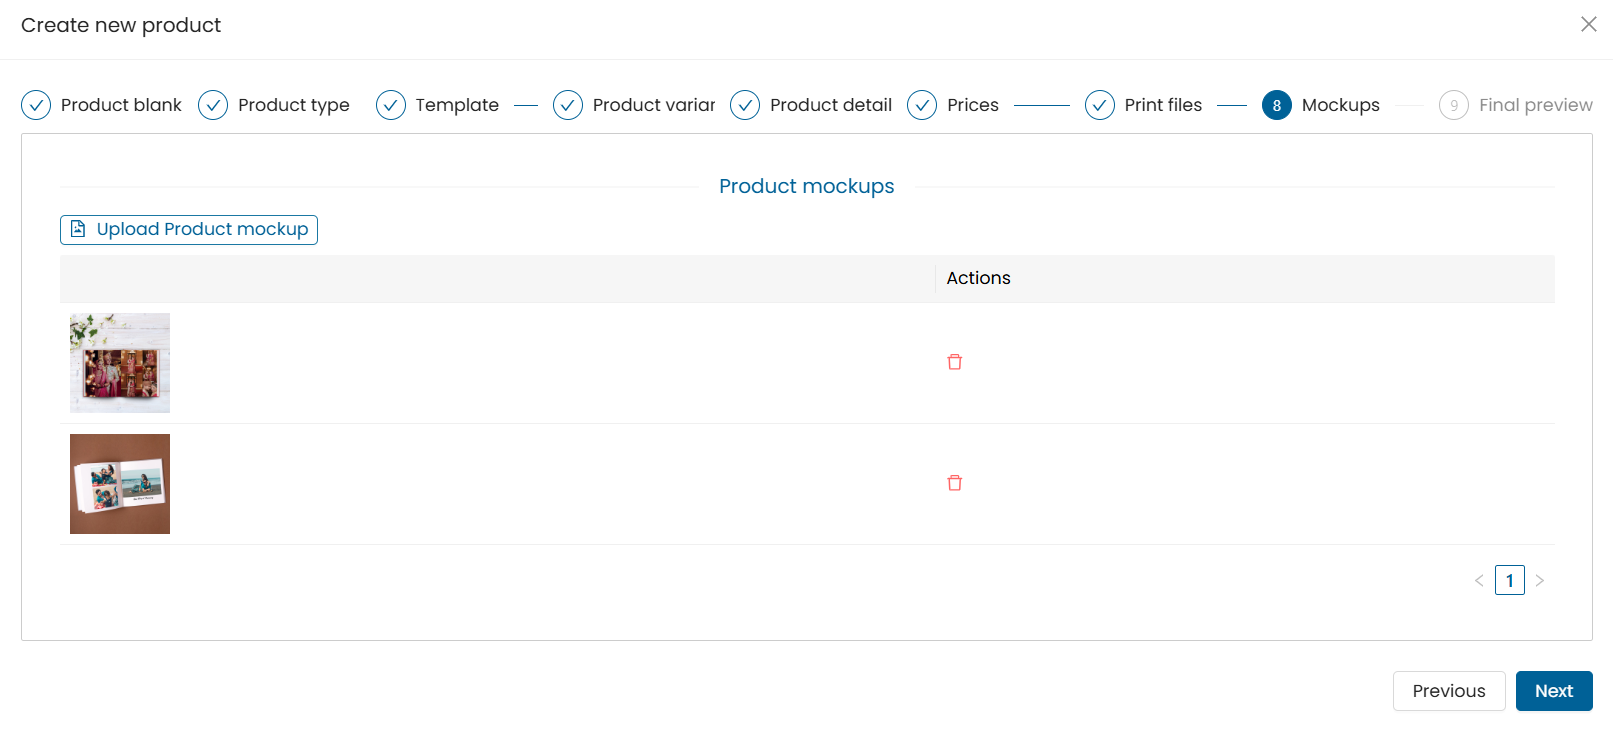
- Click on the “Next” button to continue.
Step 12: Preview the page mockup and once all details are verified.
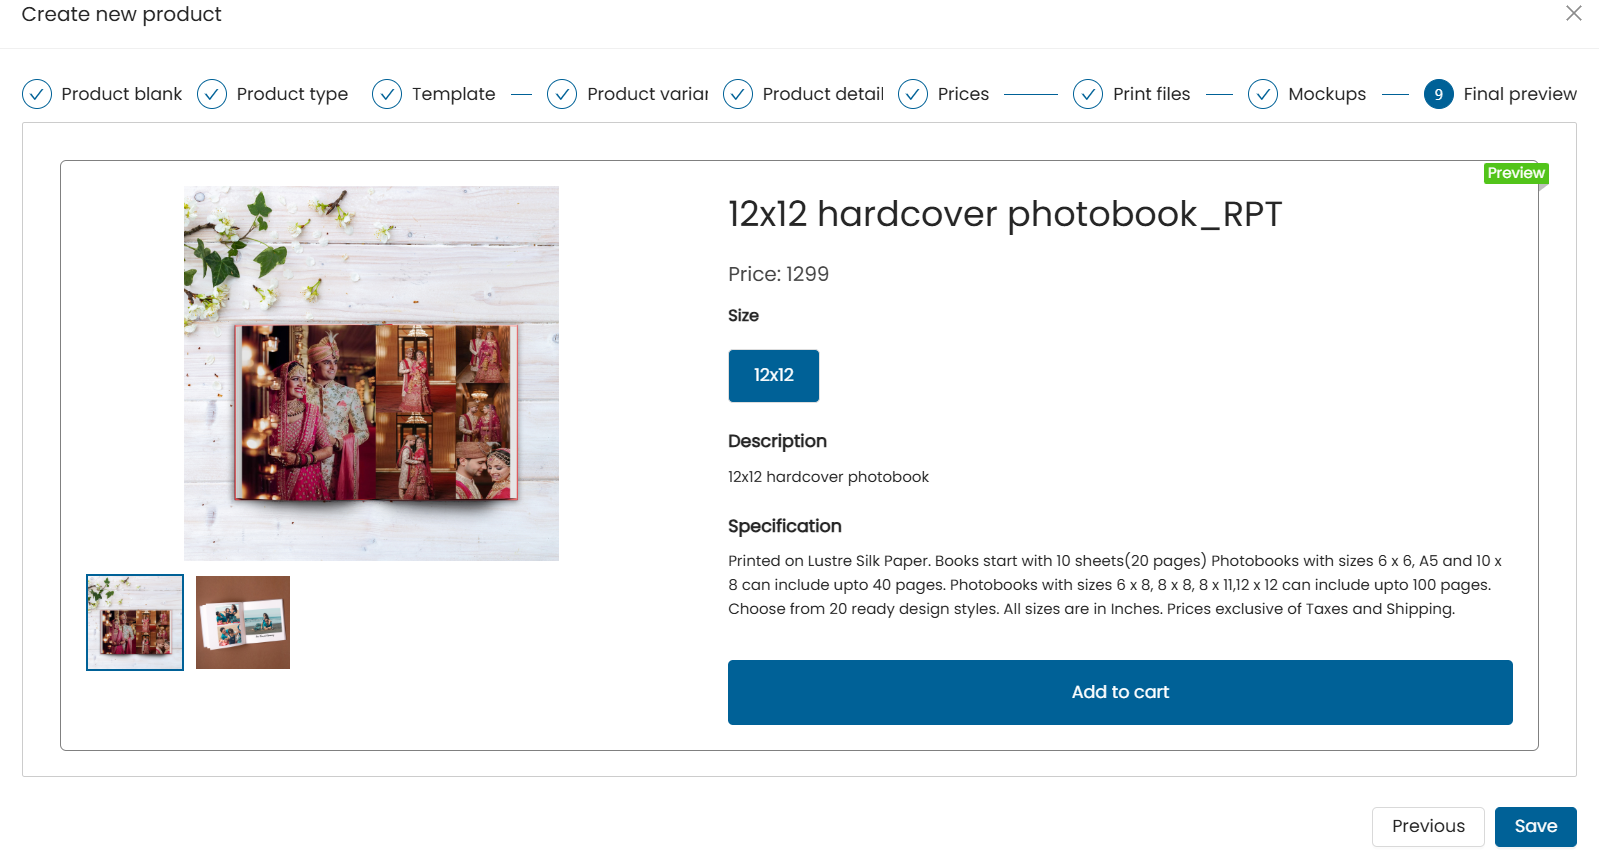
- Click on the save button to save the product.
- The product will get added to the dashboard.
- To publish the product to store click on the publish button.

Step 13: The product will be published to the store.

Need Help?
If you're stuck, don’t worry — just email us at support@ezycreate.com or send your thoughts to feedback@ezycreate.com.