Merch Product Flow
Overview
This document outlines the steps to create a merchandise product in EzyCreate from start to finish. It includes definitions of key terminologies, preconditions, and a detailed, step-by-step process.
Key Terminologies
-
Product Blank: A foundational base item (e.g., mug, t-shirt) that includes only basic definitions such as dimensions and type. It does not include pricing, eCommerce configurations, templates, or designs.
- Example: A standard 11oz mug with no associated template or sales info.
-
Product: A market-ready version that includes all attributes necessary for selling, including pricing, eCommerce metadata, and at least one design template.
-
Product Types:
- Customizable Product: End users can personalize this using the design tool (e.g., add images, text).
- Merchandise Product: Pre-designed product (e.g., branded merch) that may or may not allow image uploads.
-
Template: A design layout applied to a product blank.
-
Template Group: A collection of templates with similar designs, used to organize variants.
-
Variant: A version of the product that varies by design, size, color, etc., within the same template group.
-
SKU (Stock Keeping Unit): A unique identifier for each variant.
-
Merch Album: A group of pre-uploaded images used in product customization.
3. Preconditions
- The user is logged into the EzyAdmin.
- The user has appropriate permissions to create/manage products.
- At least one product blank and one published template must be available.
How to Create a Merchandise Product
Step 1: Navigate to Product Creation

- Log in to EzyAdmin.
- In the left sidebar, go to Products → My Products.
- Click + Create new product.
Step 2: Select a Product Blank
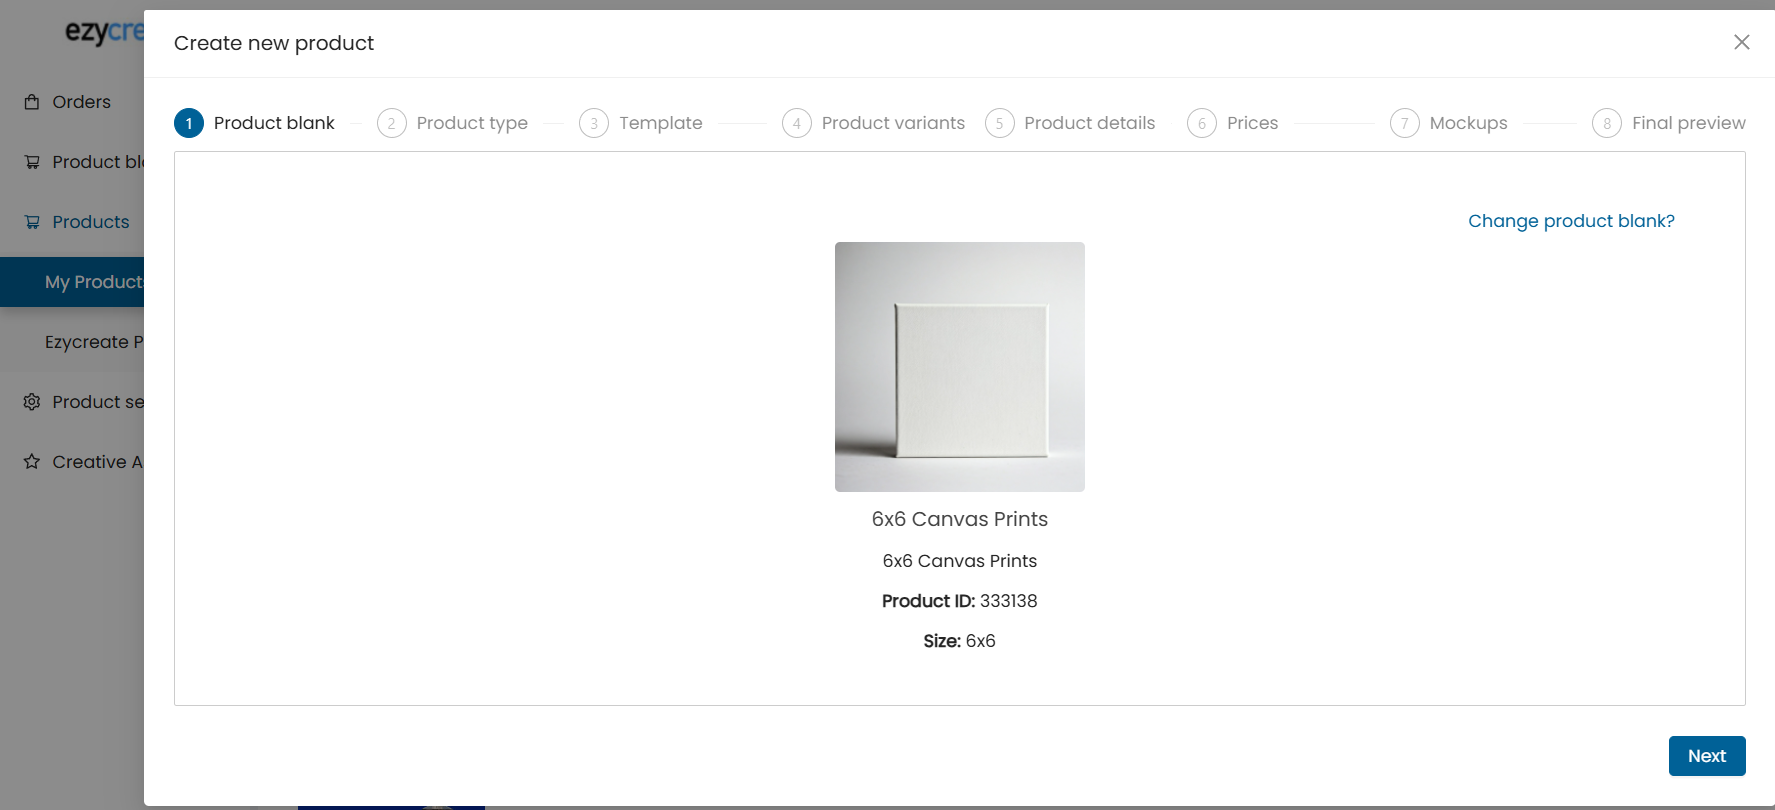
- Under Step 1 - Product Blank, click Select product blank.
- Choose a base item (e.g., Standard Mug).
- Preview the selected product blank (name, ID, size, description).
- Click Next.
Step 3: Choose Product Type
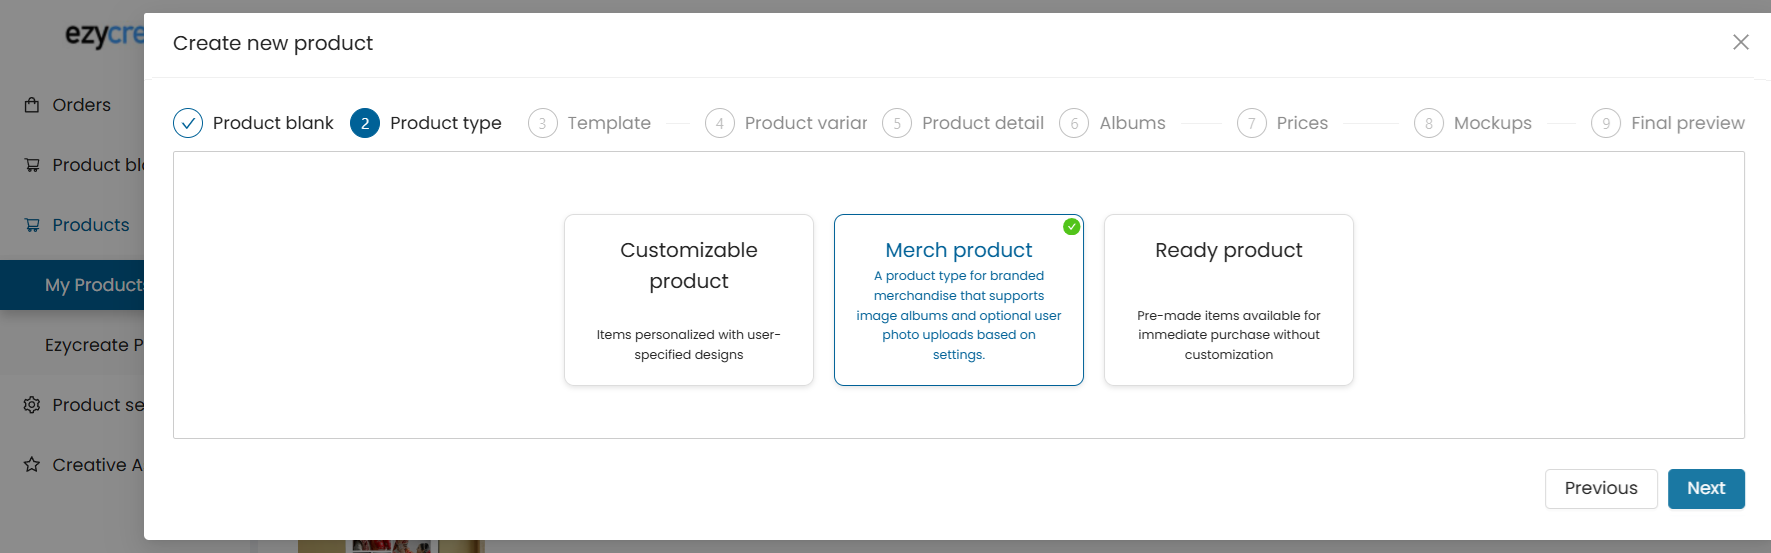
- In the Product Type tab, select:
- Merch product
- Click Next.
Step 4: Select Template
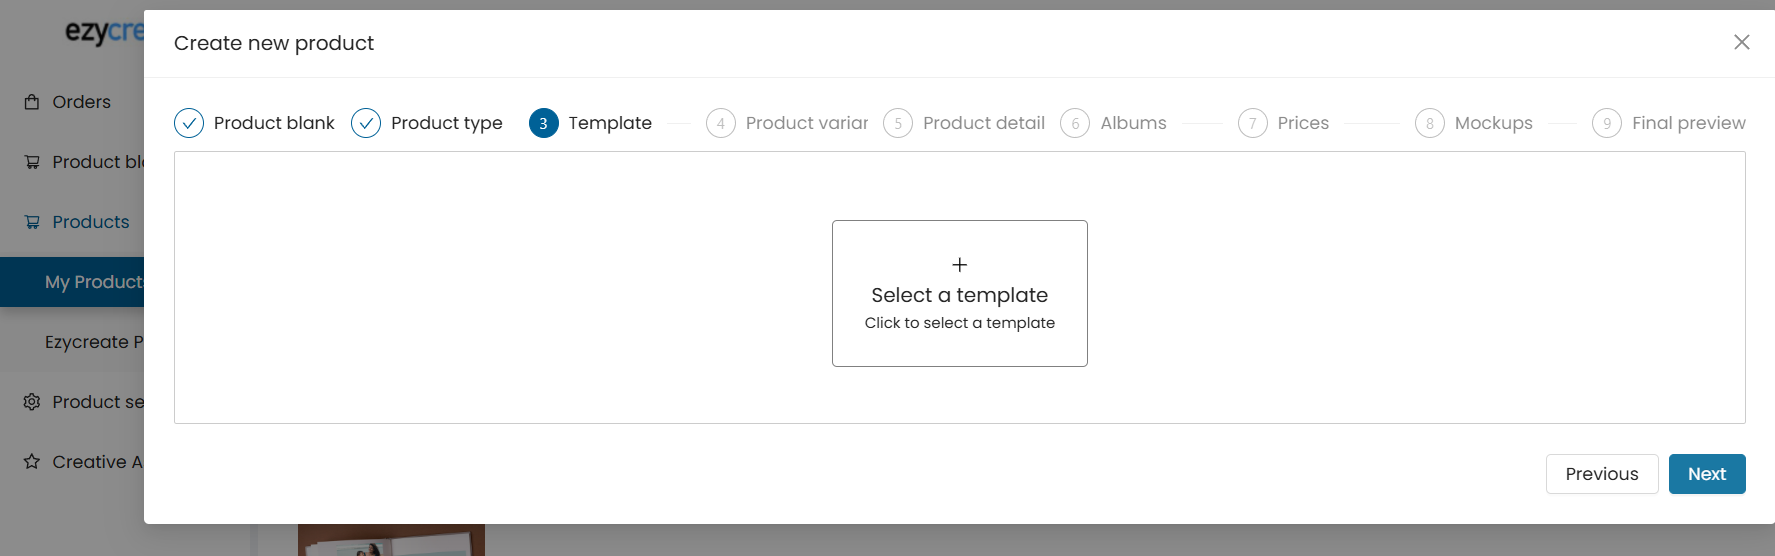
- Click Select a template.
- Choose a template design.
- Note: If your template does not appear, ensure it is published.
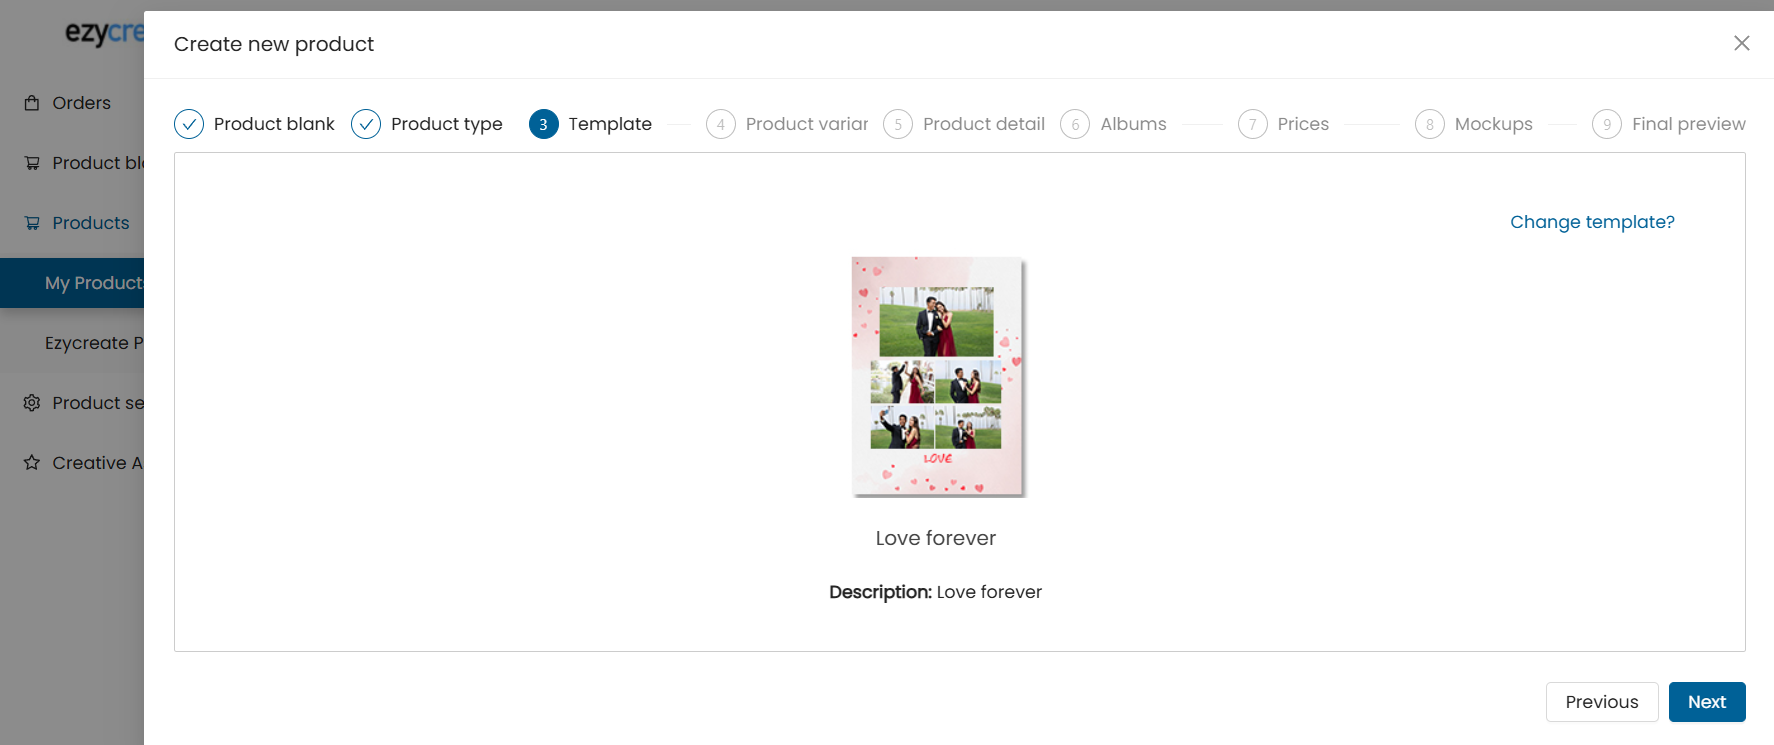
- Click Next.
Step 5: Add Product Variants
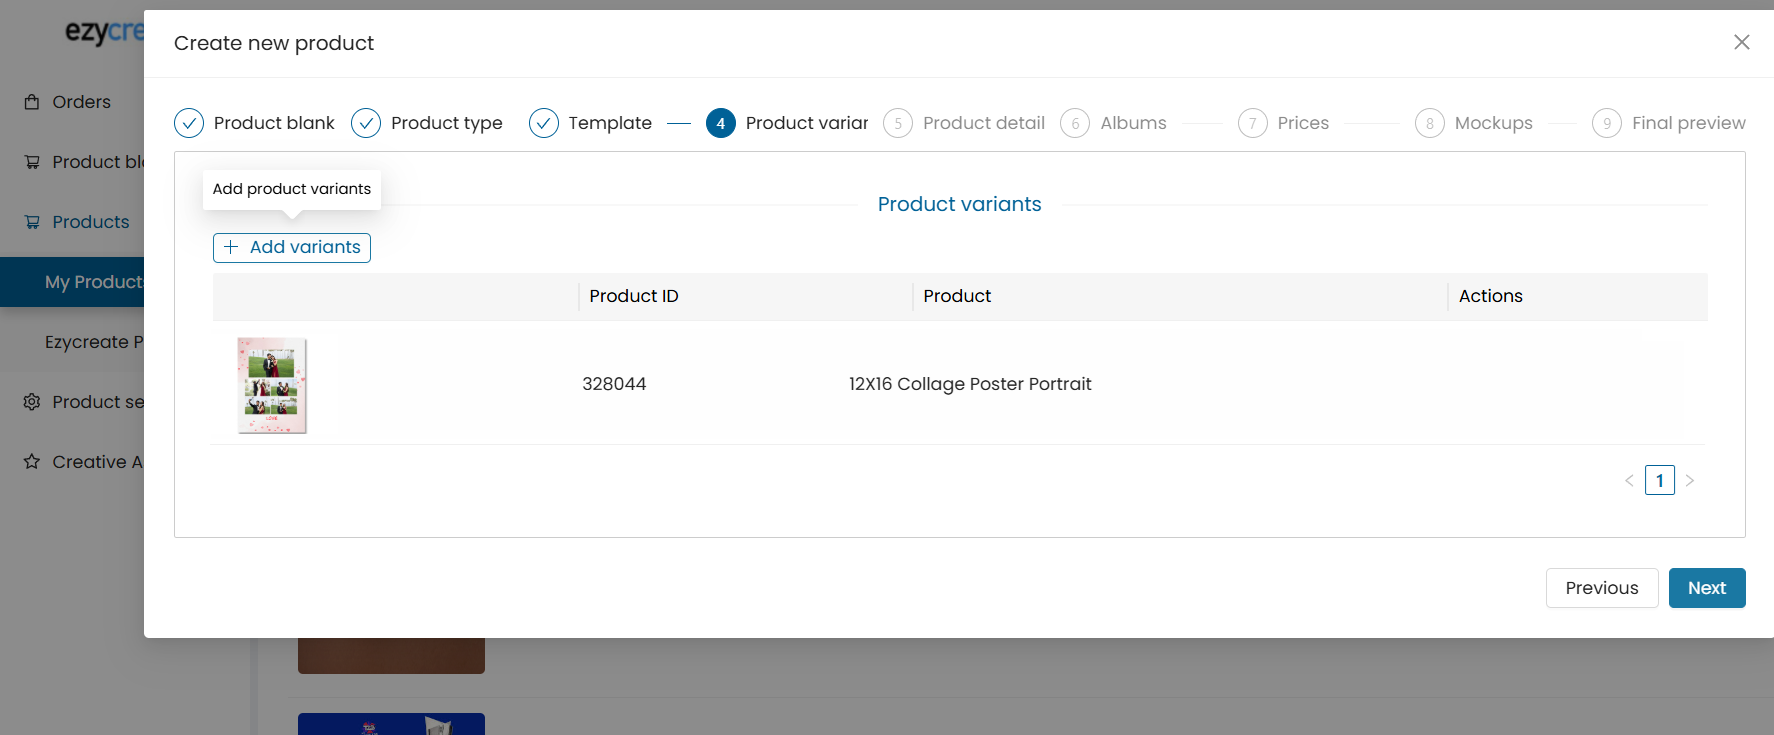
- In the Product Variants tab:Click + Add variants.
- Only designs from the same template group can be added.
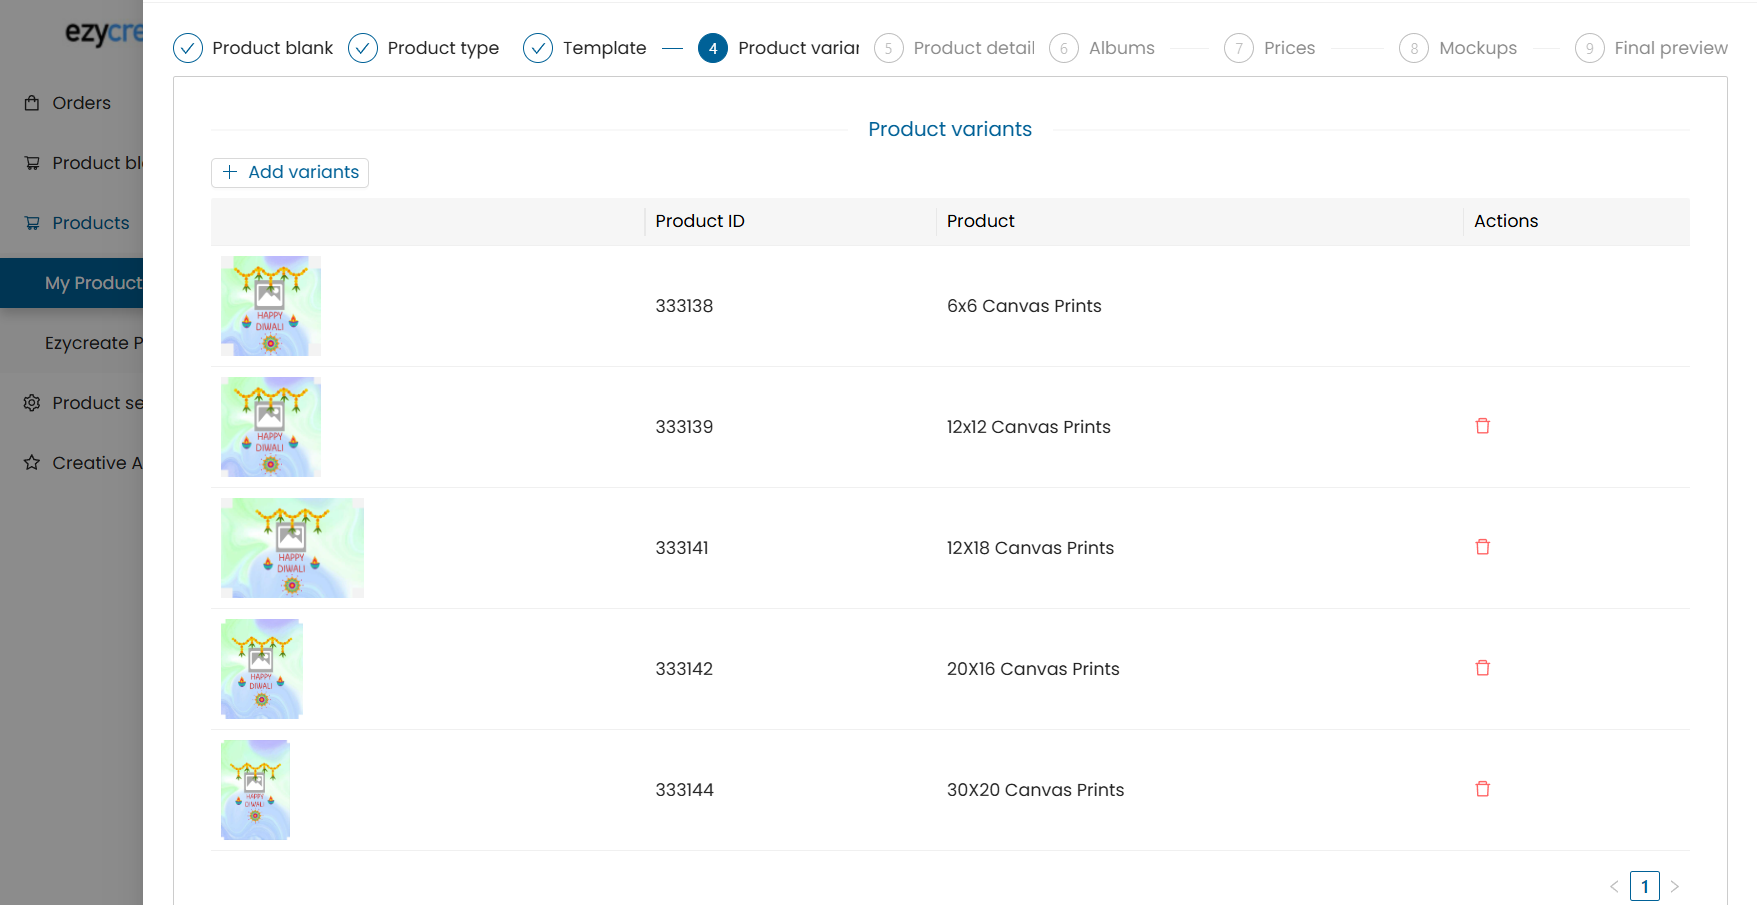
- Use the "Set default" option to mark one variant as the default.
- Use the trash icon to remove a variant.
Important:
All variants must be visually unique.
All variants must belong to the same template group.
One variant must be marked as default.
Click Next.
Step 6: Enter Product Details
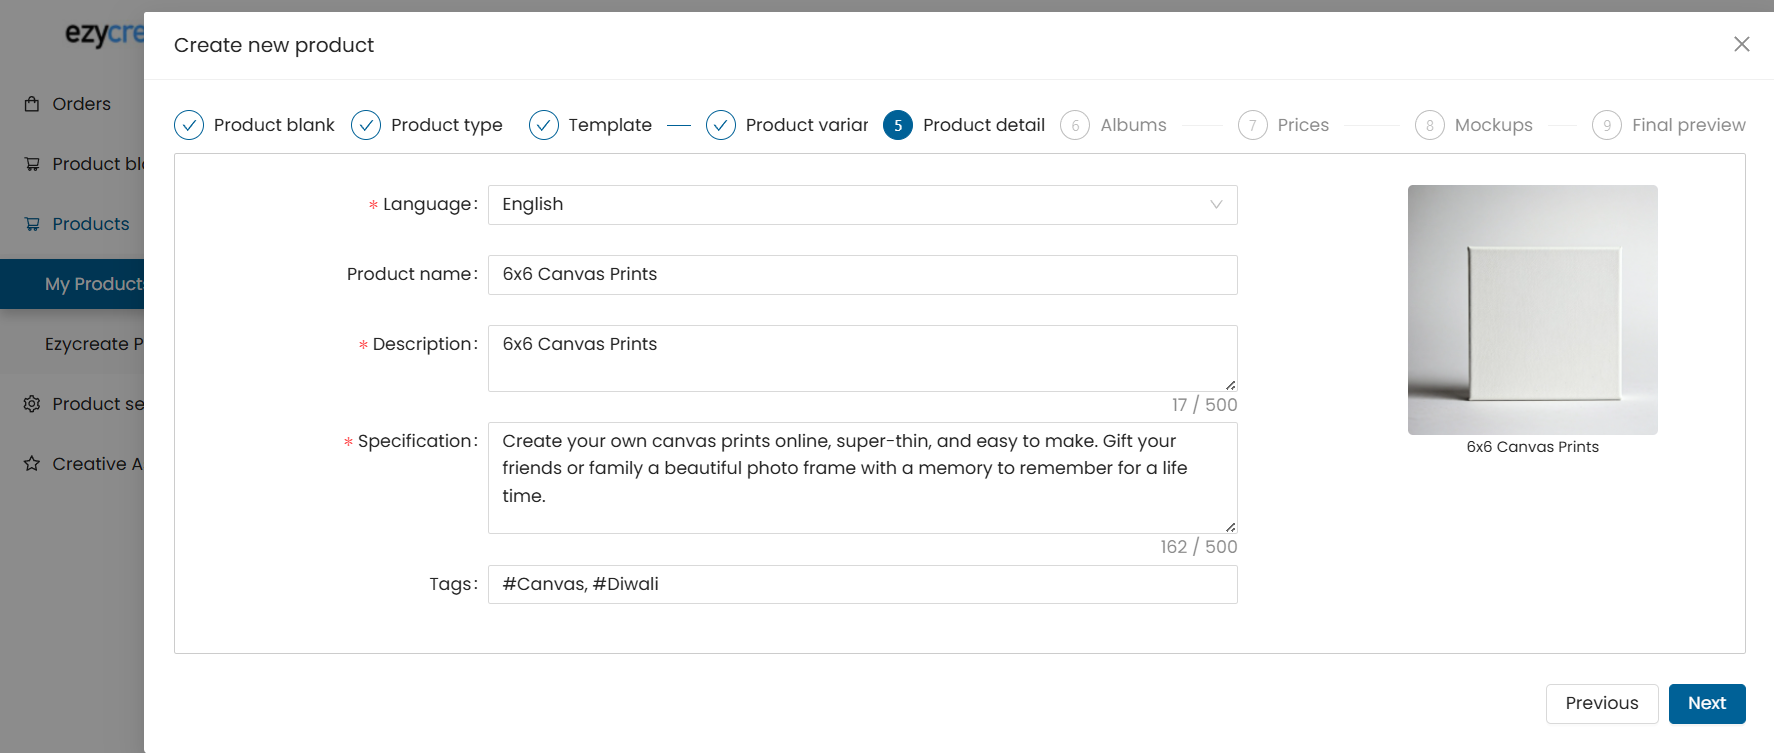
- Select the product language (e.g., English).
- Fill in:
Product Name
Description
Specifications (materials, dimensions, etc.)
Tags (used for filtering and search)
- Click Next.
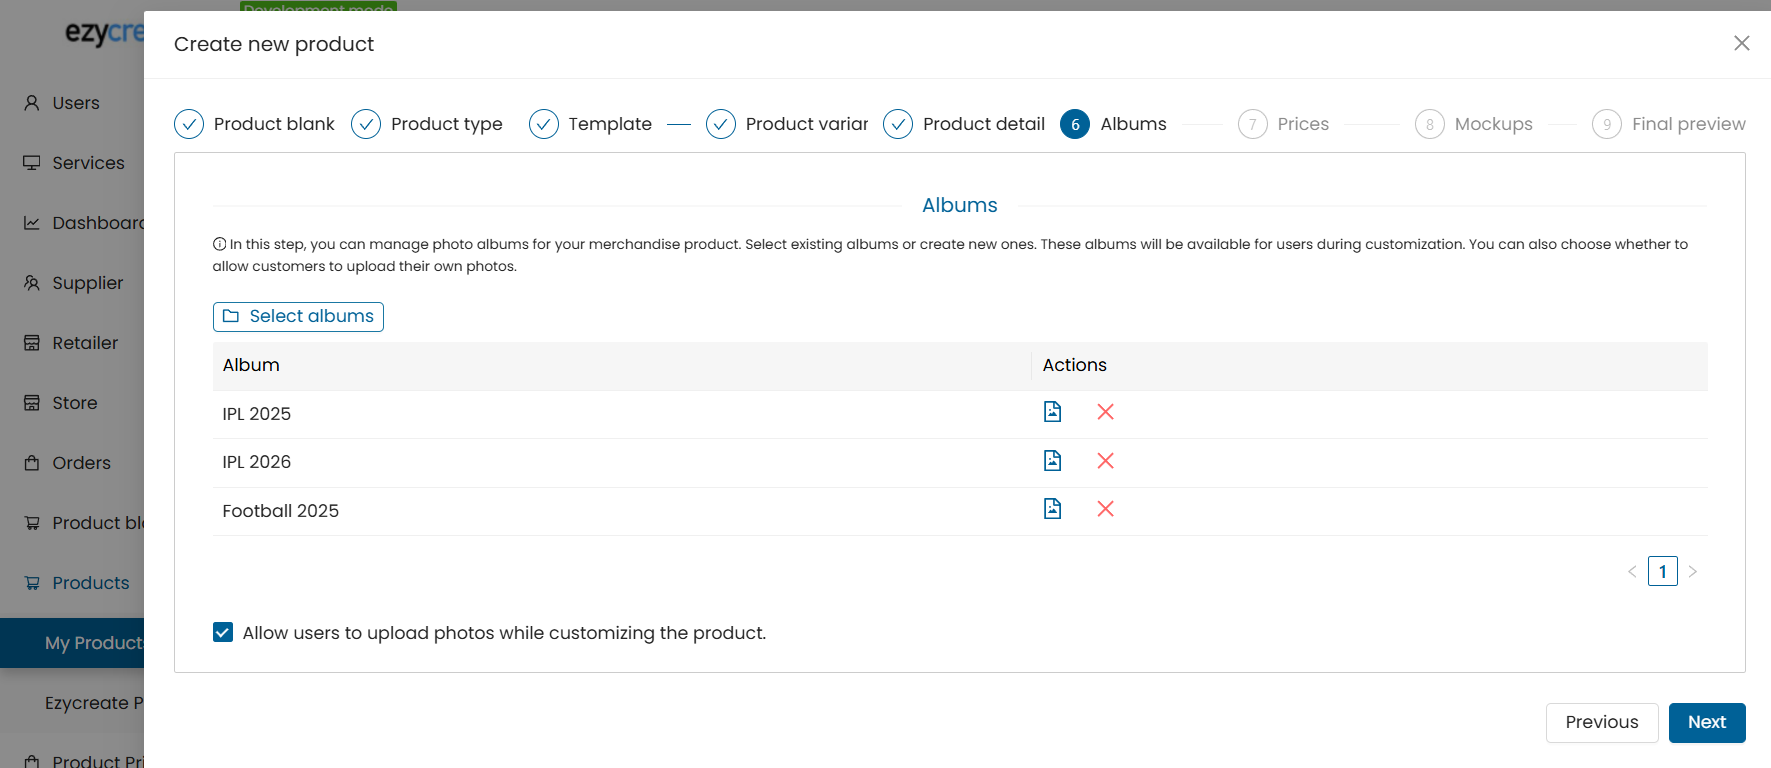
Step 7: Manage Albums & Upload Settings
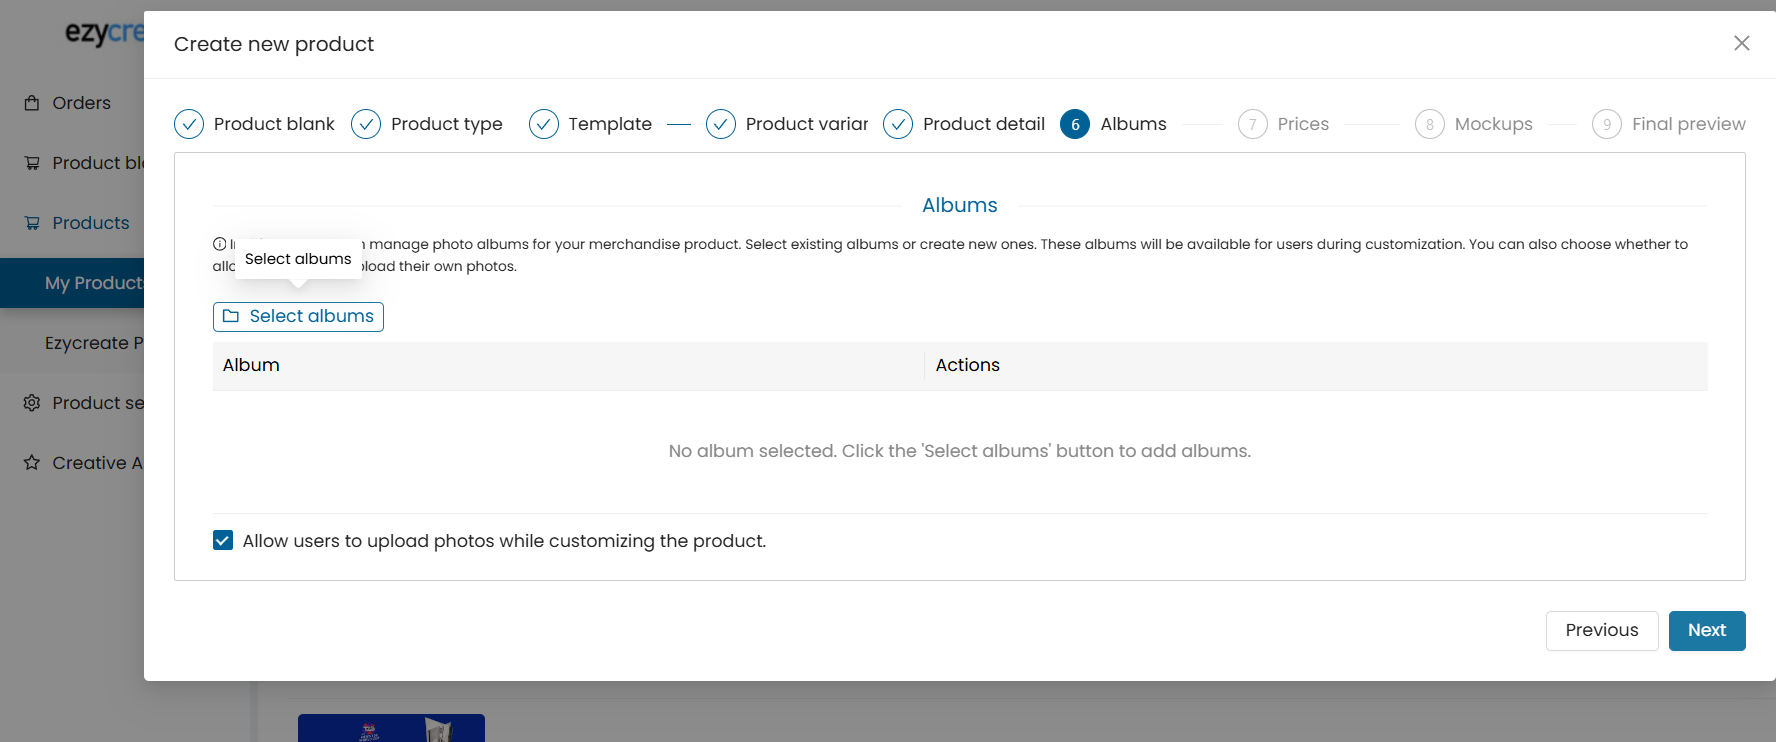
- Click Select albums to associate image collections. (You can also manage merch albums from Creative asset → merch albums)
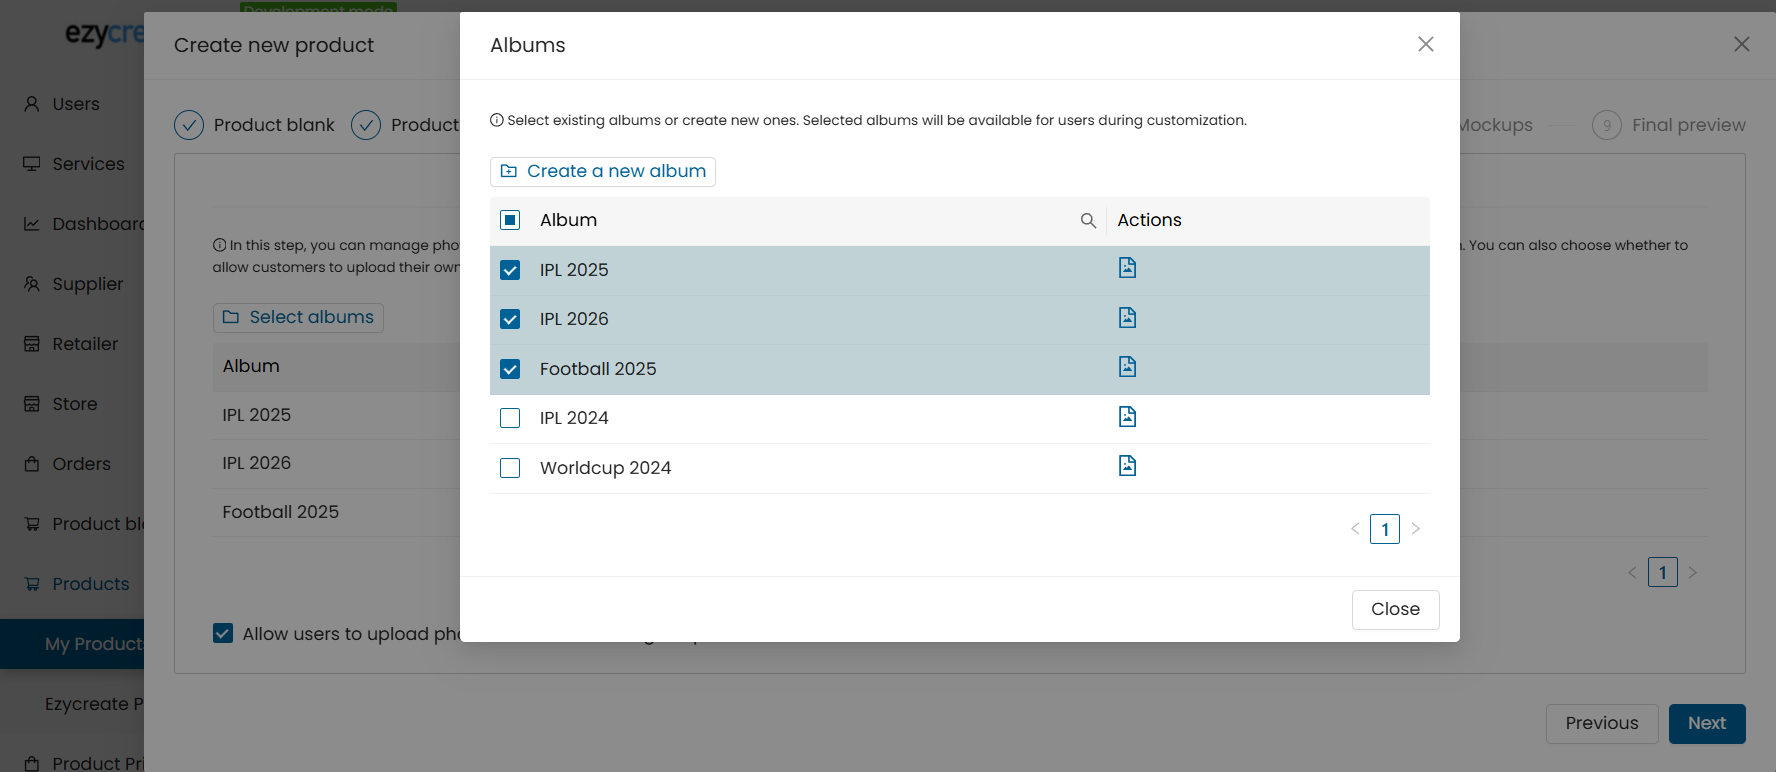
- Remove any undesired albums.
- Optionally enable "Allow users to upload photos while customizing".
- Click Next.
Step 8: Set Product Prices
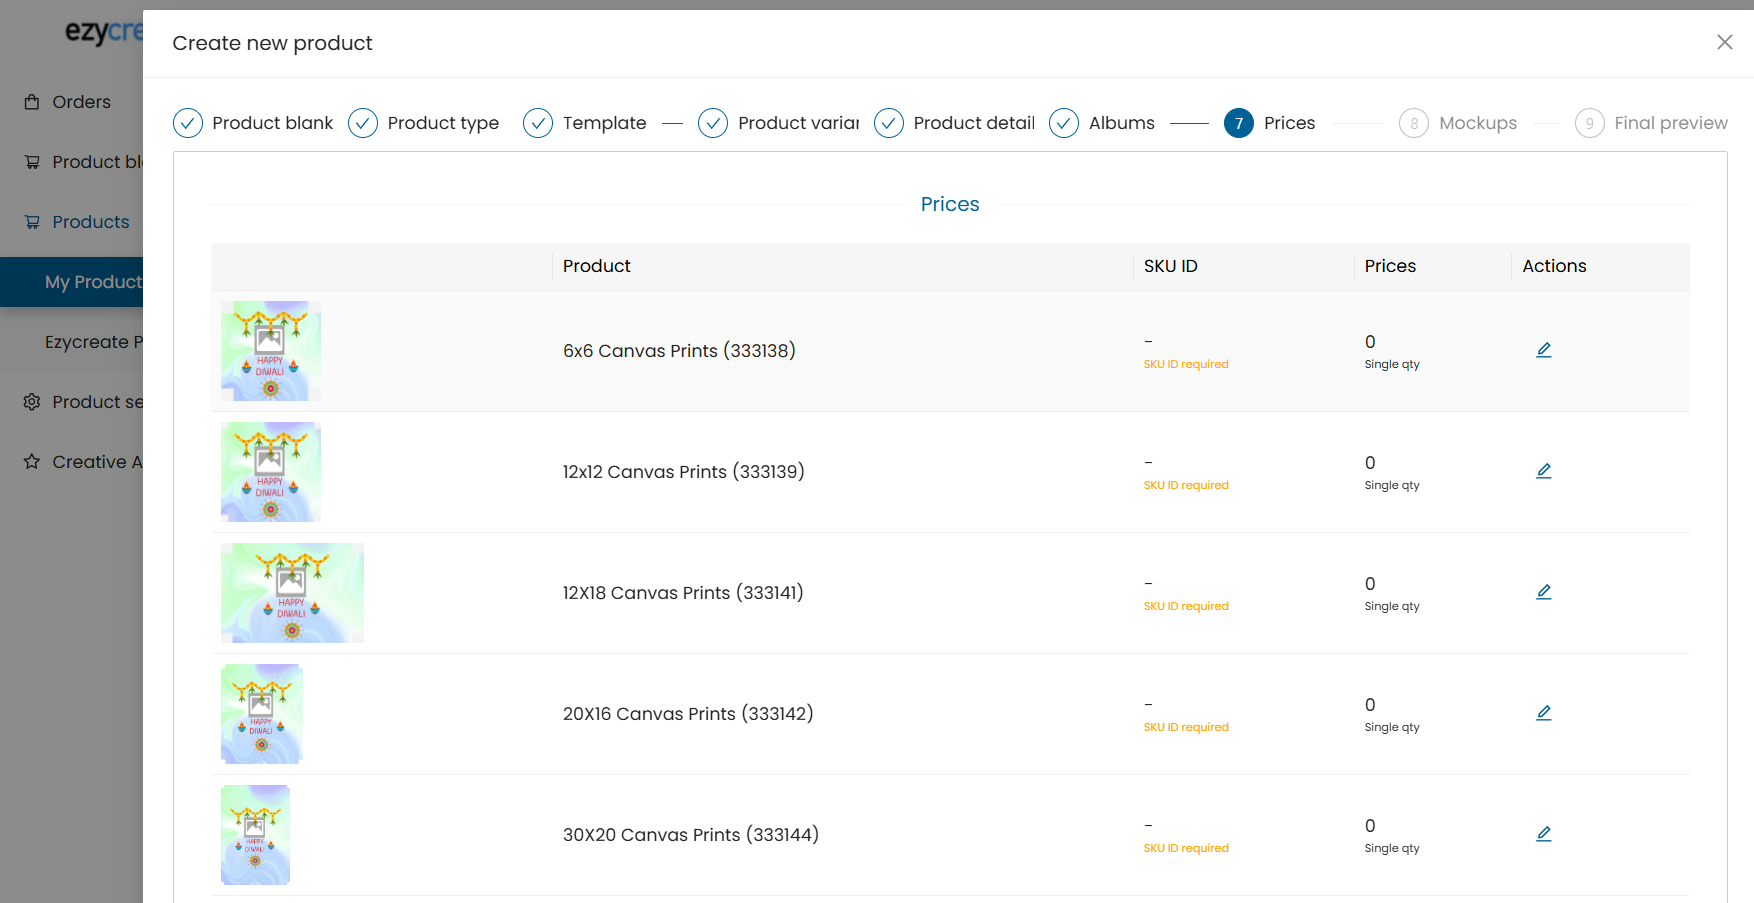
- All added variants will be shown with editable: SKU & Price
- Click the Edit icon for each to update pricing.
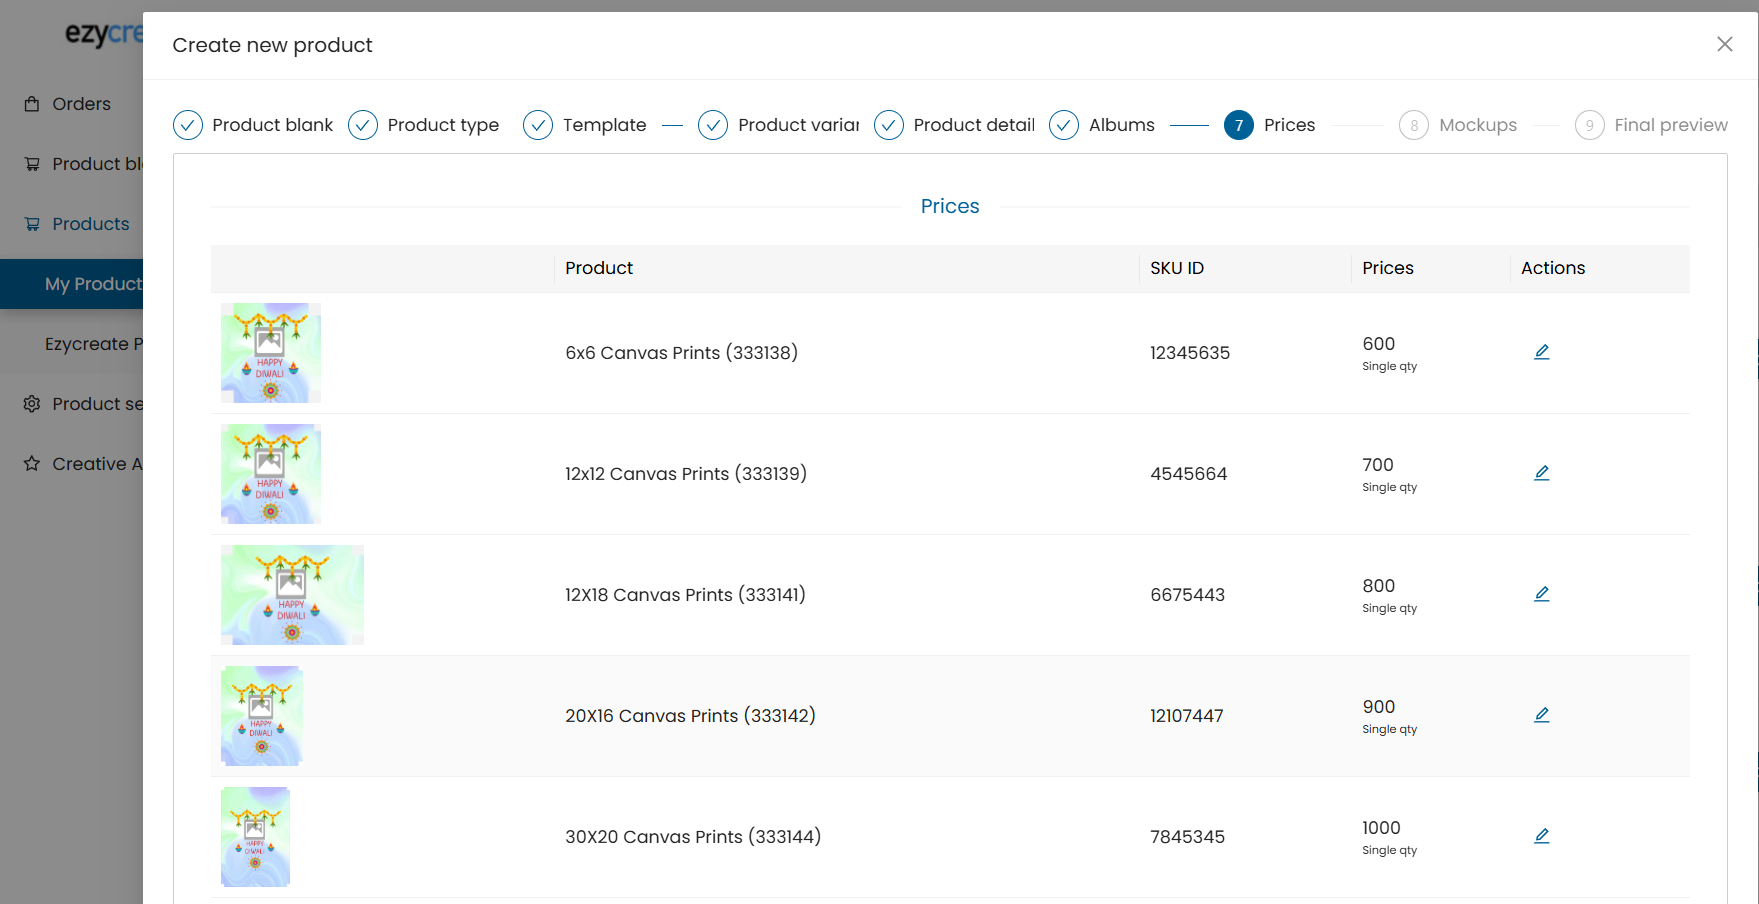
- Click Save after updating each entry.
- Click Next.
Step 9: Upload Mockup Images
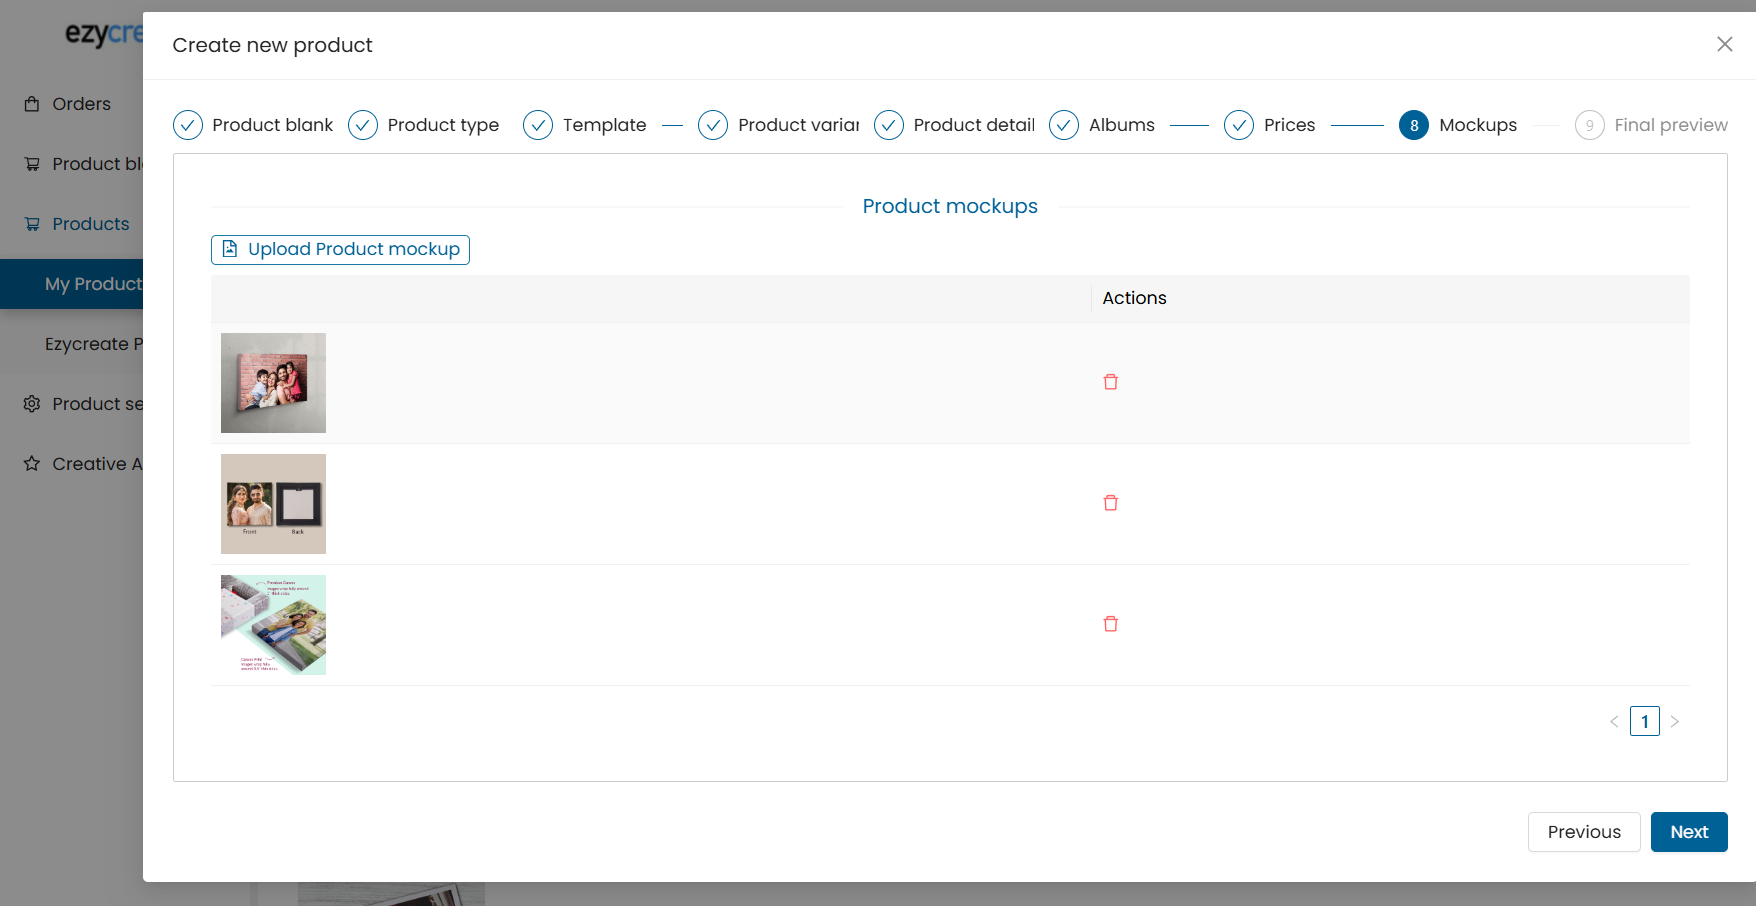
- Upload visual previews/mockups.
- Ensure the mockups visually represent the template accurately.
- Click Next.
Step 10: Final Preview and Save
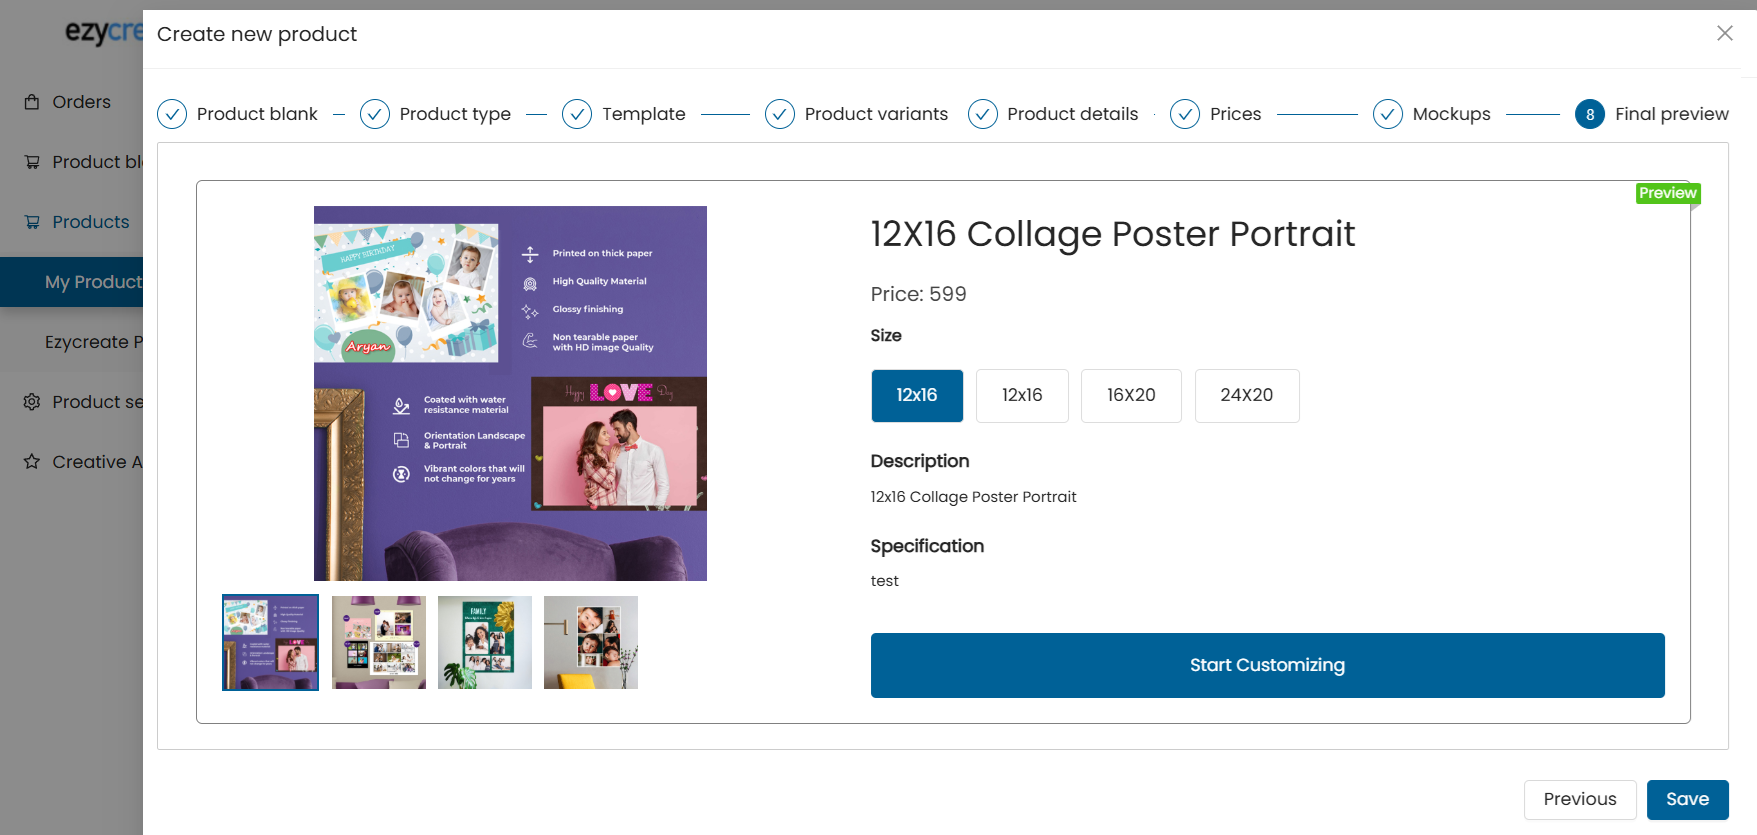
- Review all information:
- Product details
- Variants
- Pricing
- Albums
- Mockups
If everything is correct, click Save.
Section II: How to Create a thumbnail mockup.
The Thumbnail feature is designed to make the process of creating preview images for templates faster and easier.
Currently, when a new template is created using the Template Designer, it doesn’t automatically generate a thumbnail (preview image). This means designers have to create these thumbnails manually and upload them to the store’s website, which takes time and effort.
With this feature, thumbnails will be automatically created for each template. This ensures every template has a high-quality preview image without needing manual work.
Add the Thumbnail Mockup & Test the Preview
- Upload a mockup image – This is the base image where the design will appear (like a frame, mug, or canvas).
- Draw the placeholder box – Mark the area where the customer’s design will go.
- Add a mask shape – Define the shape and visibility of the design (to crop or blend naturally into the mockup).
- Test the preview – Upload any sample image to check how it looks on the mockup. This ensures everything is aligned and works perfectly before proceeding.
Select one product blank to add a product mockup

Click on 3 dots on the action and select the thumbnail preview setup

A product mockup form will open and is divided into 4 steps
- Upload
- Placeholder
- Mask area
- Test
Click on choose file and add a mockup image. This is the base image where the design will appear (like a frame, mug, or canvas).

After uploading image, click on the next button

After uploading your mockup image, it will load along with the placeholder box tools.
This placeholder box defines where the user's design will appear on the mockup
You can adjust:
- Position – move the box around the image
- Rotation – rotate the box along X, Y, and Z axes
- Zoom – resize the box without changing the mockup image *Note: The placeholder box maintains the same aspect ratio as the product’s print area. (e.g., 4x6, 8x10, etc.).*
This ensures the design fits perfectly when rendered and reflects the actual product dimensions accurately. Once the placeholder box is positioned correctly, click Next to proceed.

Use the control options to adjust the placeholder box as needed (position, size, and rotation). Once you're satisfied with the placement, click the Next button to continue.


Mask Area
Use points and curves to accurately outline the printable area on the mockup.
- Add Points – Click to add anchor points on the image.
- Add Curves – Click to add curves between two points for smoother edges.
- Undo – Click to remove the last action.
- Clear – Click to remove all points and start over. *Note: Curves can only be added between two existing points.*
Once you’ve defined the mask area, click Done and save to save your changes.


After clicking the Save button, the Next button will appear. Now click on the Next button to test the created mockup

- Test – To test the preview, choose an image and it will be uploaded.

A crop window will appear. You can adjust the image using the mouse scroll wheel or the zoom in/out bar. After adjusting the image, click the OK button — it will redirect you to the product preview form’s test step.
Now, click on the 'Generate Preview' button. It will generate the preview using the uploaded mockup and the test image.

A test product mockup will be generated with the test image. If it does not meet expectations, click on 'Previous' to adjust the placeholder and mask area.
To save the product mockup, click on the 'Save’' button.

Usage of Mockup images :
Adding a thumbnail mockup to my product
Once your mockup setup is ready, you can now generate real previews.
The usage is in the “My Product” section

On product creation when the user clicks on create new product or when he edits an existing product by clicking the pencil icon.

Once the user has completed all the steps from 1-6 then on step 7 is the mockup step. Here are the instruction for using the mockups generated for the blank Note - in step 1 there is an option to select default blank, kindly make sure the Mockup setup is done for this blank if you wish to see the mockup scene being implemented. Also on step 2 the mockup feature is available only for customizable products.
On step 7 below are the instructions : Click “Generate Thumbnails” – The system will automatically:Enter the images and texts as per the form provided. The no. of images and textboxes are based on the template selected.
Once the:
Apply the template and image and text to added and a mockup is generated using the provided input.
If generated mockup is as per your requirement, click on generate variants mockup and the mockups for the variants is also generated. *Note- if any of the variants have no mockup step up done then only the template will be rendered.*
Review and Save – Check the generated thumbnails or regenerate if needed.
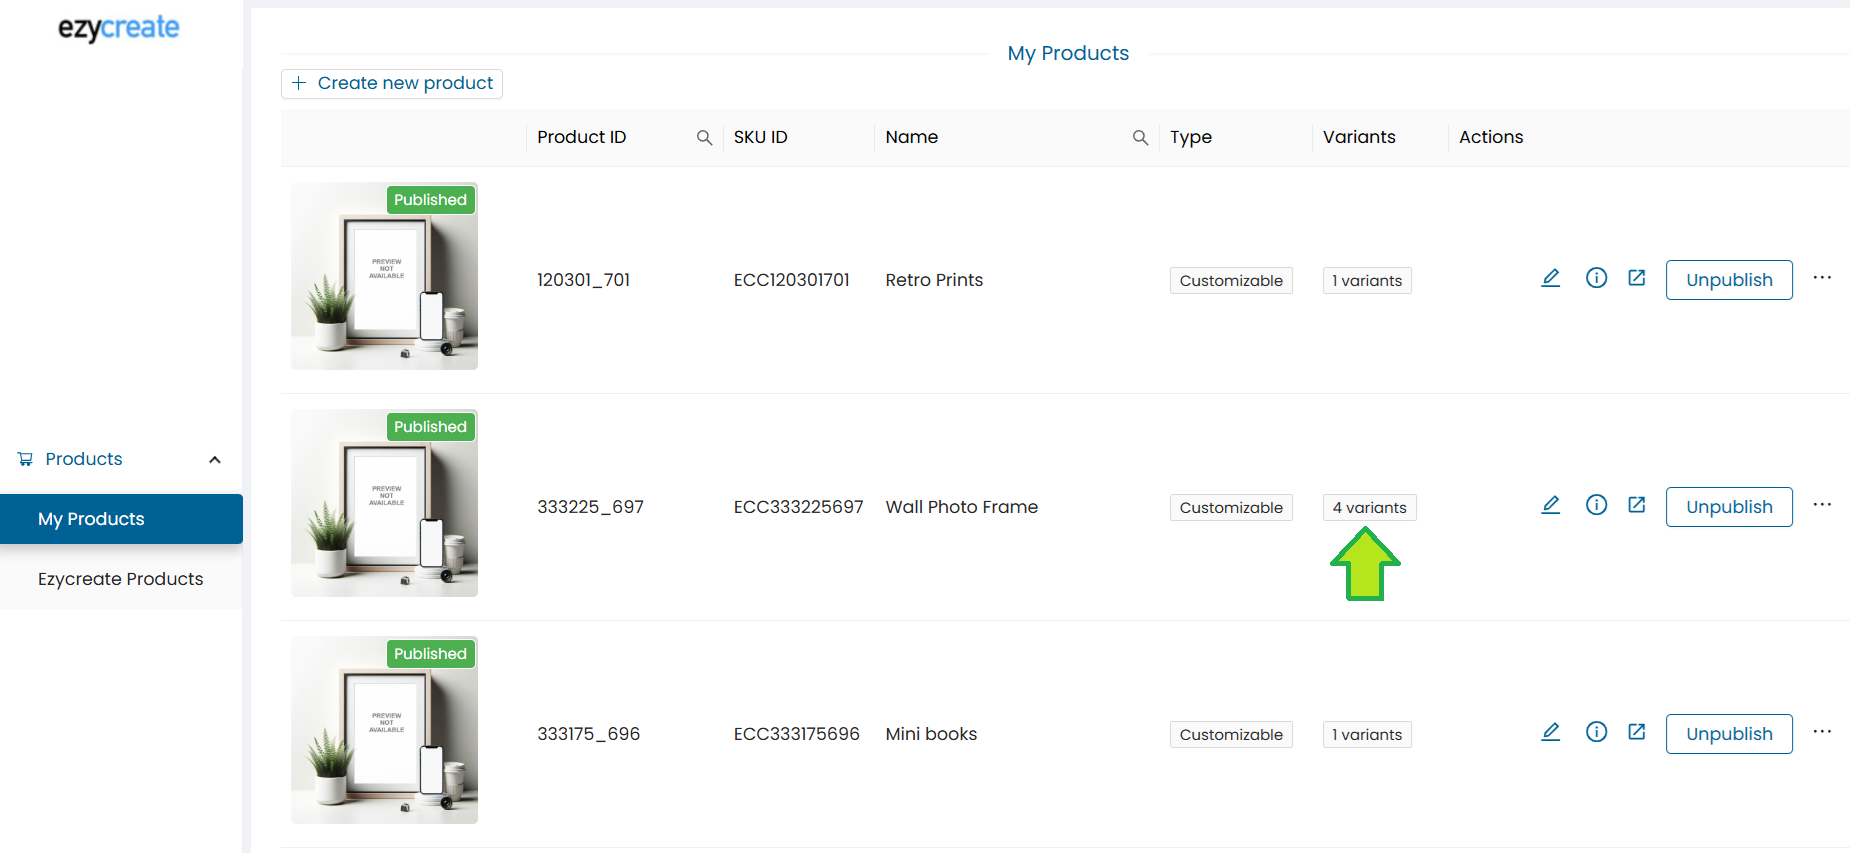
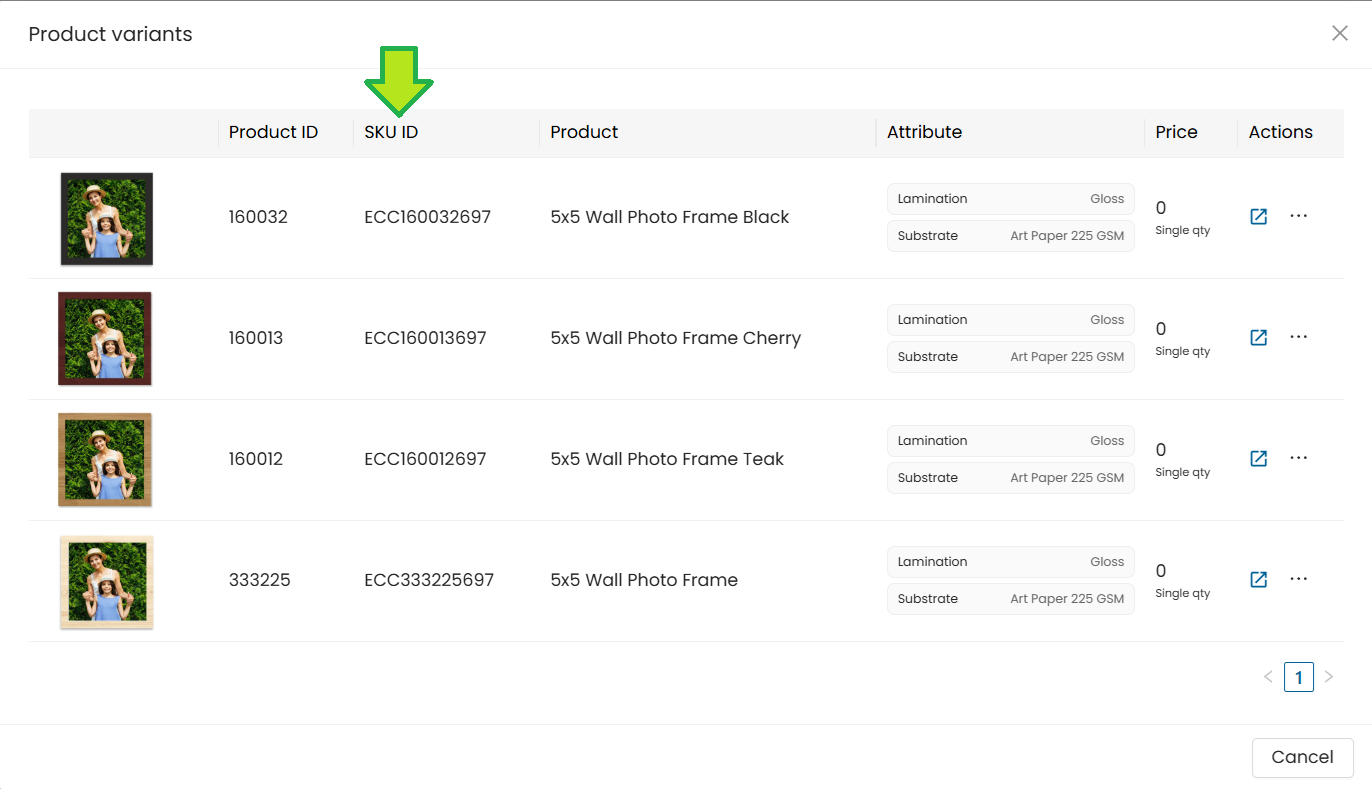
View the SKU id of the created product
Open the "my products" dashboard.

click on the "Variants" options and it will display the list of SKU ids.
Need Help?
If you're stuck, don’t worry — just email us at support@ezycreate.com