How to create a T-Shirt Product Blank
Before You Start: Setup Checklist
Please review the following points to ensure a smooth and efficient product setup process:
Mask Images
create masks For T-Shirt products: View Mask Guidelines
Note :
-
The masks to be created in .PNG format.
-
Note : the "clippath mask" transparency color need to be maintained same as the product color.
For example:
Occasions
If your required occasion isn’t listed, add it here: Add Occasion
Subcategories
For custom subcategories, use this link: Manage Subcategories
Review Steps
Go through the setup steps once to know what resources you'll need.
Once ready, start the product setup process.
Glossary:
Product Blank is a basic product setup used to define how a product works in the design and order system, before adding visuals or final templates.
Product Code This is a unique code that needs to be added for every definition.
SKU ID a unique id assigned to each product or product variant in the product fulfillment process.
Safe Area This is the outline marking on the product designer to let the customer know which part on the page may get cropped/cut while product fulfillment.
Bleed Area Bleed area is a portion of a design that extends beyond the final trim size of a printed product.
Trim Area The trim area refers to the space around the product where excess material is cut away during the final cutting process.
Substrate / Attributes It is the paper used for a product. Ie. Artpaper, Silky, Lustre etc.
Lamination It is the layers of material to the surface of a product, often a printed material, to enhance its durability, visual appeal, or specific properties.
Image Size Is the size of the image used in the designer.
Photo width Photo width is the size of the photo set to the full designer area.
Binding Is to securely attach the pages together and create a book structure. This involves various techniques, such as imagewrap binding, stitch binding, perfect binding etc.
Display Mask Image Is the overlay mask to be displayed in the designer.
Clippath Mask Image Is the mask area set for designing purposes by the designer.
Offset Value Are used to set the mask on the designer.
Category Is used to organise products under certain sections
Sub Category Is used to organise multiple types of products under specific sections
App name It refers to the type of the designer to be used for the configured product ie. prints products designer, photobook products designer, calendar designer, decor products designer.
Printable surfaces It refers to the designer surface where the designing will be done. Of which the product specification to be added.
Output type It refers to the output file type required to be generated after the order is processed ie. jpeg format or pdf format.
Min pages It refers to the minimum number of pages with which a product will open
Max page It refers to the maximum number of pages a product will have an option to add up to.
1. How to Create a Product Blank (Single Surface Product)
Example (Single Surface Product)
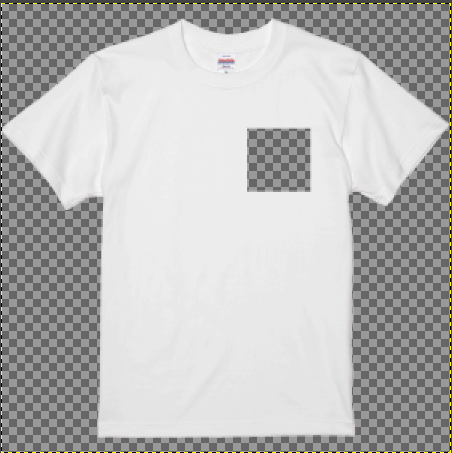
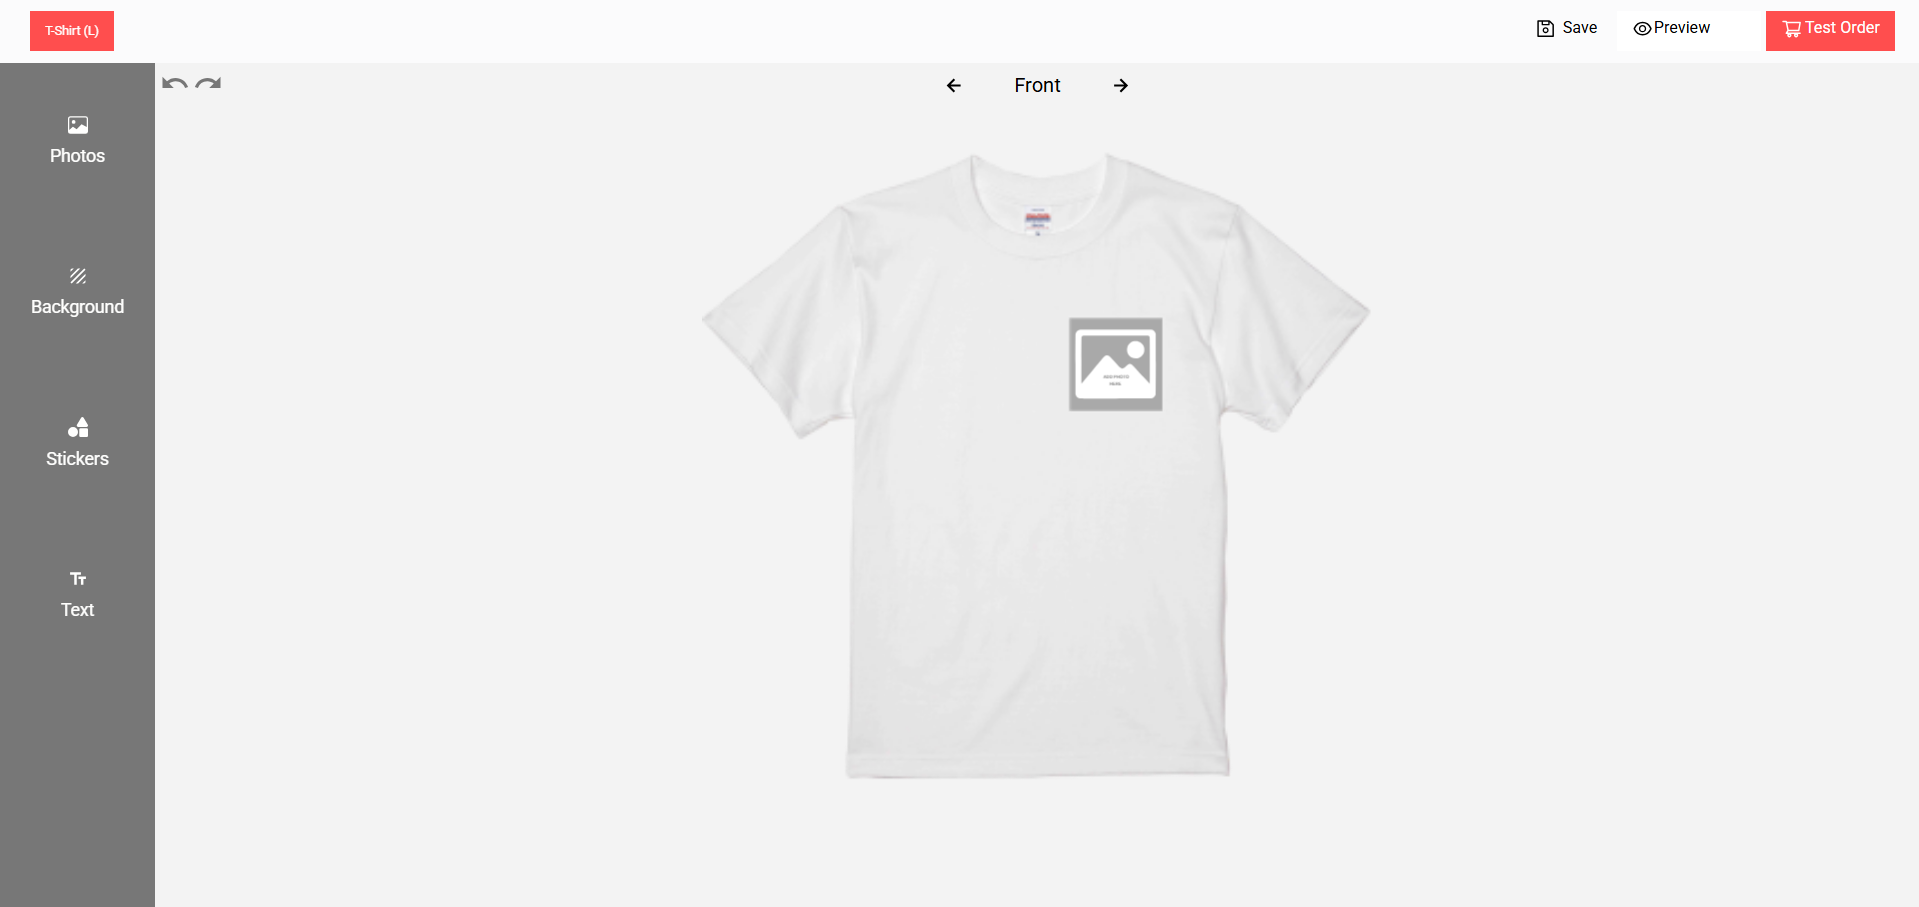
This guide explains how to create a Single Surface Product (example: T-shirt with only front design).

Product Type: T-shirt
Surface: Front side only
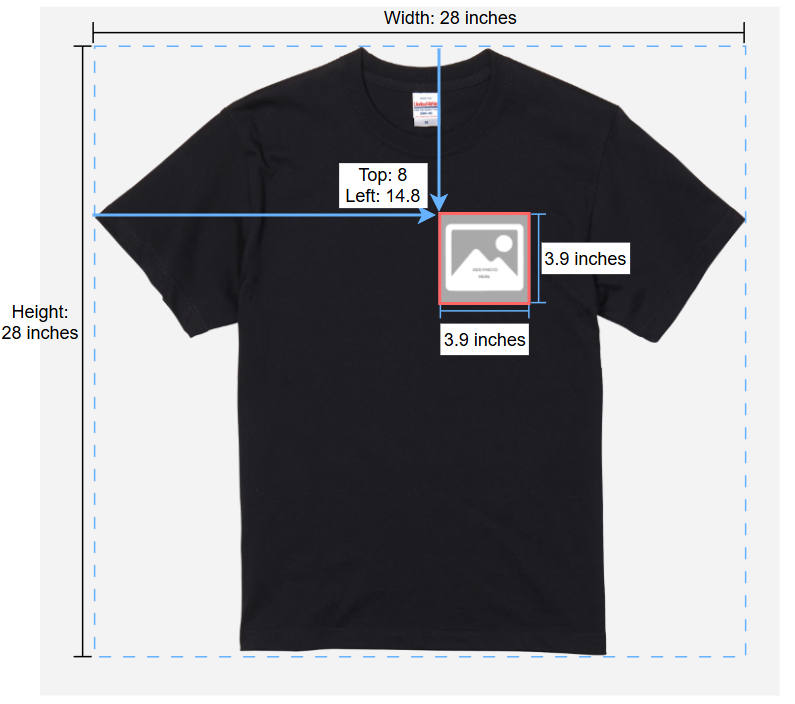
Product Width: 28 inches
Product Height: 28 inches
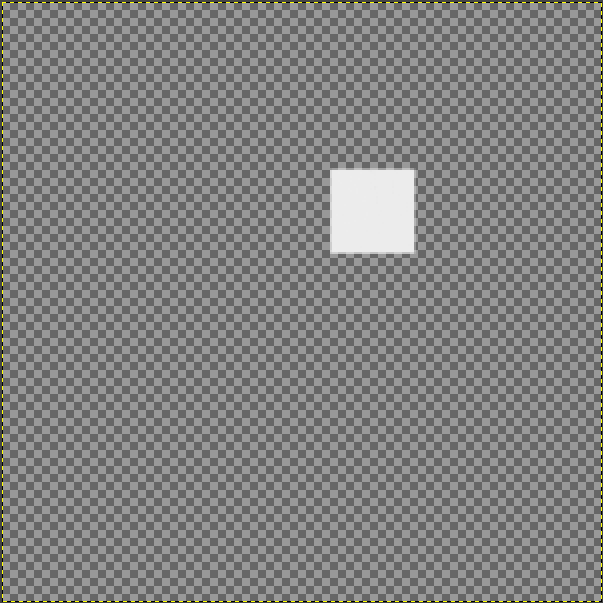
Design Area Size: 3.9 × 3.9 inches
Design Area Position: Top = 8 inches, Left = 14.8 inches
Rendered Image Size: 3.9 × 3.9 inches
Prerequisites
Before starting, make sure you have the following:
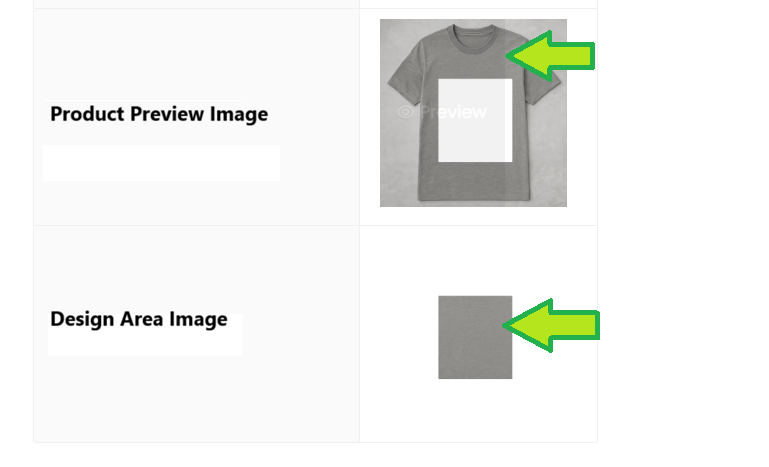
Assets
- Product Preview Image (Shows the actual product like a T-shirt)
- Design Area Image (Shows the printable area where the design will be placed)
Note: Product Preview Image and Design Area Image must have the same dimensions.
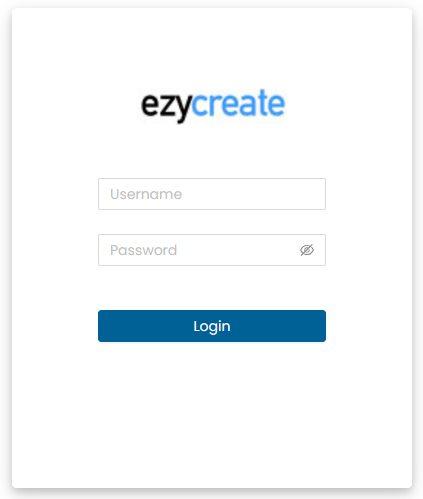
Step 1: Open the website link Enter valid login details and click on login button
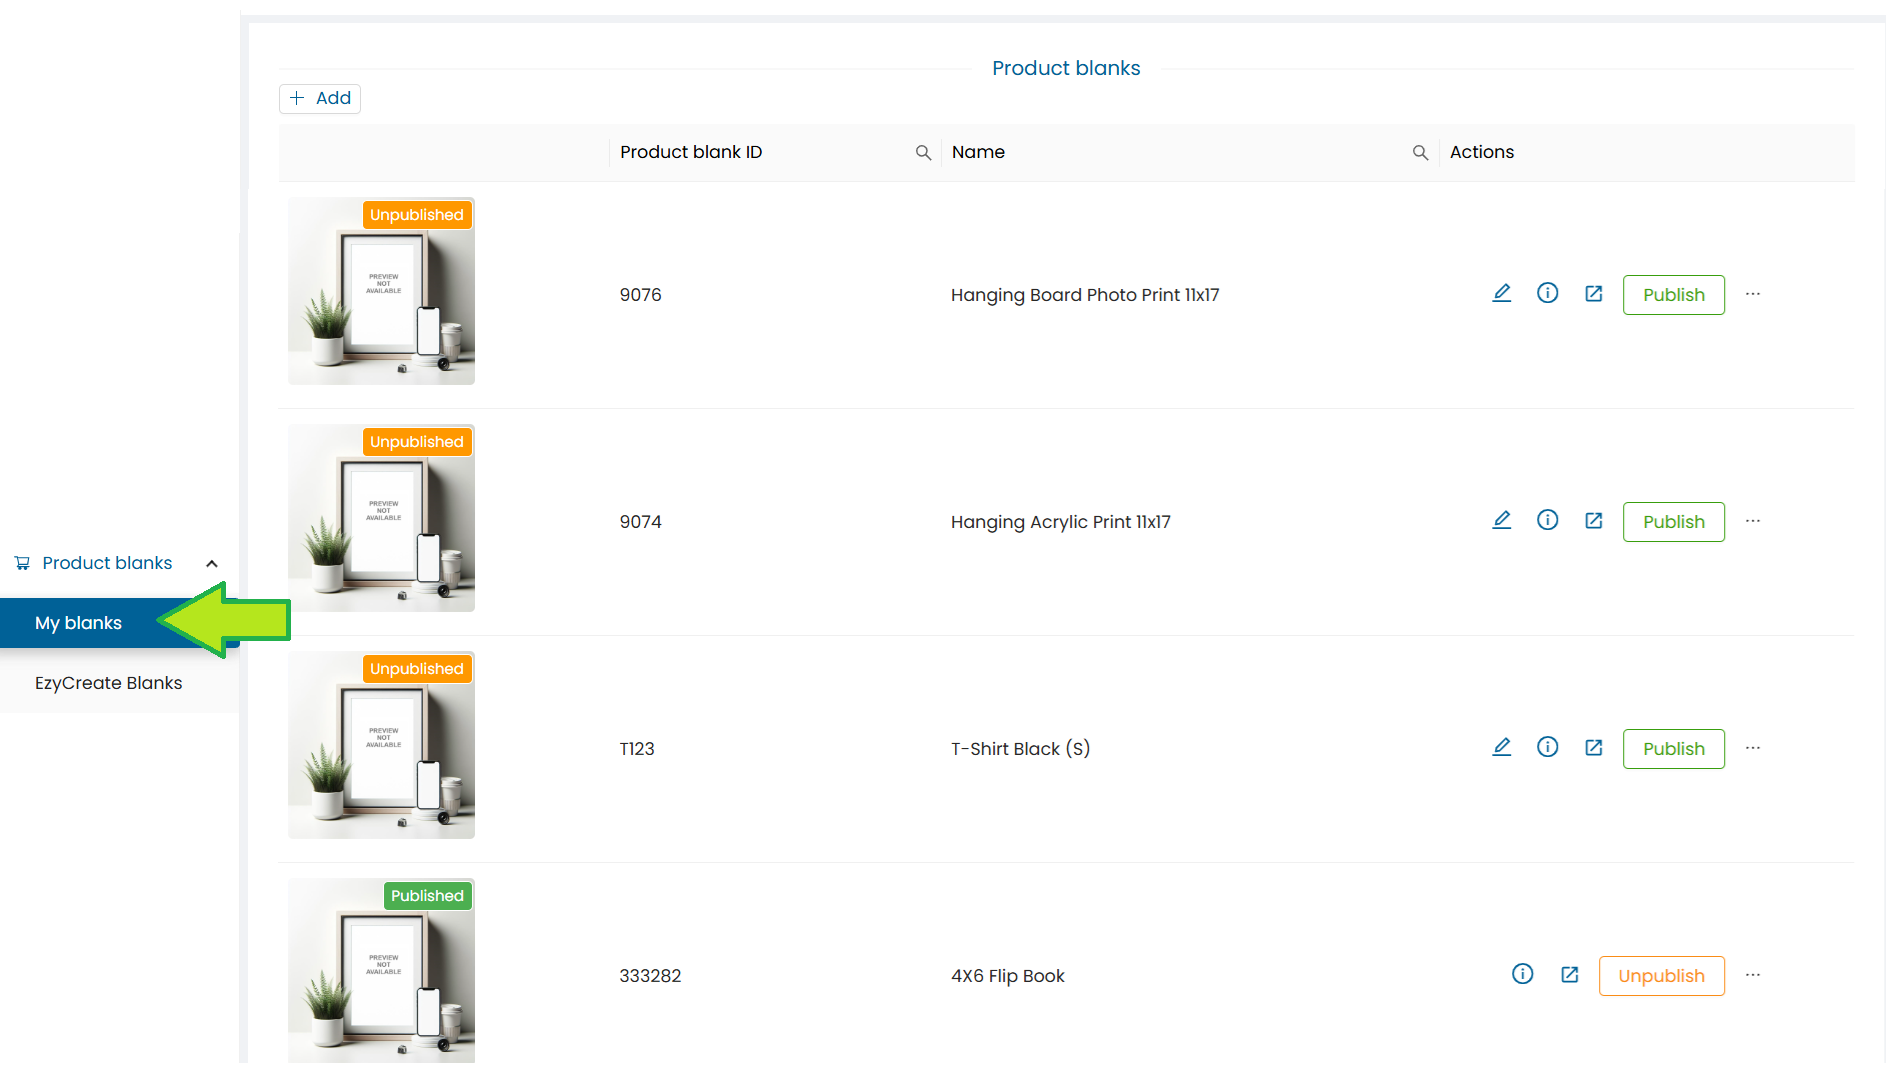
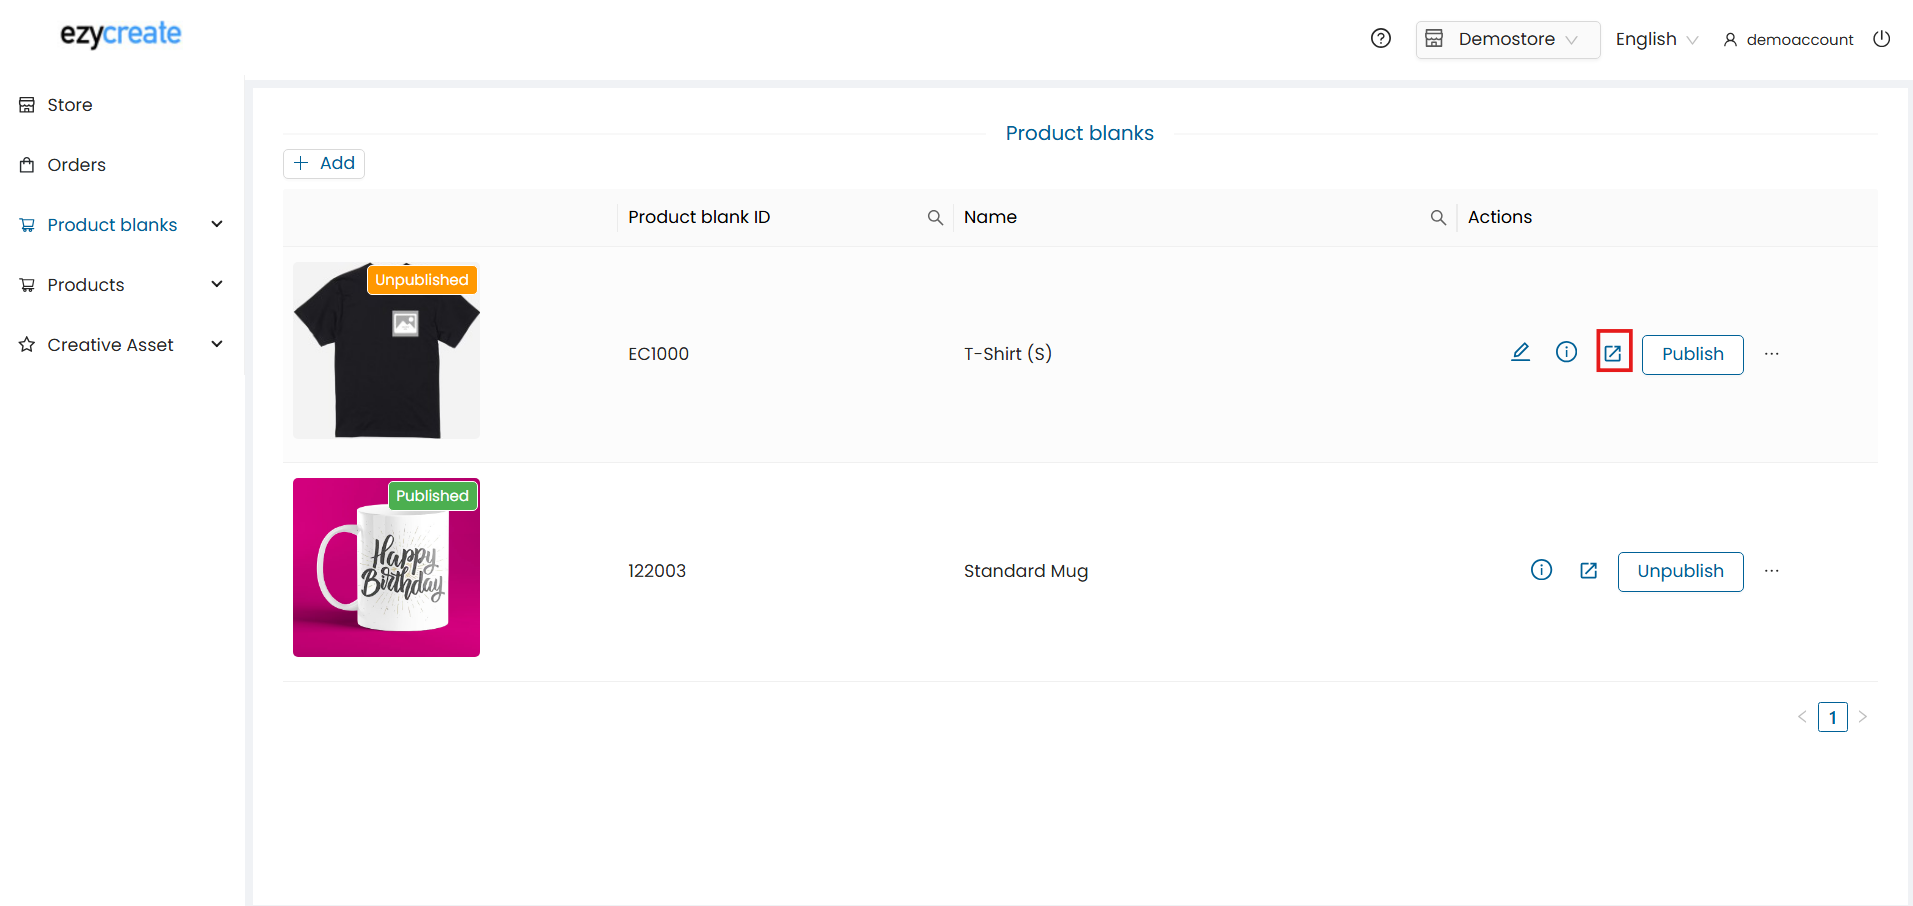
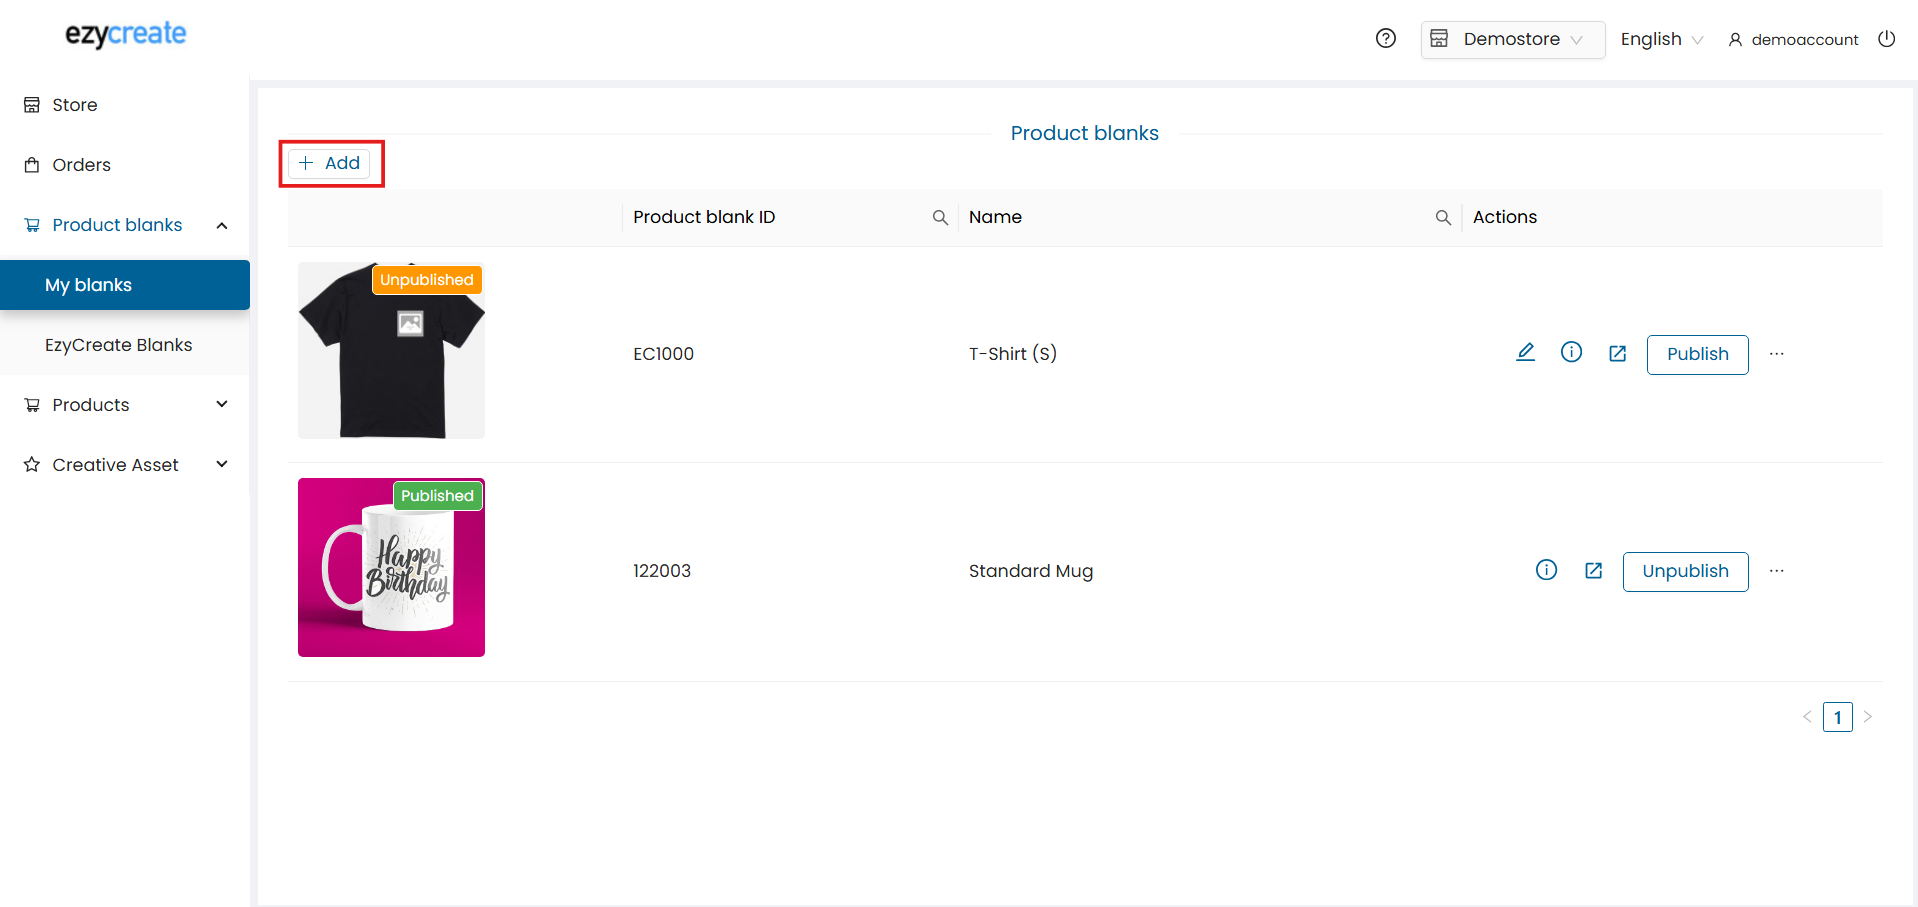
Step 2: Click on “Product blanks” and then click on My Blanks. It will display the list of defined product Blanks.
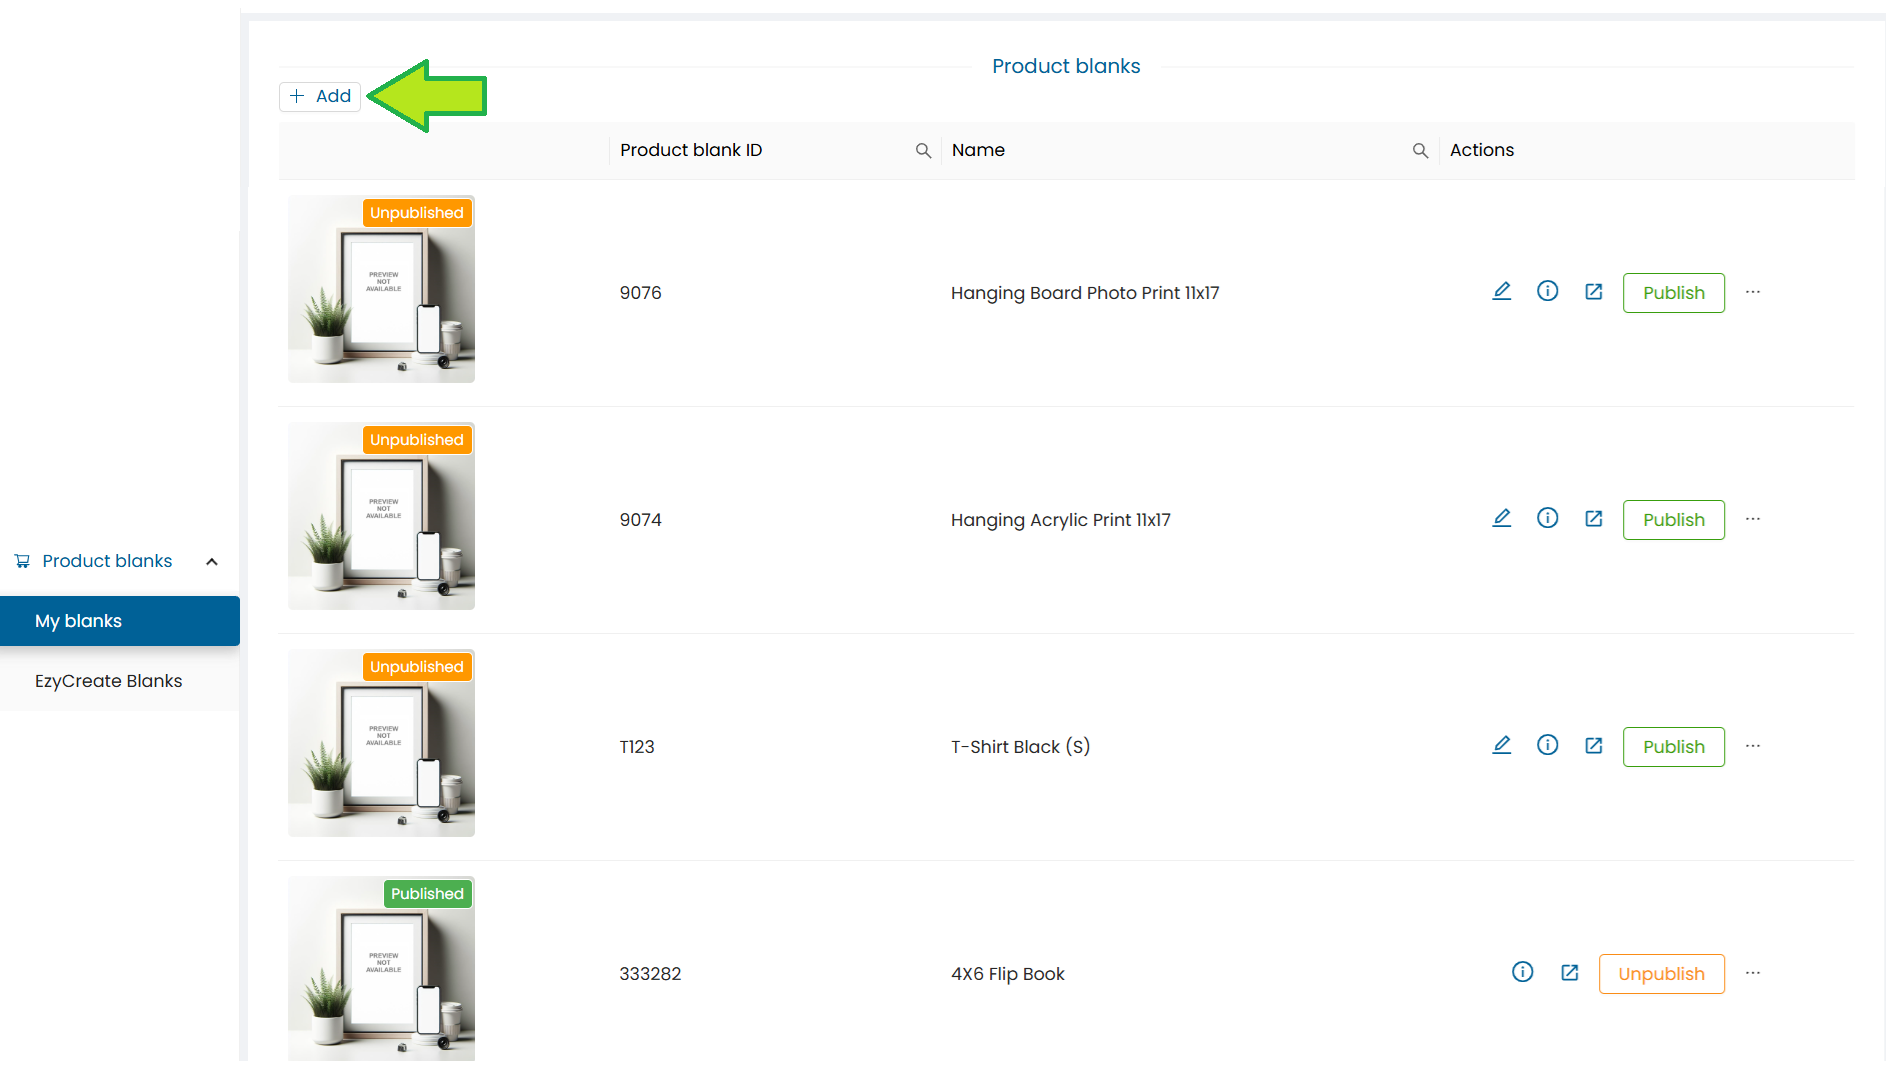
Step 3: To create a new product Blank click on the “Add” button.
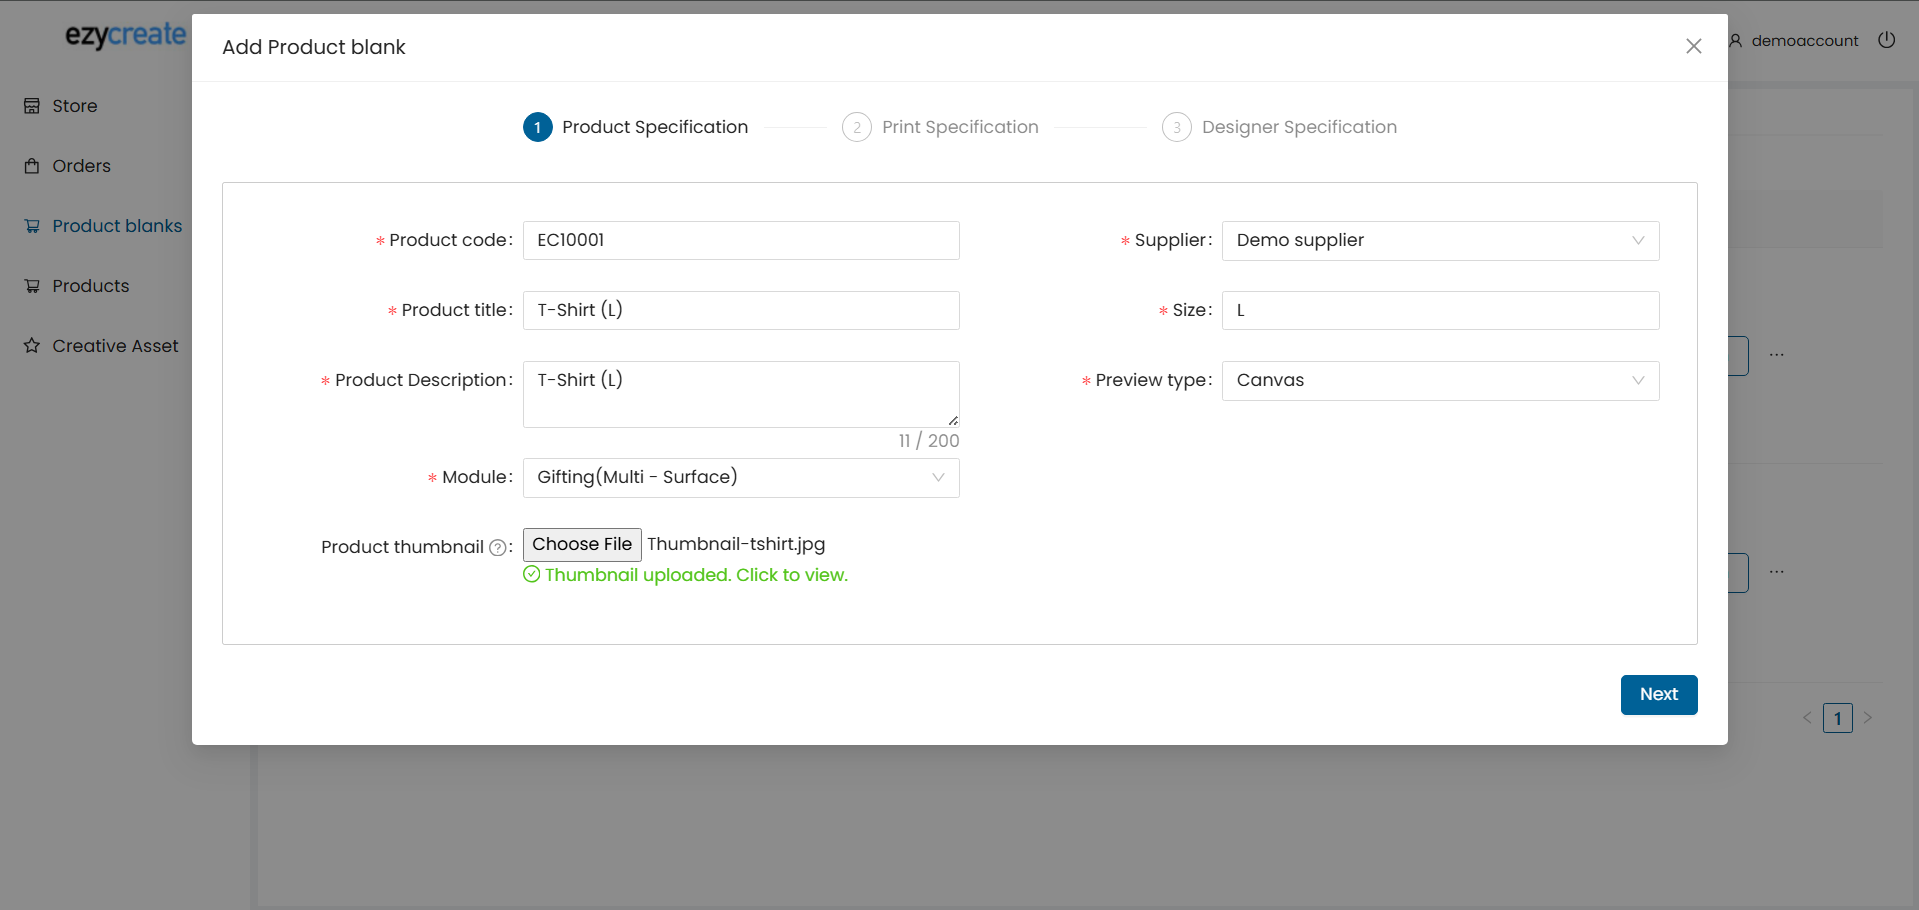
Step 4: Product Specification : This step defines basic product details.
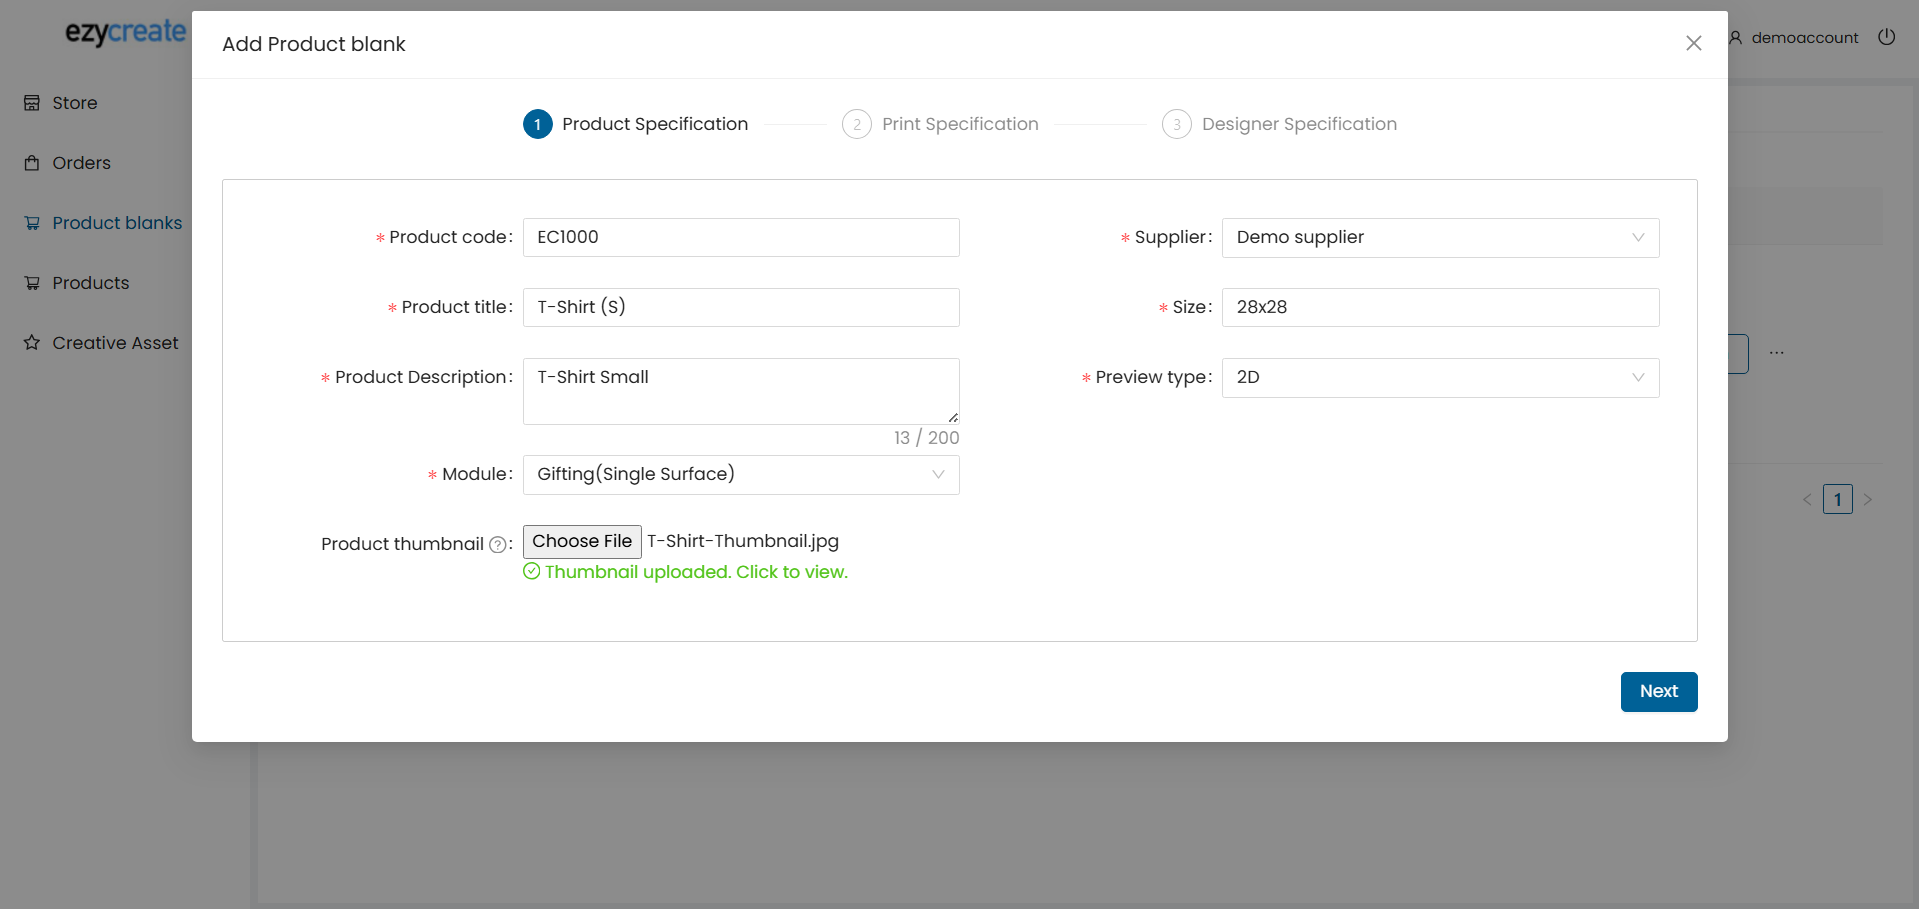
Fields Explanation
-
Product Code Unique code to identify the product blank (must be unique).
-
Product Title Name of the product blank.
-
Product Description Short description of the product blank.
-
Module Select the module based on product type:
- Prints – For photo print products
- Photobooks – For photobook products
- Gifting (Single Surface) – For products like mugs or T-shirts with only front design
- Gifting (Multi-Surface) – For products with front & back (example: T-shirt front + back)
- Calendar – For calendar products
-
Product Thumbnail Small thumbnail image shown in listings.
-
Size Product size (example: 6x6, 12x12, S, M, L, XL).
-
Preview Type Defines how the product preview appears in the designer:
- None – No preview
- Image – Shows only the design area
- Canvas – Canvas-based preview (faster loading)
- 2D – Flat 2D product preview
- 3D – 3D product preview (requires configured 3D model)
Click on the next button to continue.
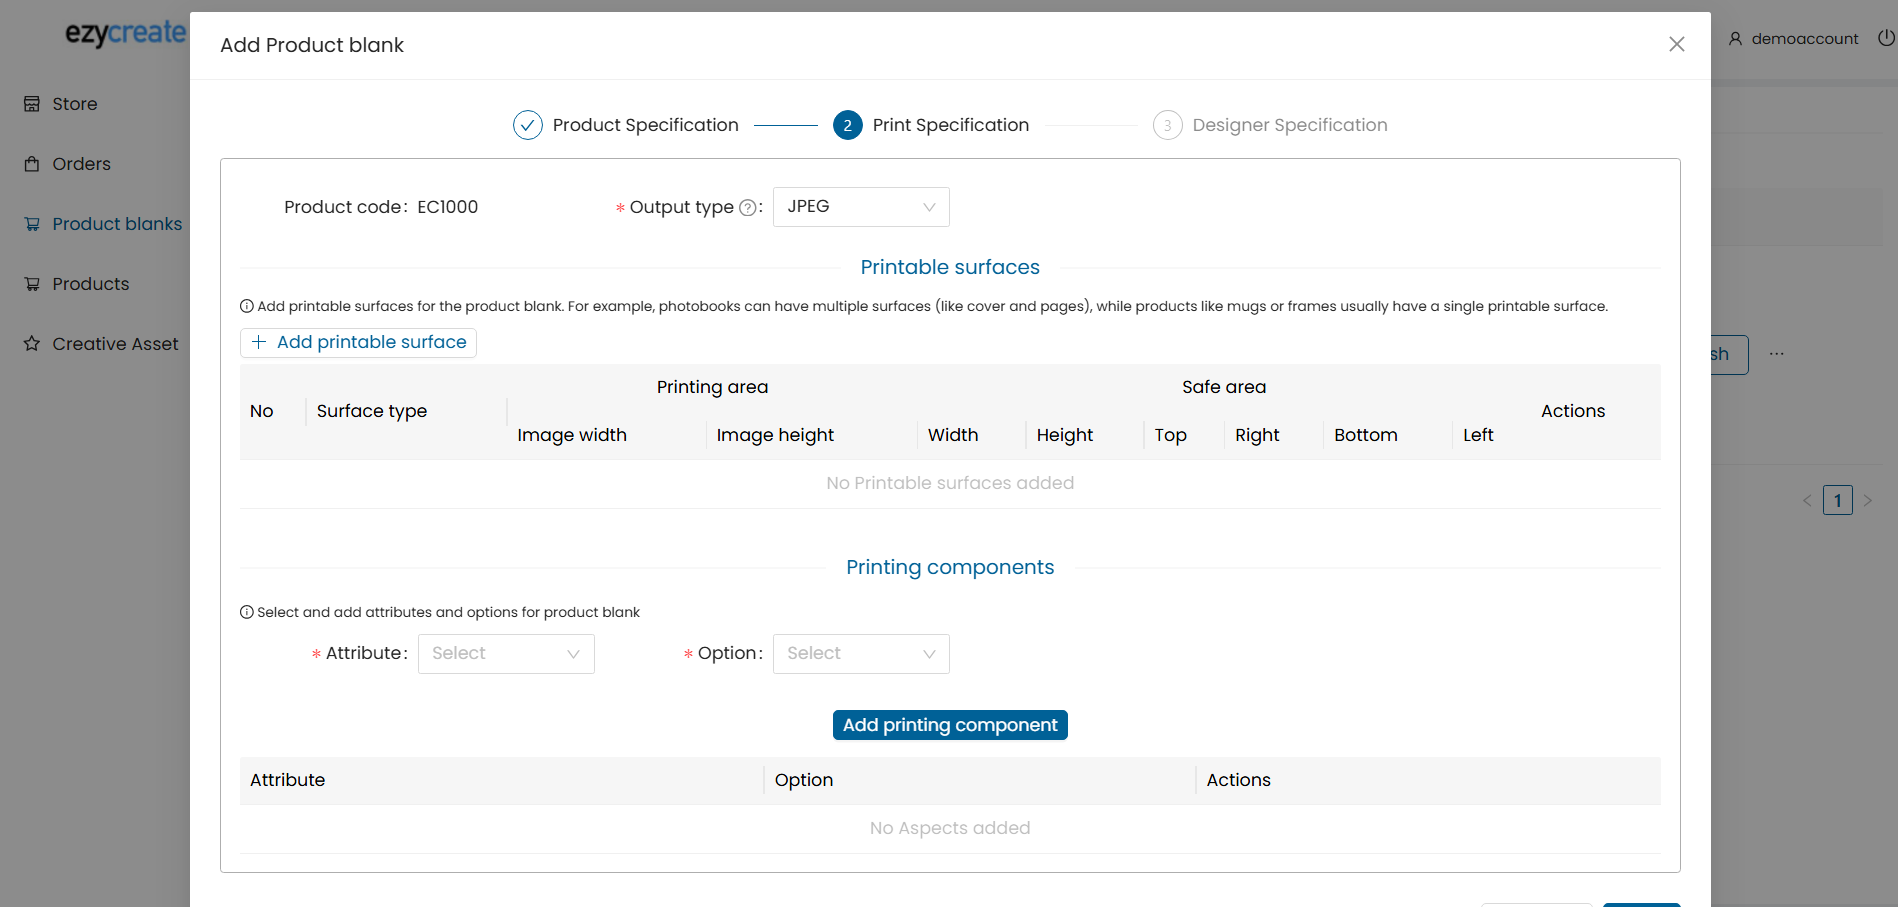
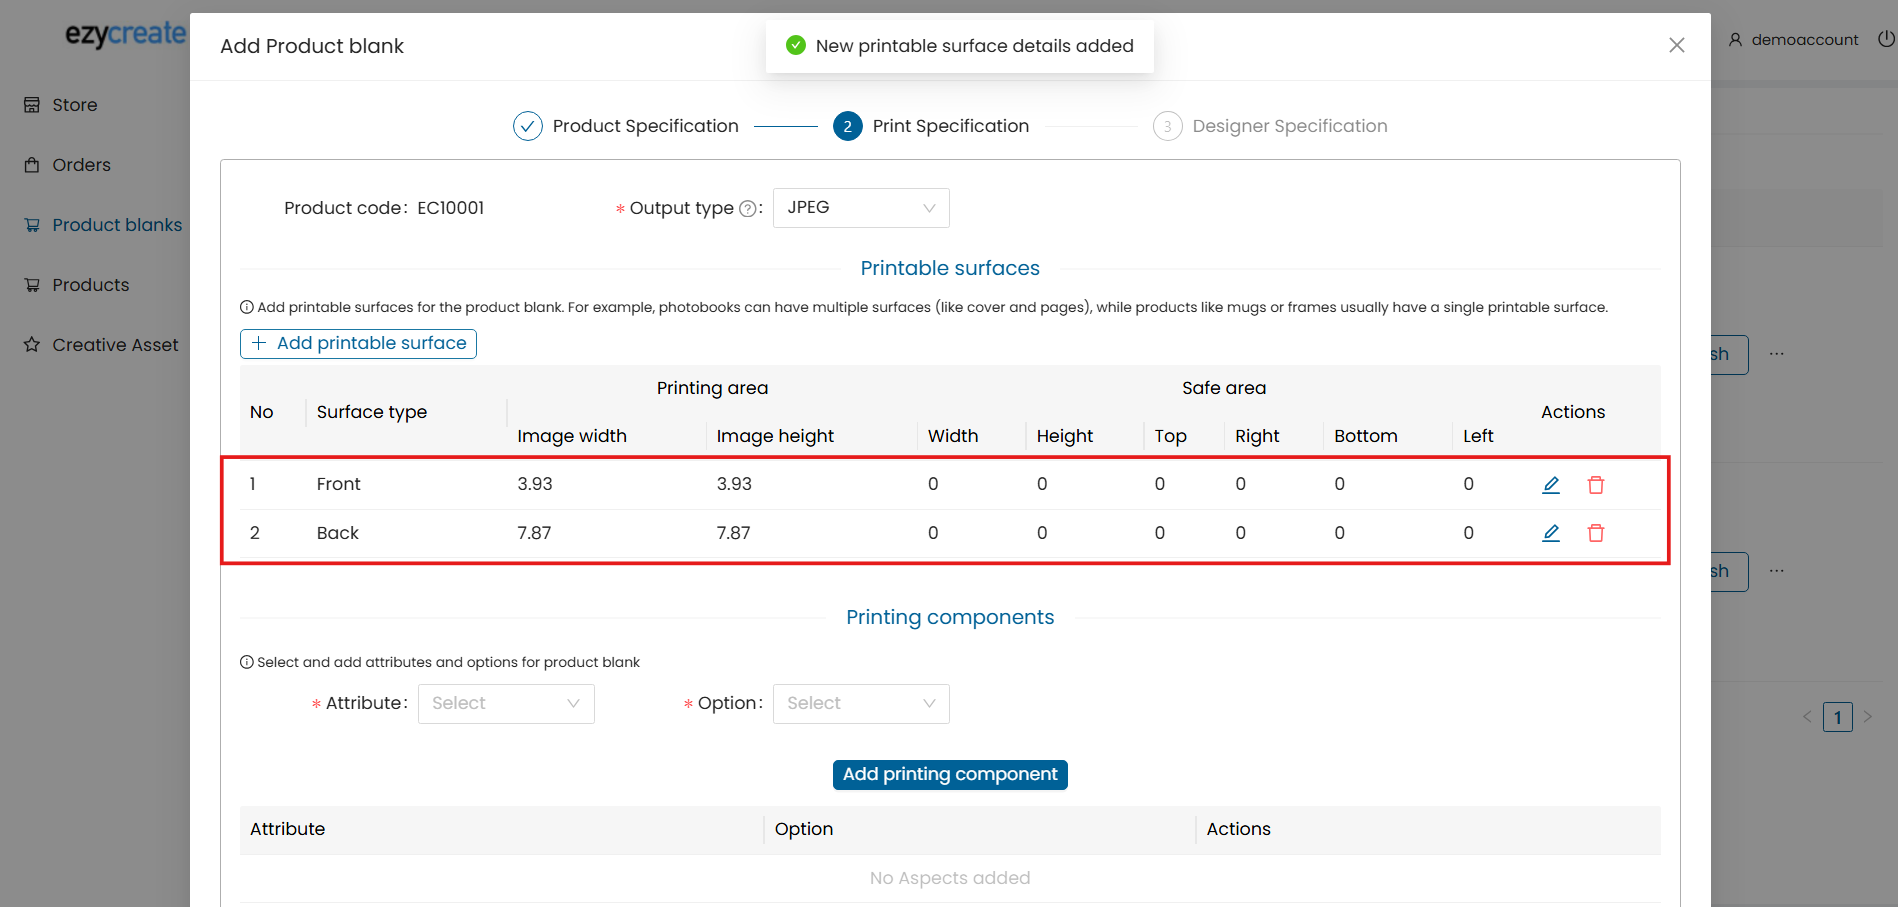
Step 5 : Print Specification: This step defines how the final image will be rendered.
-
Output Type File format of the rendered image (example: JPG, PNG).
-
Printable Surfaces Number of printable surfaces:
- Mug → 1 surface
- T-shirt (front + back) → 2 surfaces
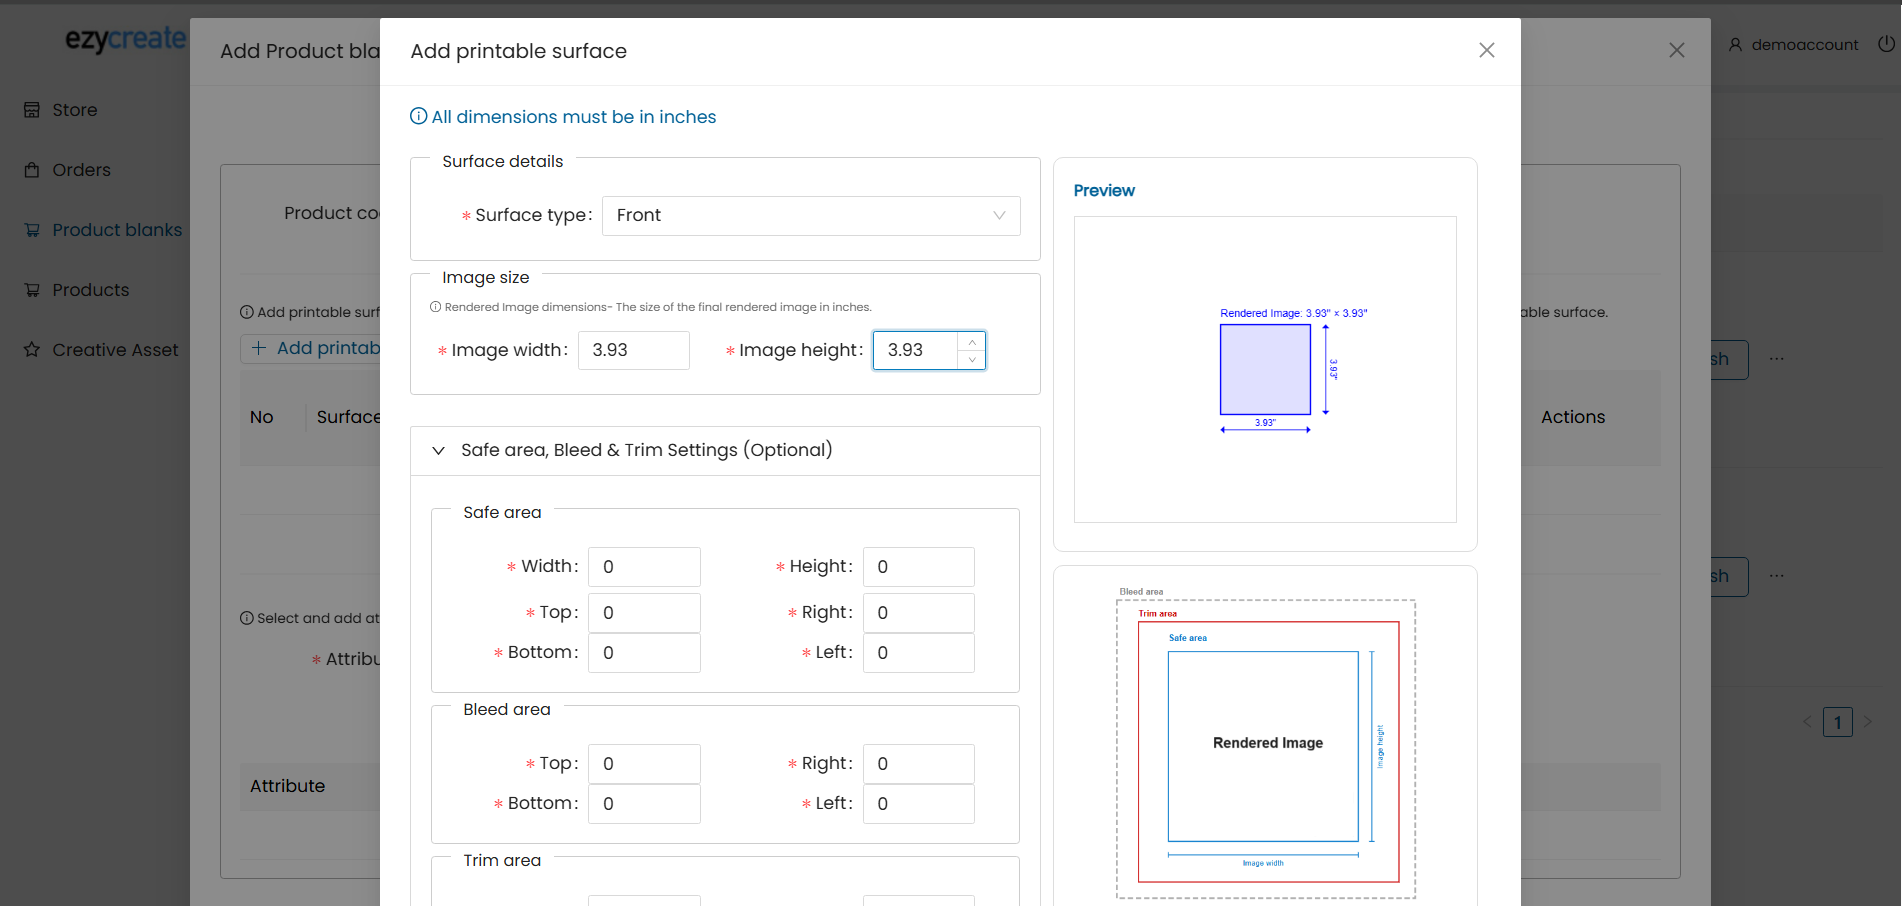
Click Add Printable Surface to configure a surface.
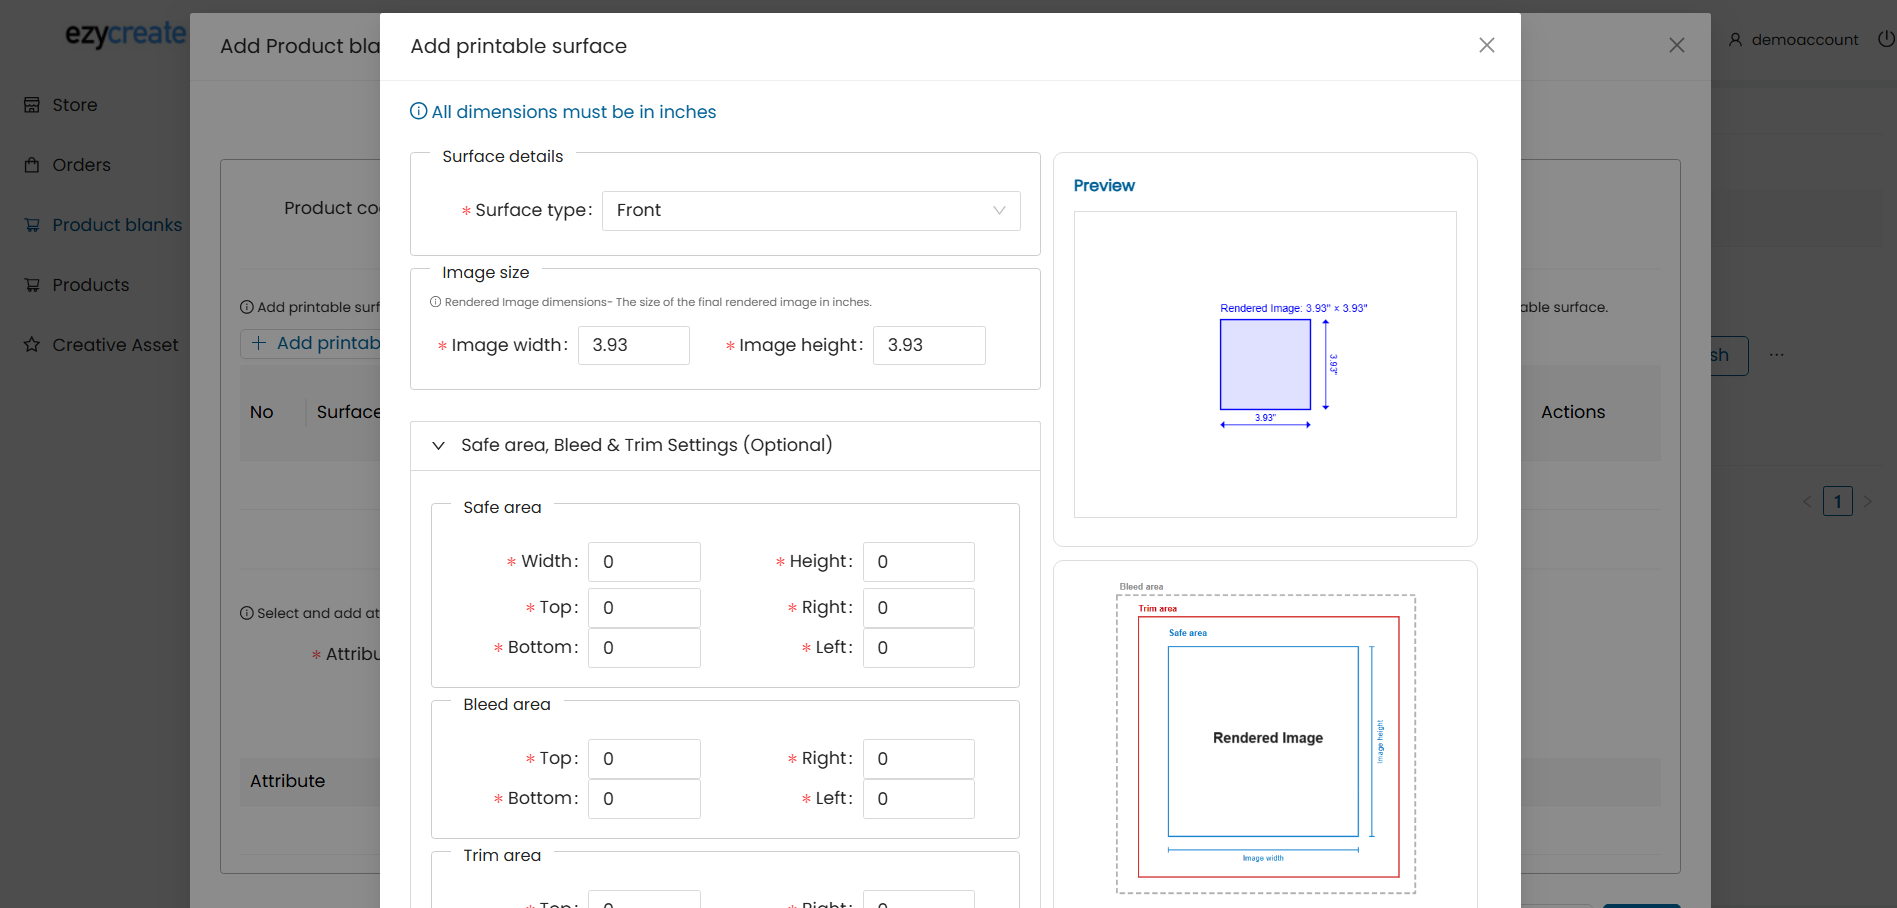
Printable Surface
- Image Size Final rendered image size. Example for T-shirt: width 3.93 and height 3.93 .
- Safe Area, Bleed & Trim (Optional) These values are optional and do not affect final output.
Click Add to save the printable surface.
Once added, the surface will appear in the printable surfaces list.
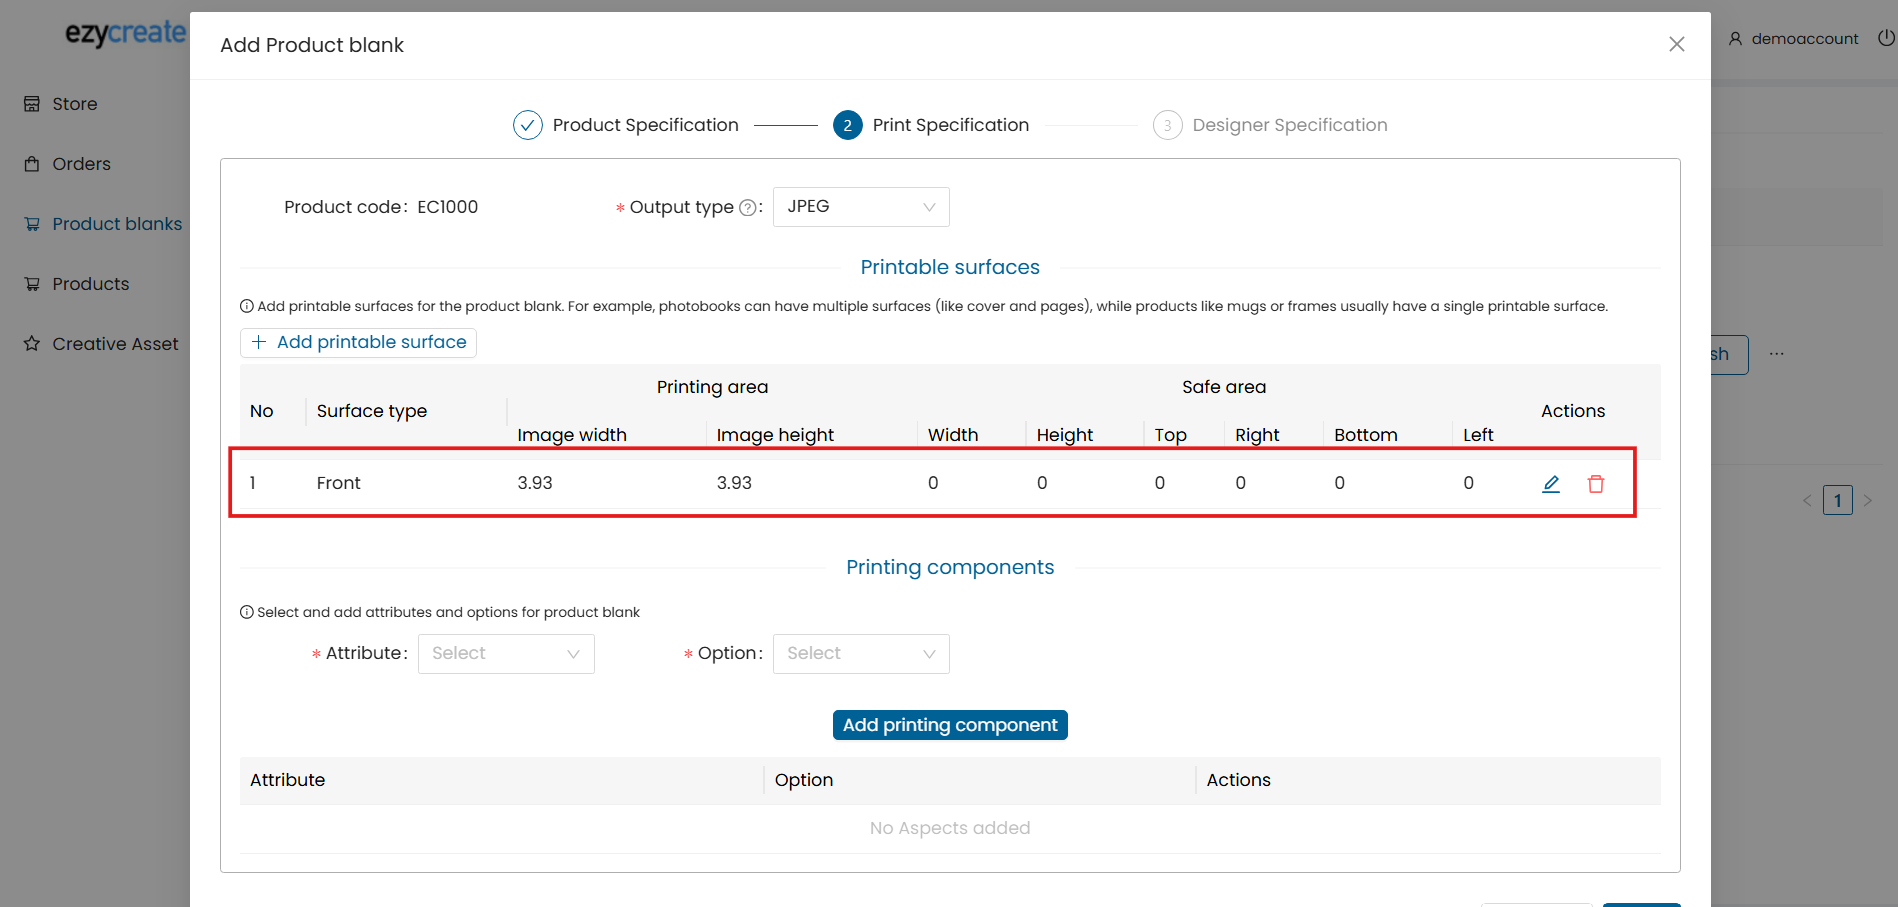
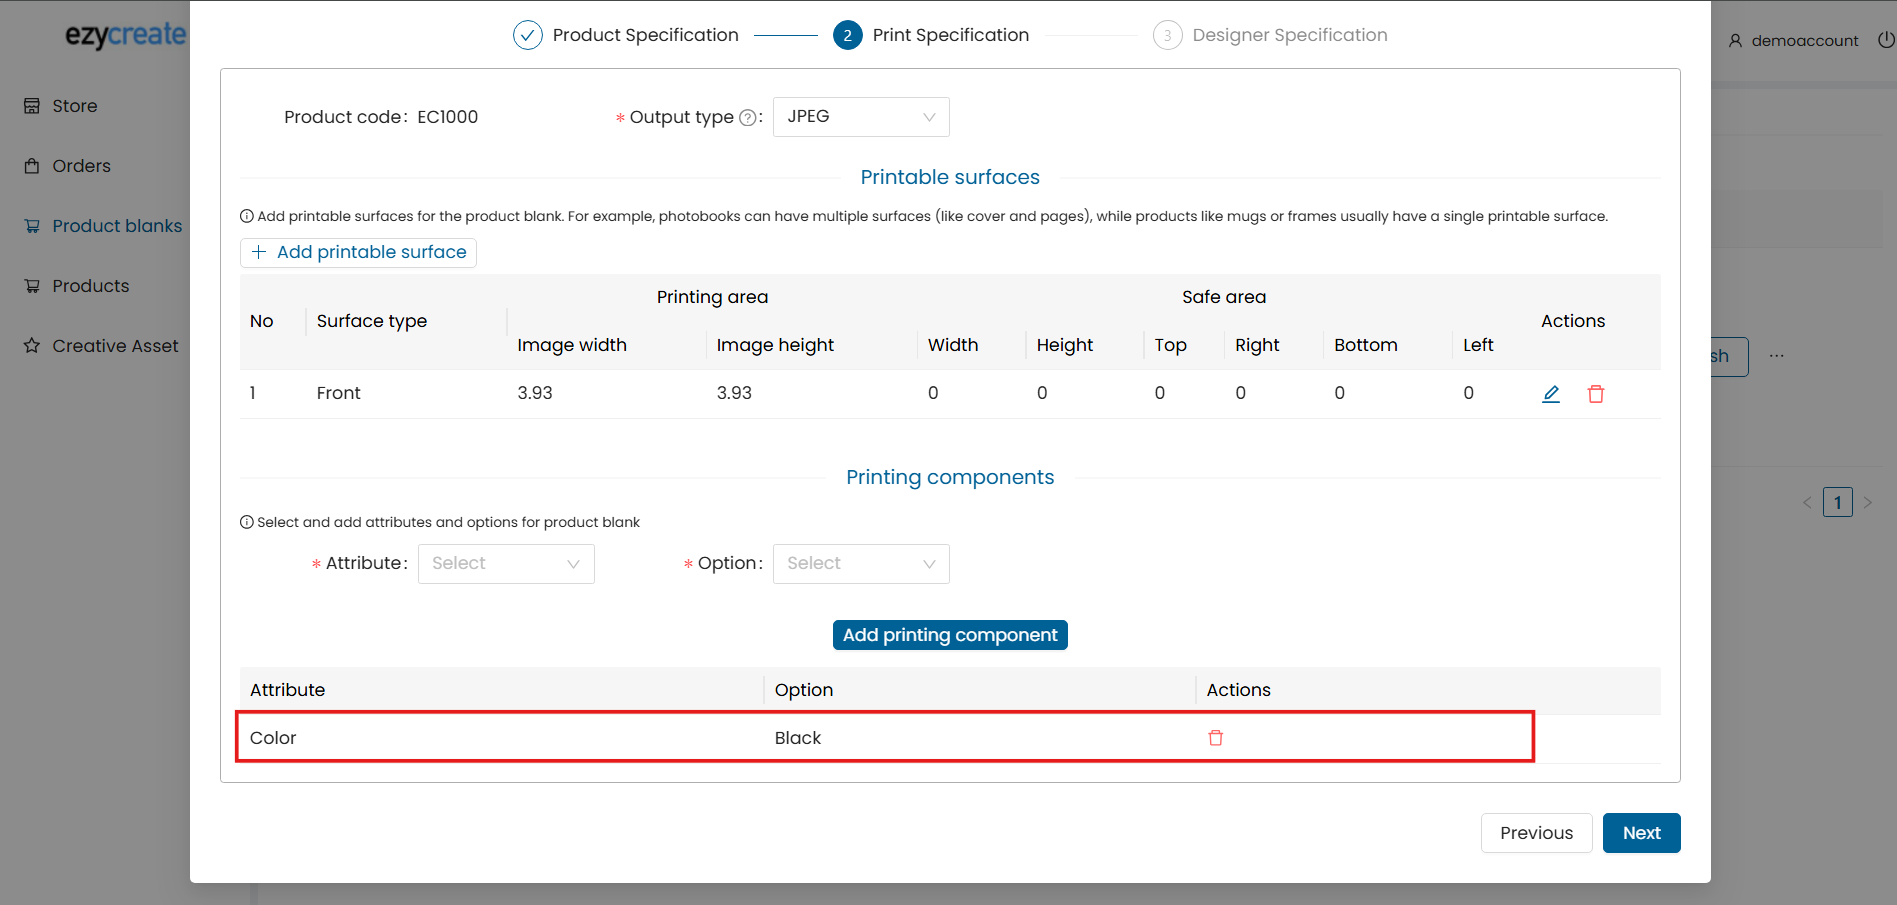
Add product components
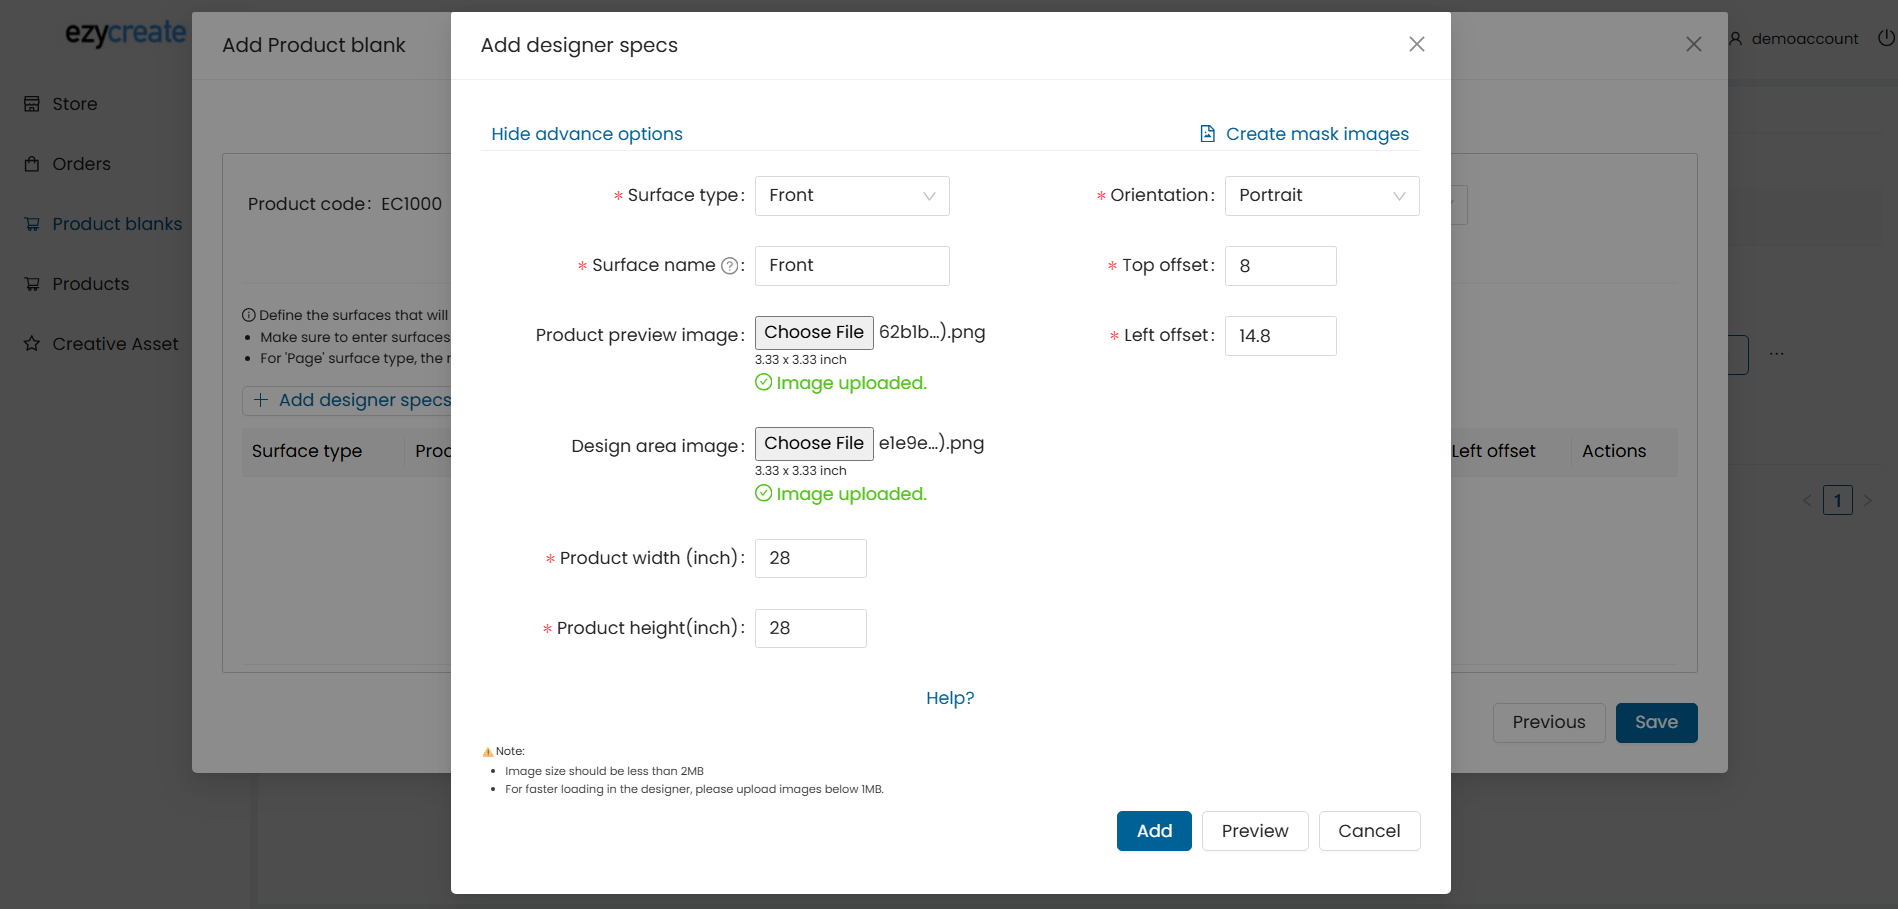
Step 6 : Designer Specification
This step controls how the product is shown in the designer.
Click Add Designer Specs to add a surface to the designer
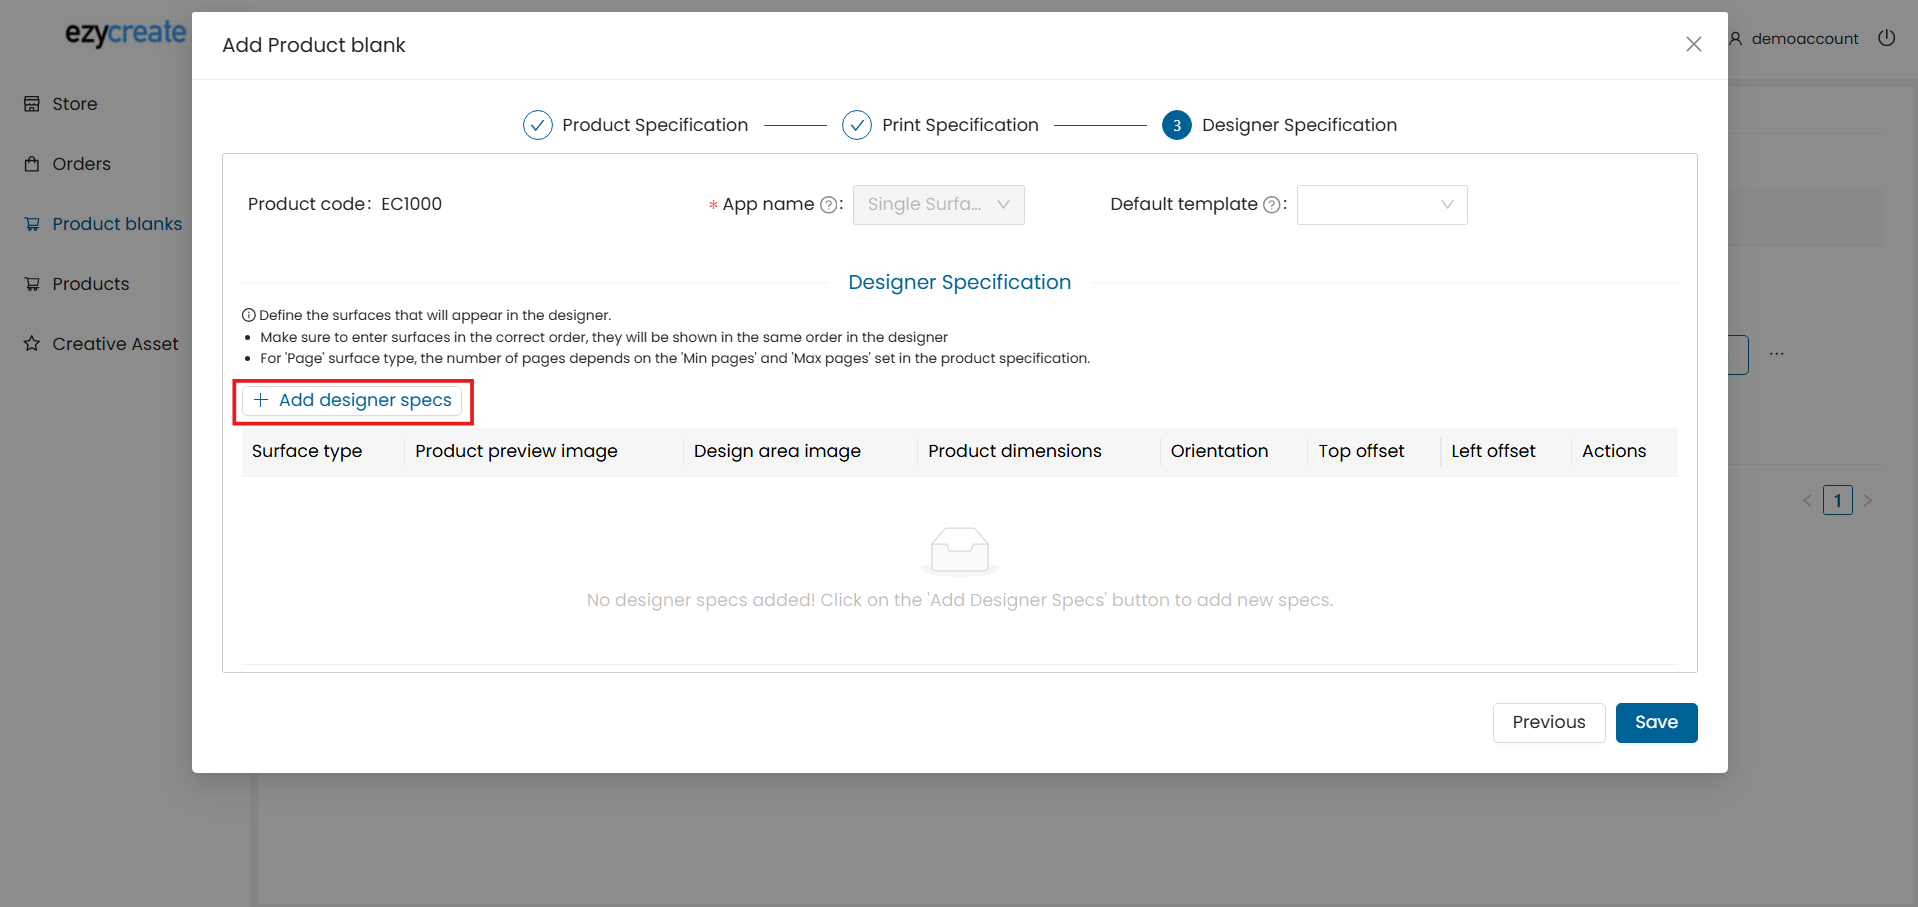
Fields Explanation
- Surface Type Select the surface type from dropdown, surface added in prints specs will be shown here.
- Surface Name Name shown to the end user in the designer (example: Front Side).
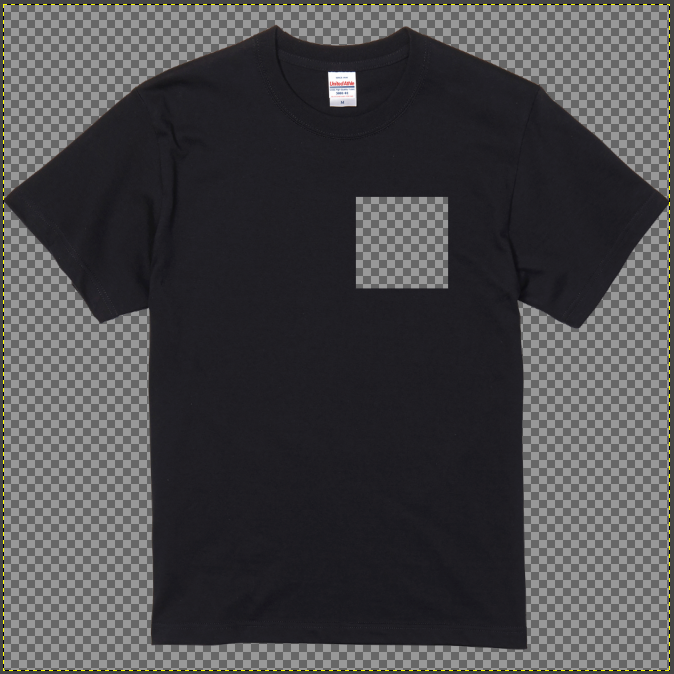
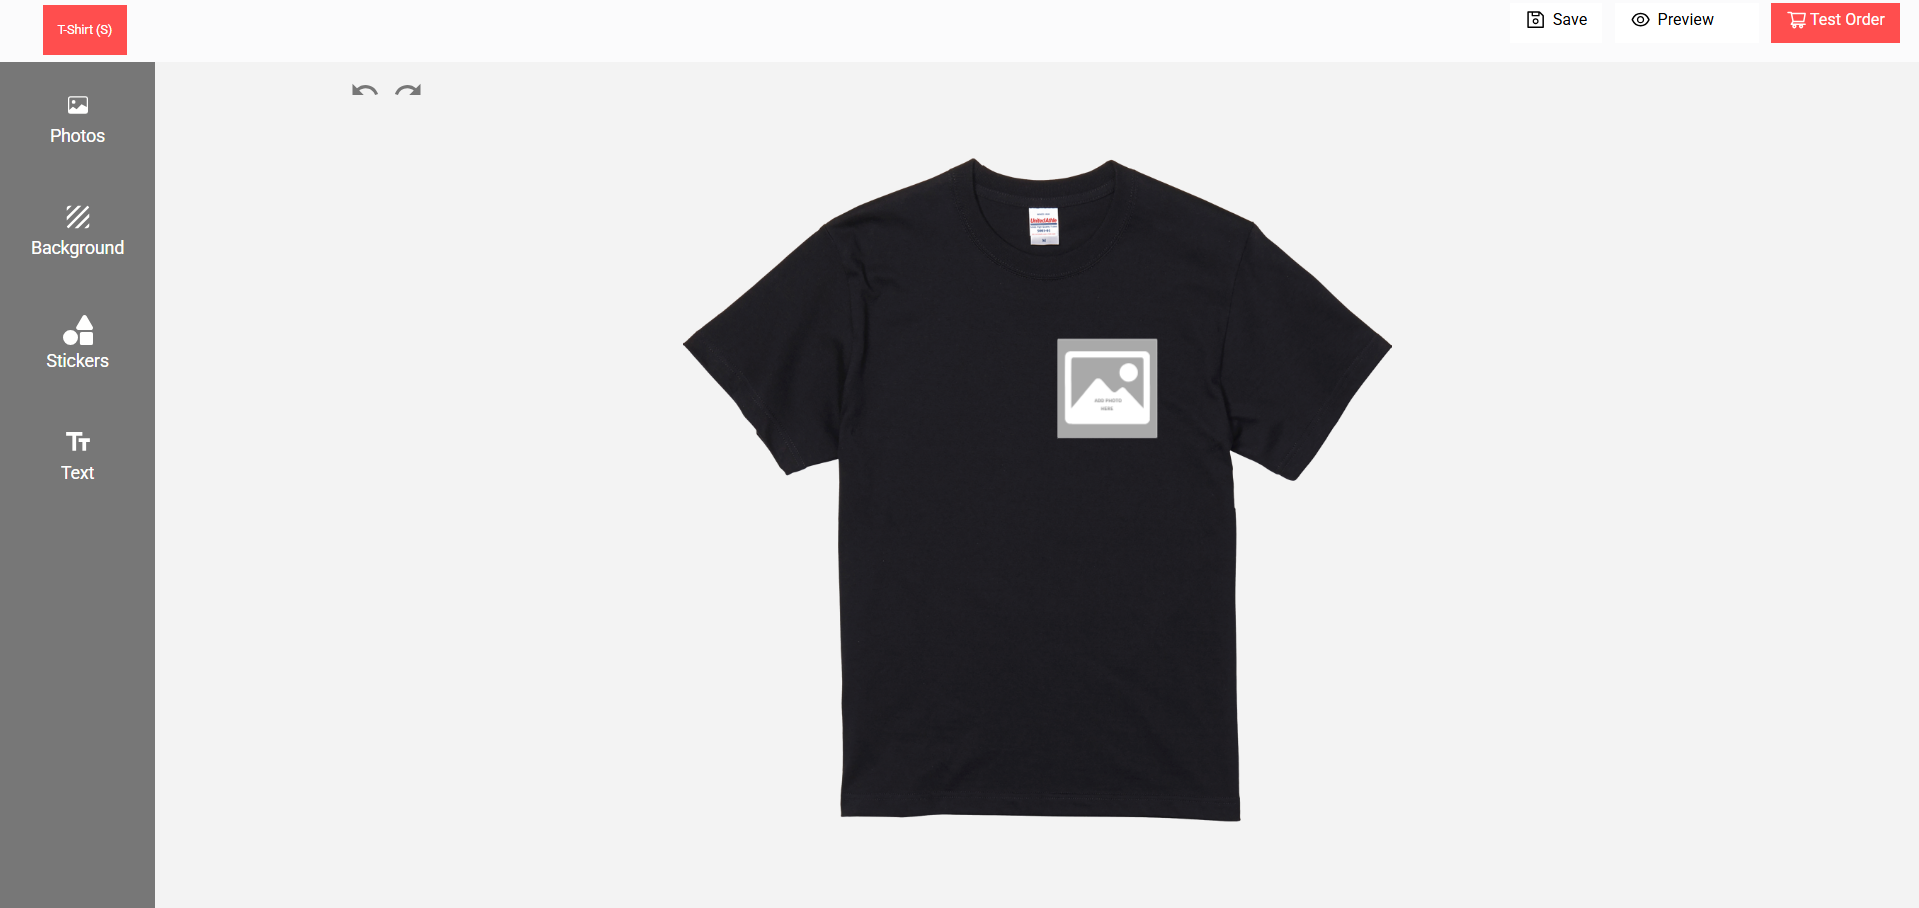
- Product Preview Image Upload the Product Preview Image (example: T-shirt image).
Product Preview Black tshirt.png
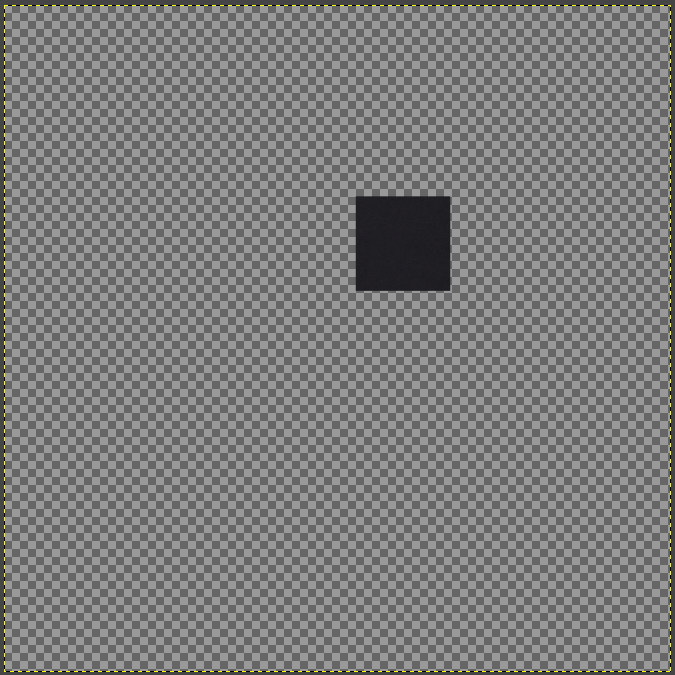
- Design Area Image Upload the Design Area Image that defines the printable area.
Note: Product Preview Image and Design Area Image must have the same dimensions.
- Product Width Actual width of the product. Example: T-shirt = 28 inches.
- Product Height Actual height of the product. Example: T-shirt = 28 inches.
NOTE: The aspect ratio of the product dimensions must match the aspect ratio of the Product Preview Image and Design Area Image. Otherwise, the design may appear misaligned in the designer.
- Orientation Product orientation (Portrait / Landscape/ Square).
- Top Offset Distance from the top where the design area starts.
- Left Offset Distance from the left where the design area starts.
Preview
Click Preview to verify alignment and positioning.
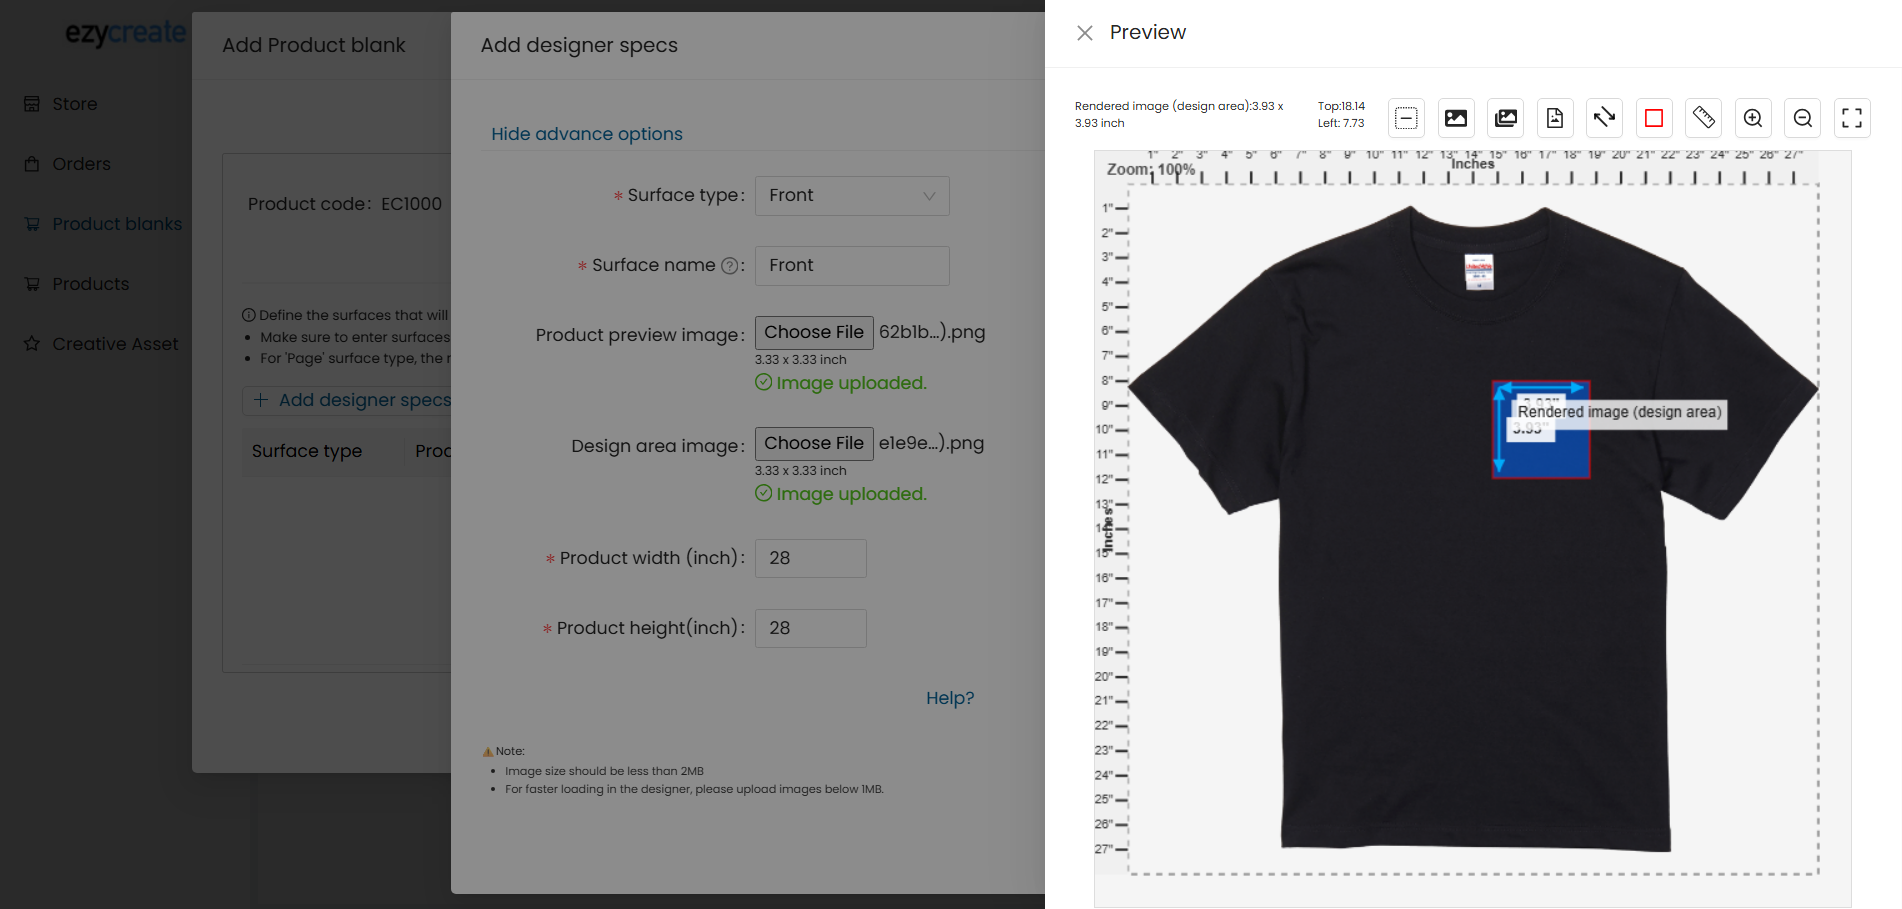
If everything looks correct, click Add to save the designer surface
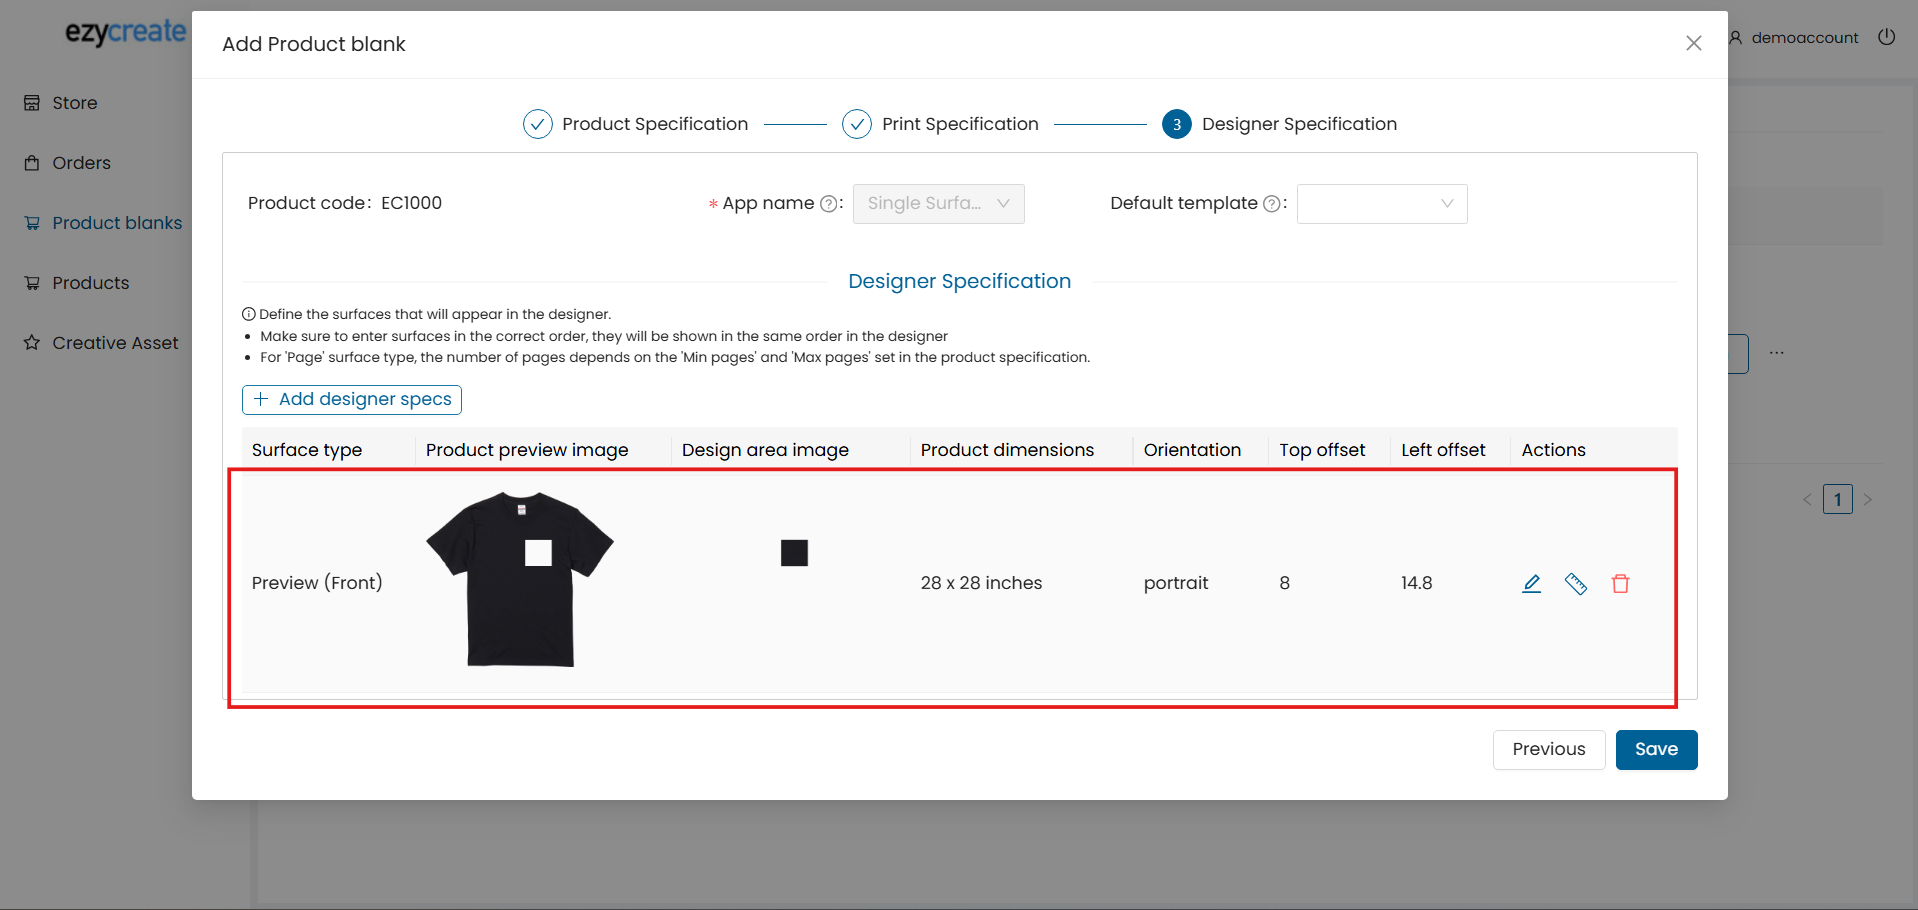
Step 7: Final Step: Save and Verify
- Click Save Product Blank
- Click View in Designer
- Verify:
-
- Design area alignment
- Preview accuracy
- Place a test order to confirm everything works correctly
2. How to Create a Product Blank (Multi-Surface)
Example 2 (Multi Surface Product)
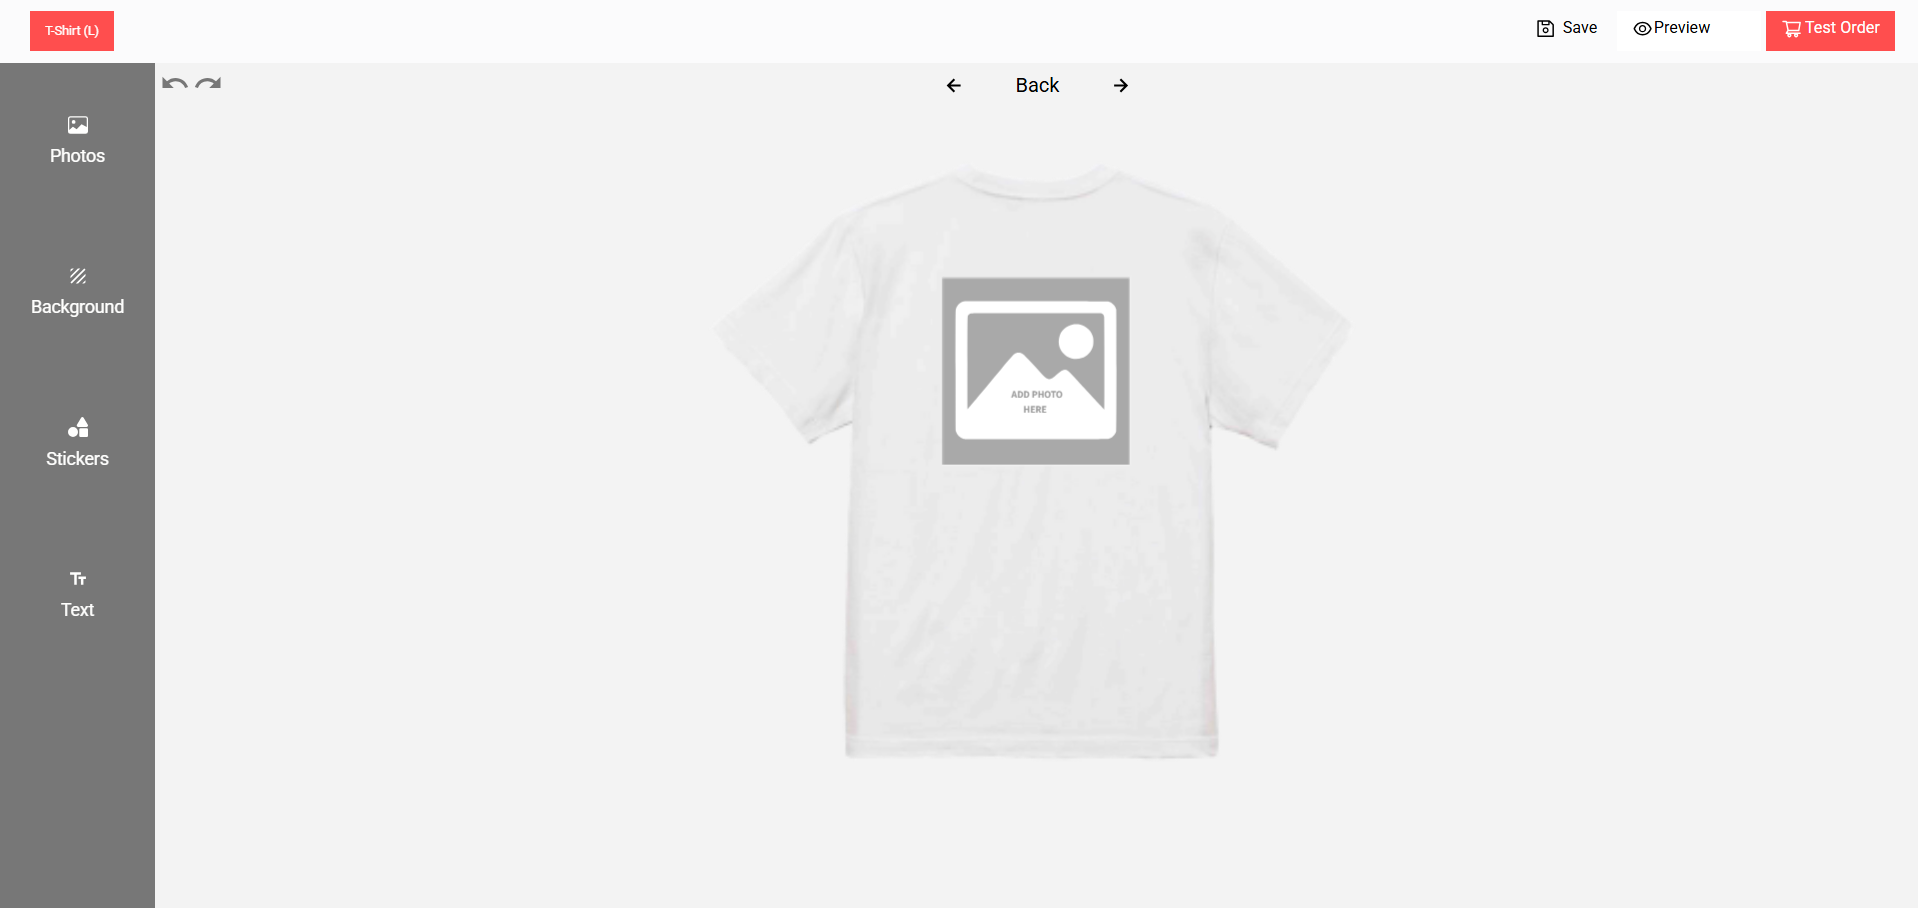
This guide explains how to create a Multi Surface Product (example: T-shirt with front and back design).
Front and back
Product Type: T-shirt
Surface: Front and Back side
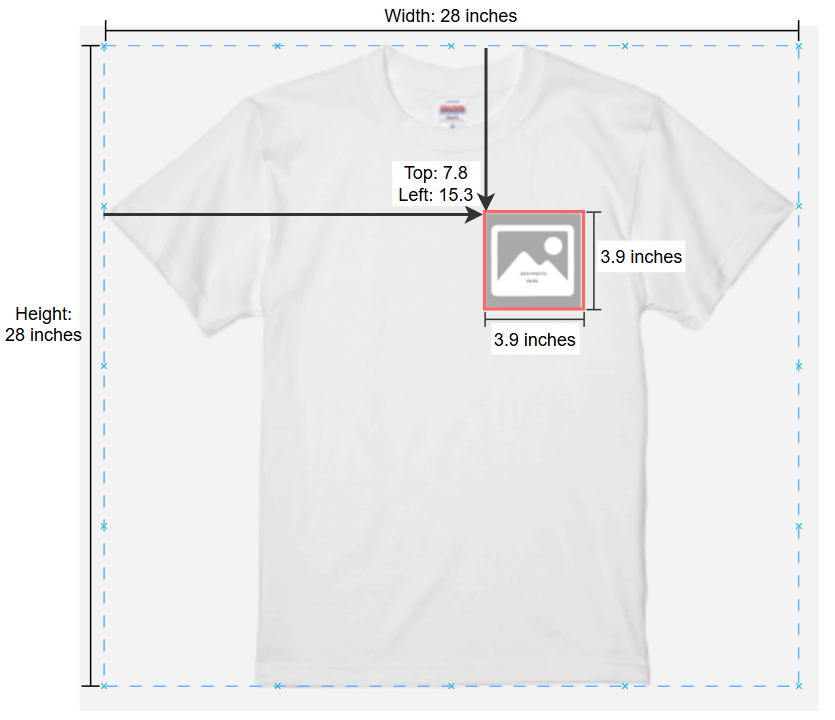
Front
Product Width: 28 inches
Product Height: 28 inches
Design Area Size: 3.9 × 3.9 inches
Design Area Position: Top = 7.8 inches, Left = 15.3 inches
Rendered Image Size: 3.9 × 3.9 inches
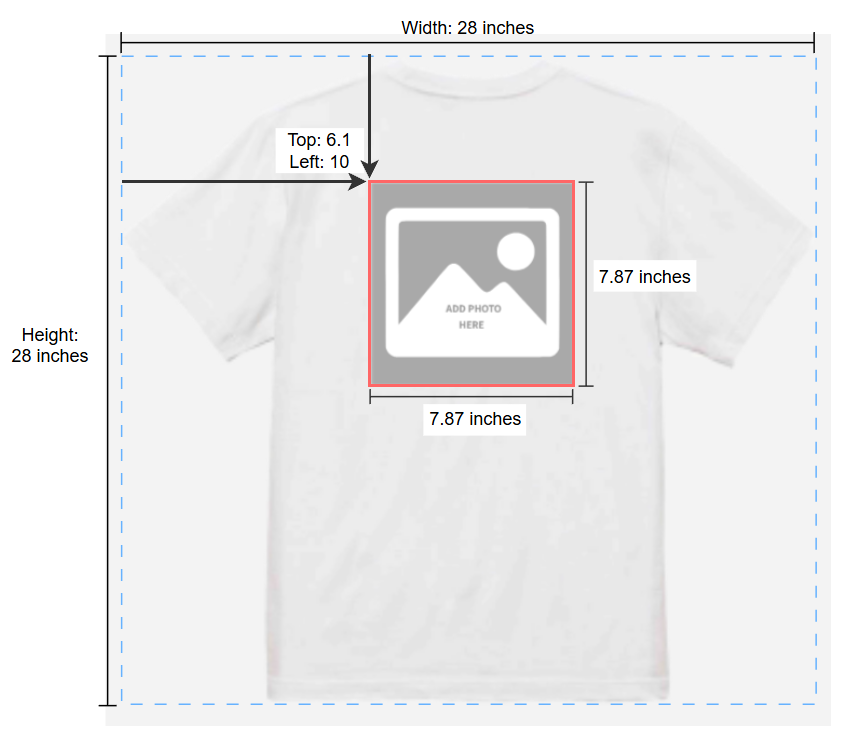
Back
Product Width: 28 inches
Product Height: 28 inches
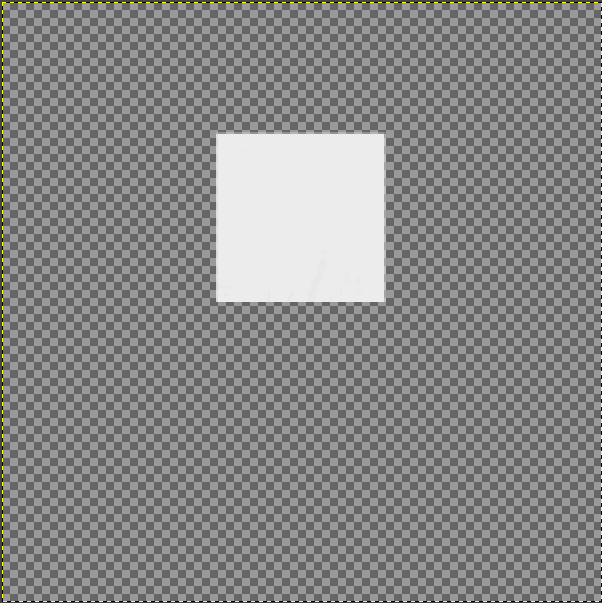
Design Area Size: 7.87 × 7.87 inches
Design Area Position: Top = 6.1 inches, Left = 10 inches
Rendered Image Size: 7.87 × 7.87 inches
Prerequisites
Before starting, make sure you have the following:
Assets
- Product Preview Image (Shows the actual product T-shirt (Front and back))
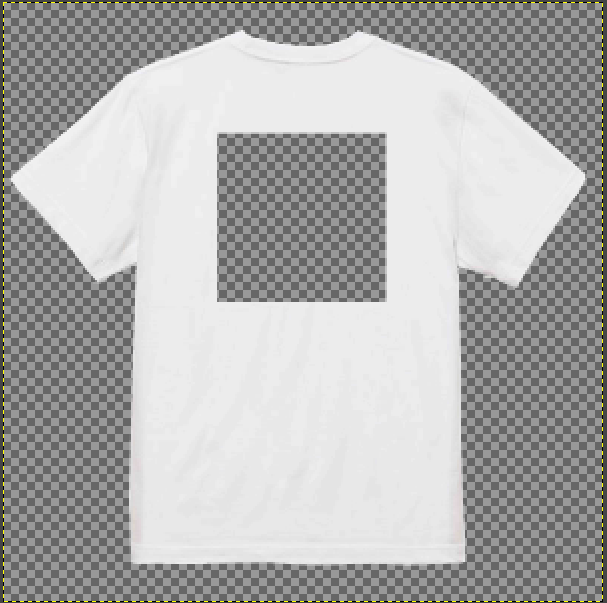
- Design Area Image (Shows the printable area where the design will be placed (Front and back))
- Note: Product Preview Image and Design Area Image must have the same dimensions.
Navigation Path
Go to: Product Blanks → My Blanks → Add
This will open the product blank creation flow.
STEP 1: Product Specification
This step defines basic product blank details.
Fields Explanation
- Module Select the module based on product type:
Gifting (Multi-Surface) – For products with front & back (example: T-shirt front + back)
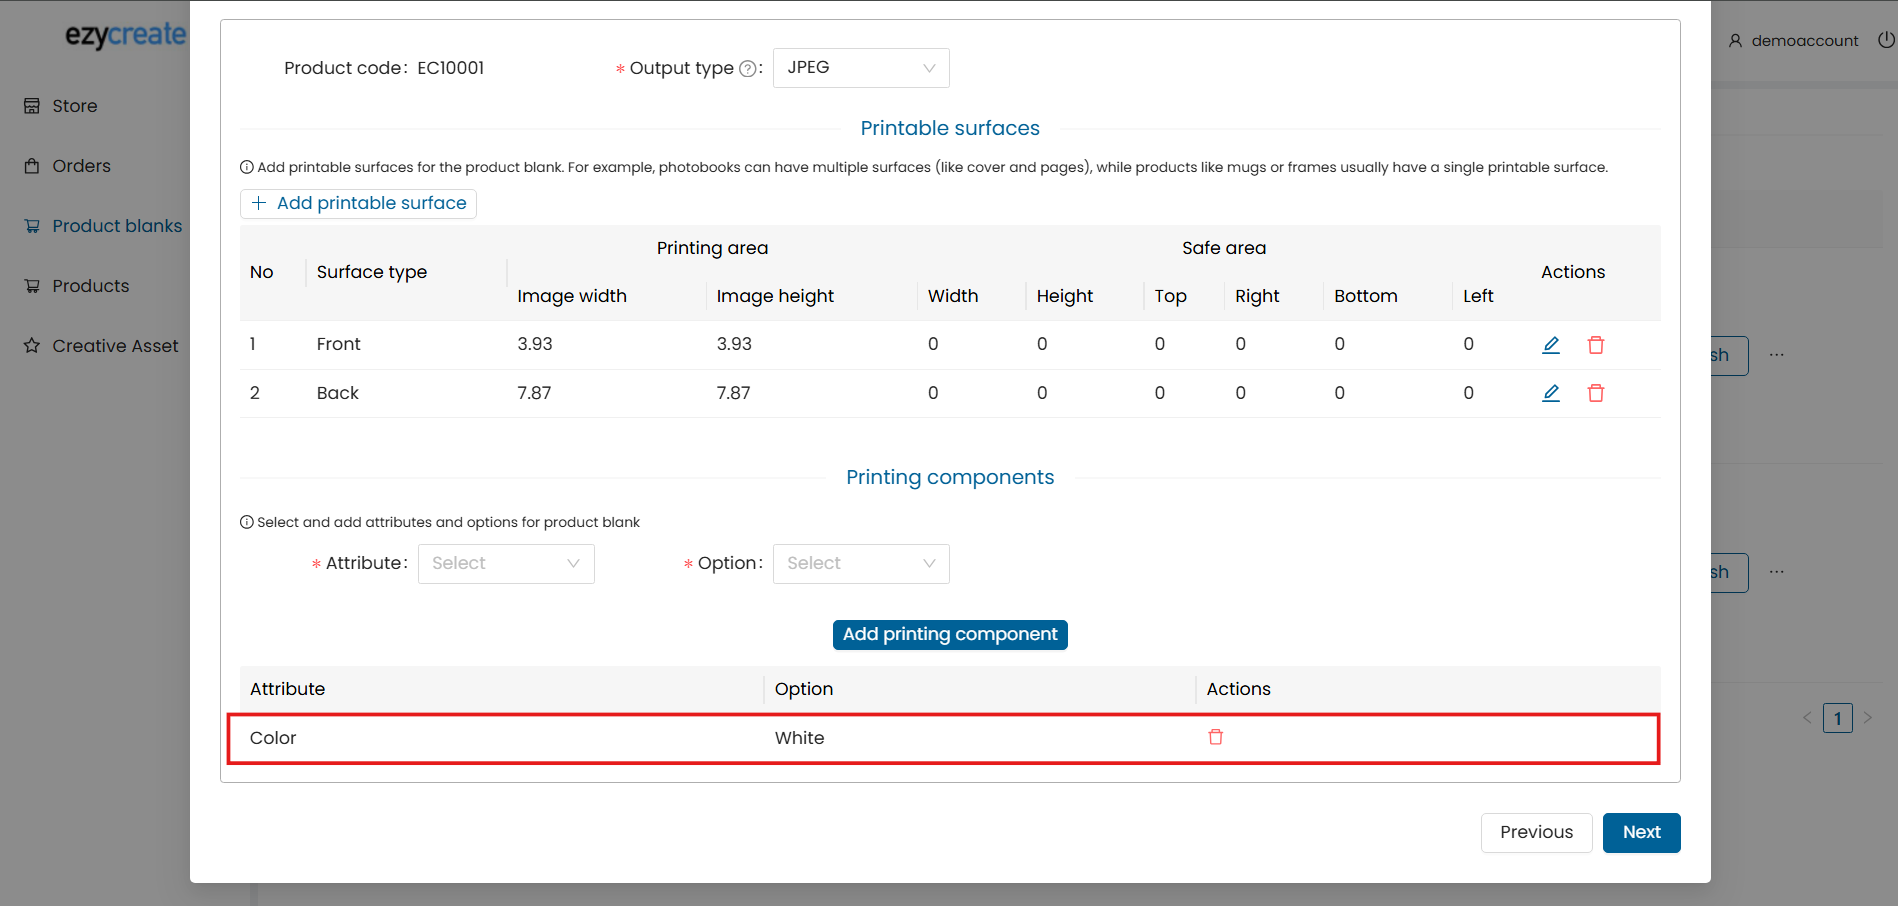
STEP 2: Print Specification
This step defines how the final image will be rendered.
Output Settings
- Output Type File format of the rendered image (example: JPG, PNG).
- Printable Surfaces Number of printable surfaces:
-
- T-shirt (front + back) → 2 surfaces
Click Add Printable Surface to configure a surface.
Printable Surface 1 (Front)
- Image Size Final rendered image size. Example for T-shirt front: width 3.93 and height 3.93 .
- Safe Area, Bleed & Trim (Optional) These values are optional and do not affect final output.
Printable Surface 2 (Back)

- Image Size Final rendered image size. Example for T-shirt back: width 7.87 and height 7.87 inches .
- Safe Area, Bleed & Trim (Optional) These values are optional and do not affect final output.
Click Add to save the printable surface.
Once added, the surfaces will appear in the printable surfaces list.
Add product components
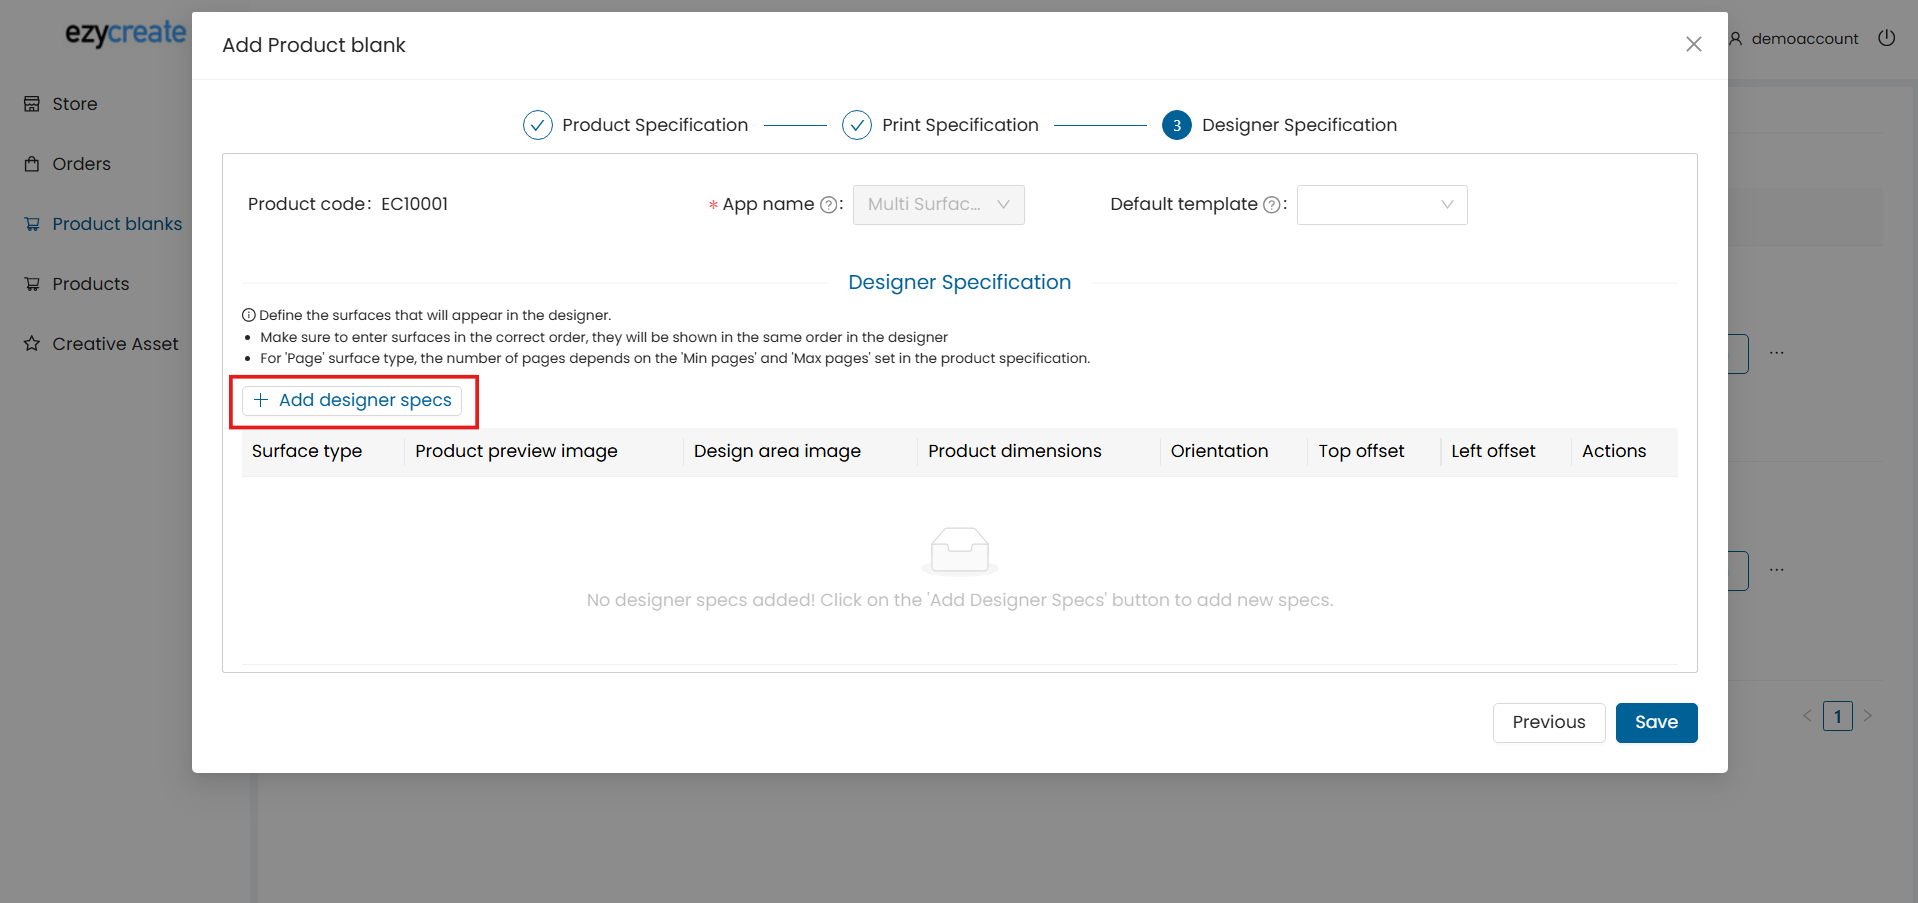
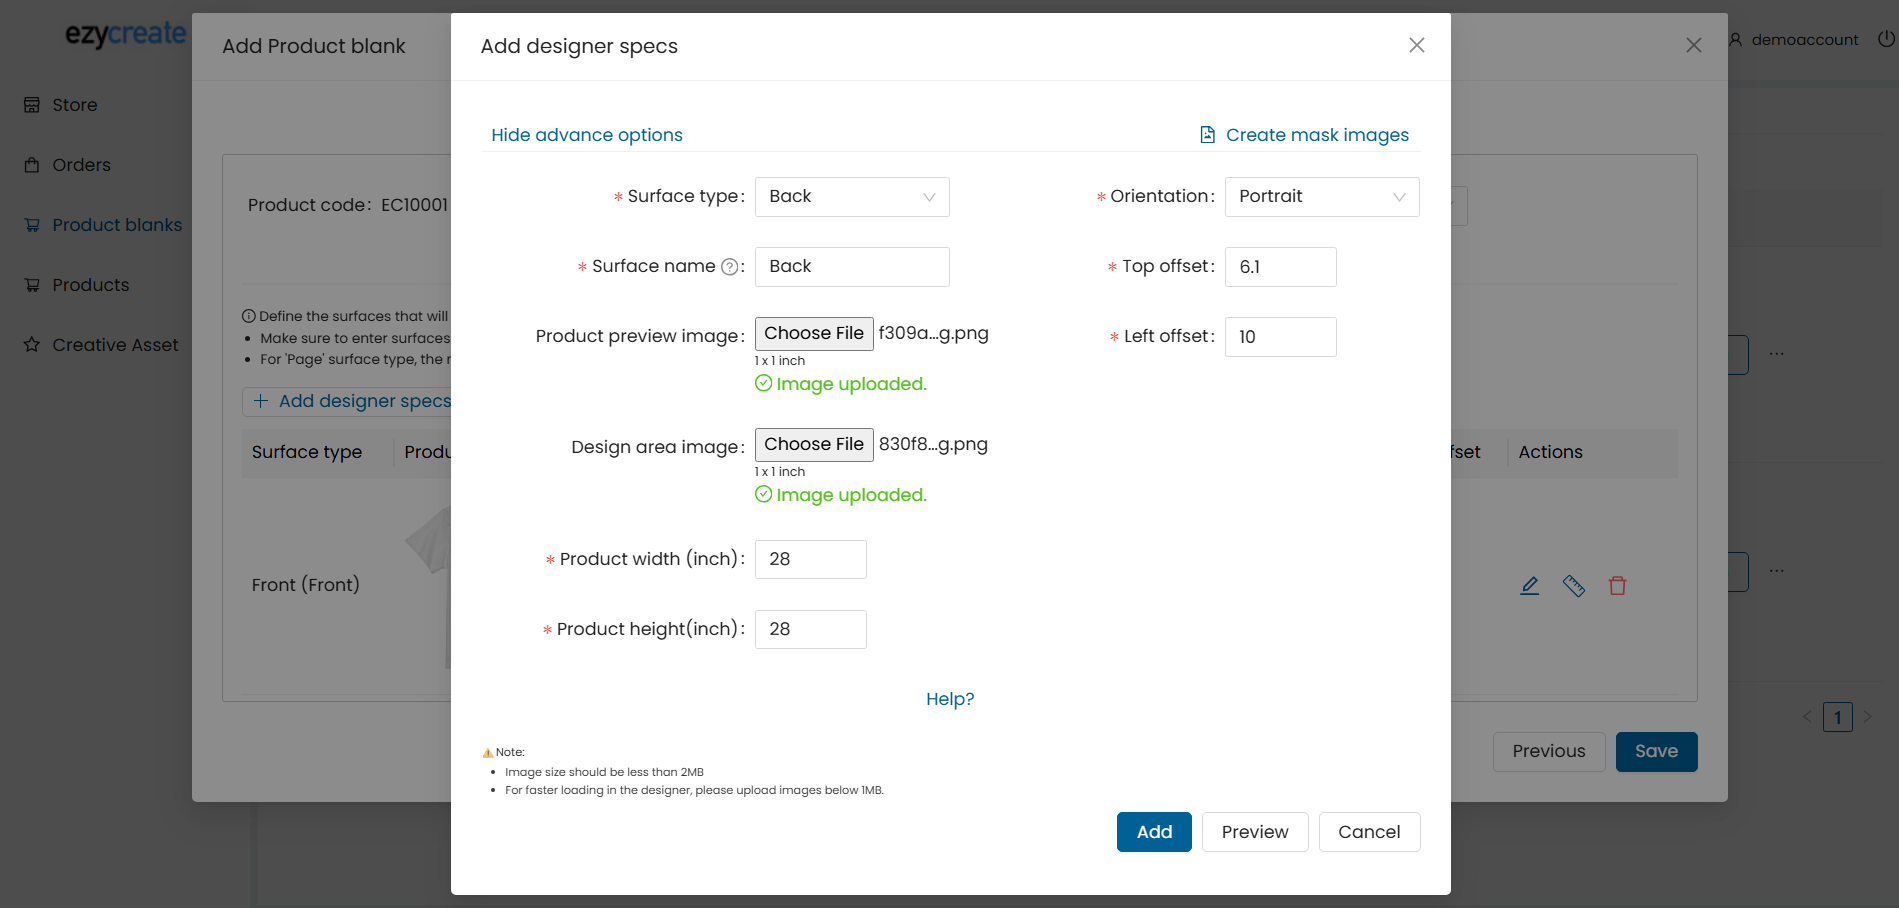
STEP 3: Designer Specification
This step controls how the product is shown in the designer.
Click Add Designer Specs to add a surface to the designer
Surface 1
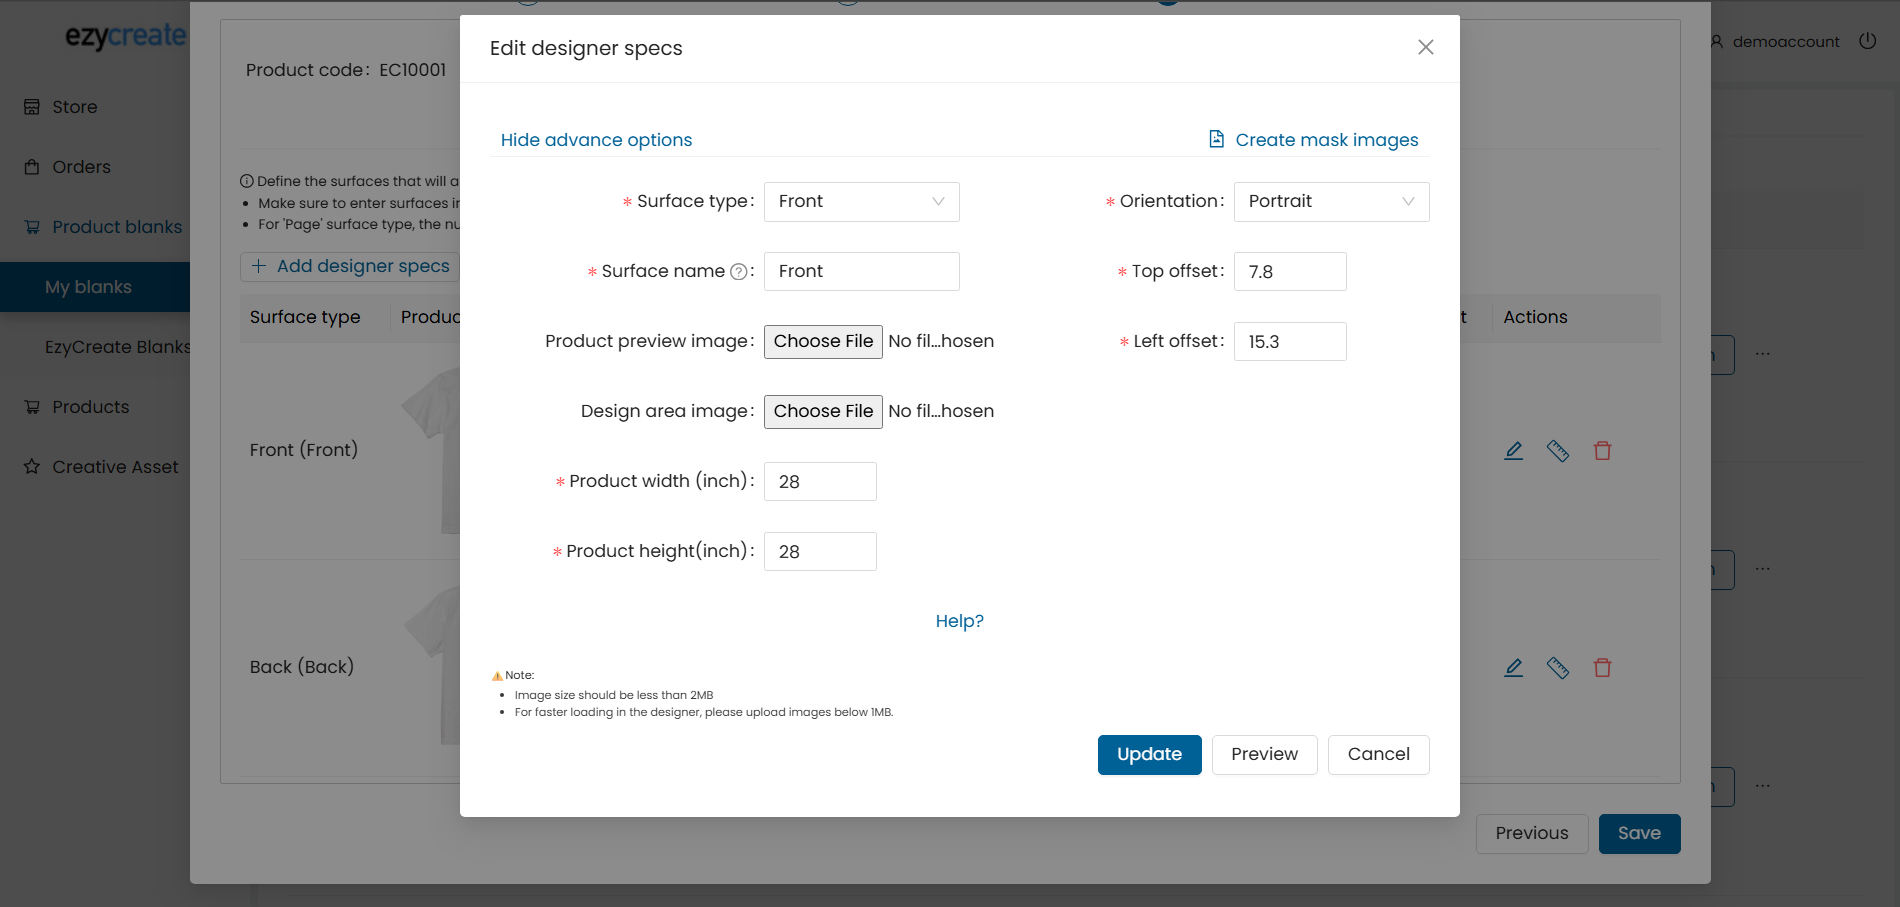
Fields Explanation
- Surface Type Select the surface type from dropdown, surface added in prints specs will be shown here.
- Surface Name Name shown to the end user in the designer (example: Front Side).
- Product Preview Image Upload the Product Preview Image (example: T-shirt image).
- Design Area Image Upload the Design Area Image that defines the printable area.
Note: Product Preview Image and Design Area Image must have the same dimensions.
- Product Width Actual width of the product. Example: T-shirt = 28 inches.
- Product Height Actual height of the product. Example: T-shirt = 28 inches.
NOTE: The aspect ratio of the product dimensions must match the aspect ratio of the Product Preview Image and Design Area Image. Otherwise, the design may appear misaligned in the designer.
- Orientation Product orientation (Portrait / Landscape/ Square).
- Top Offset Distance from the top where the design area starts.
Left Offset Distance from the left where the design area starts.
Preview
Click Preview to verify alignment and positioning.
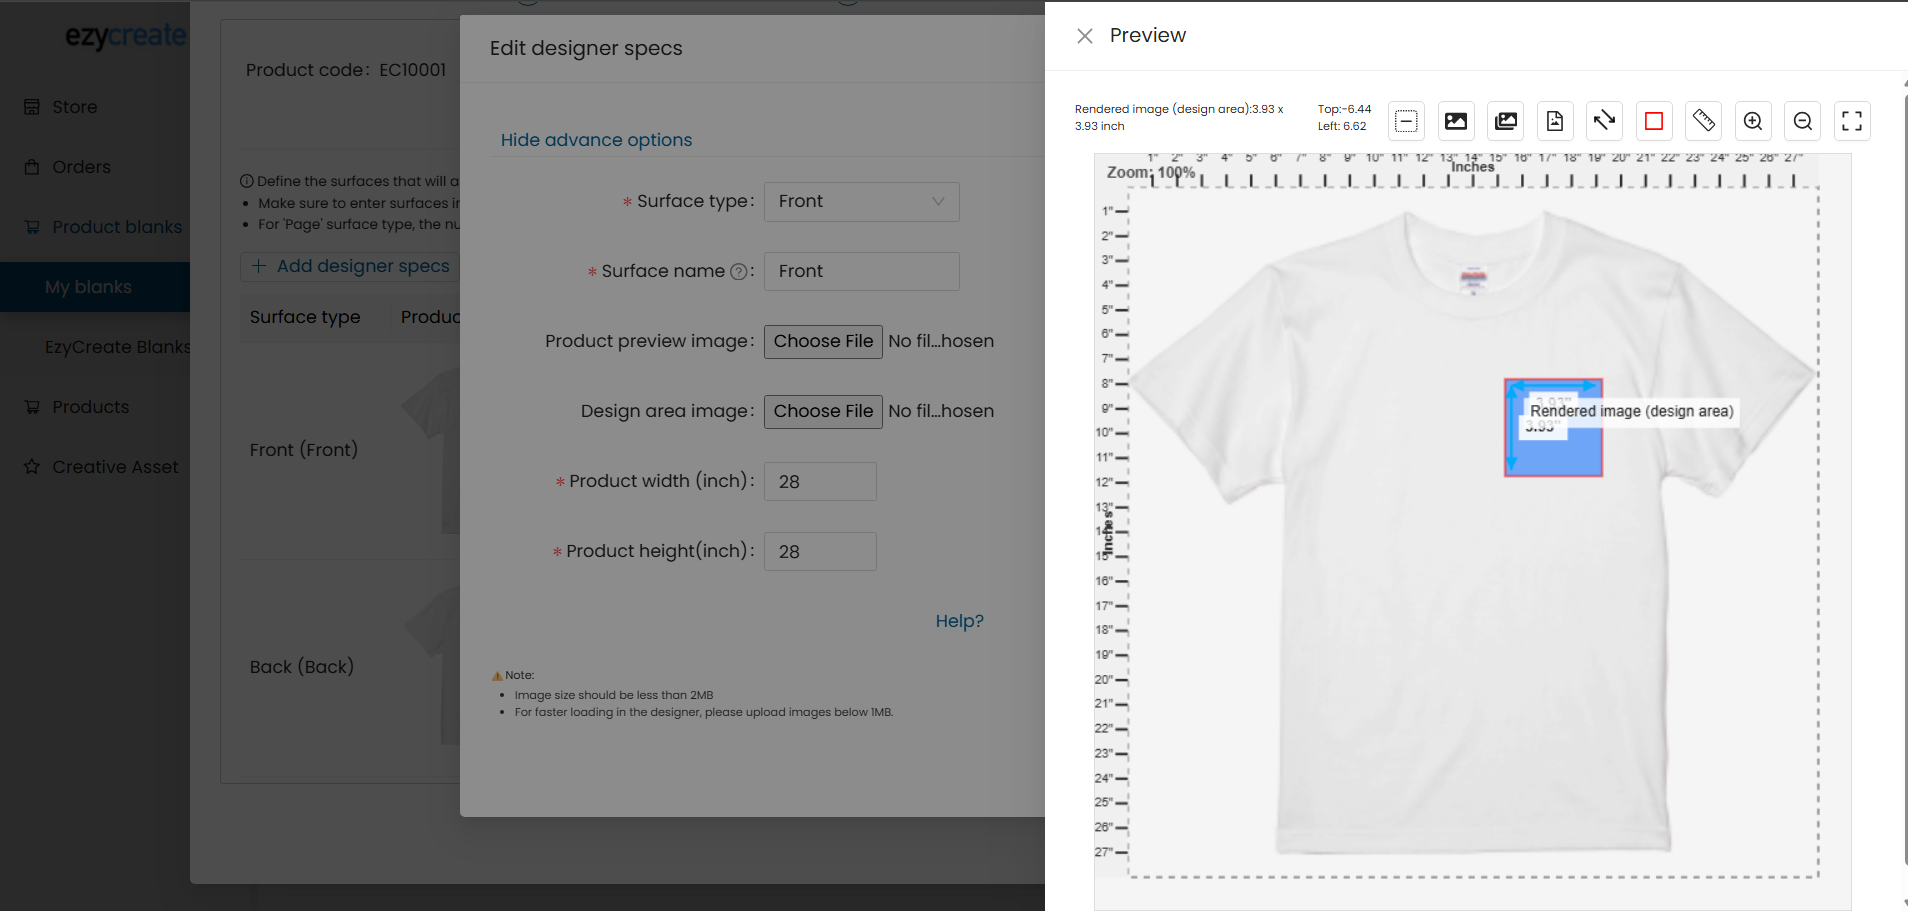
If everything looks correct, click Add to save the designer surface.
Surface 2

Click Preview to verify alignment and positioning.
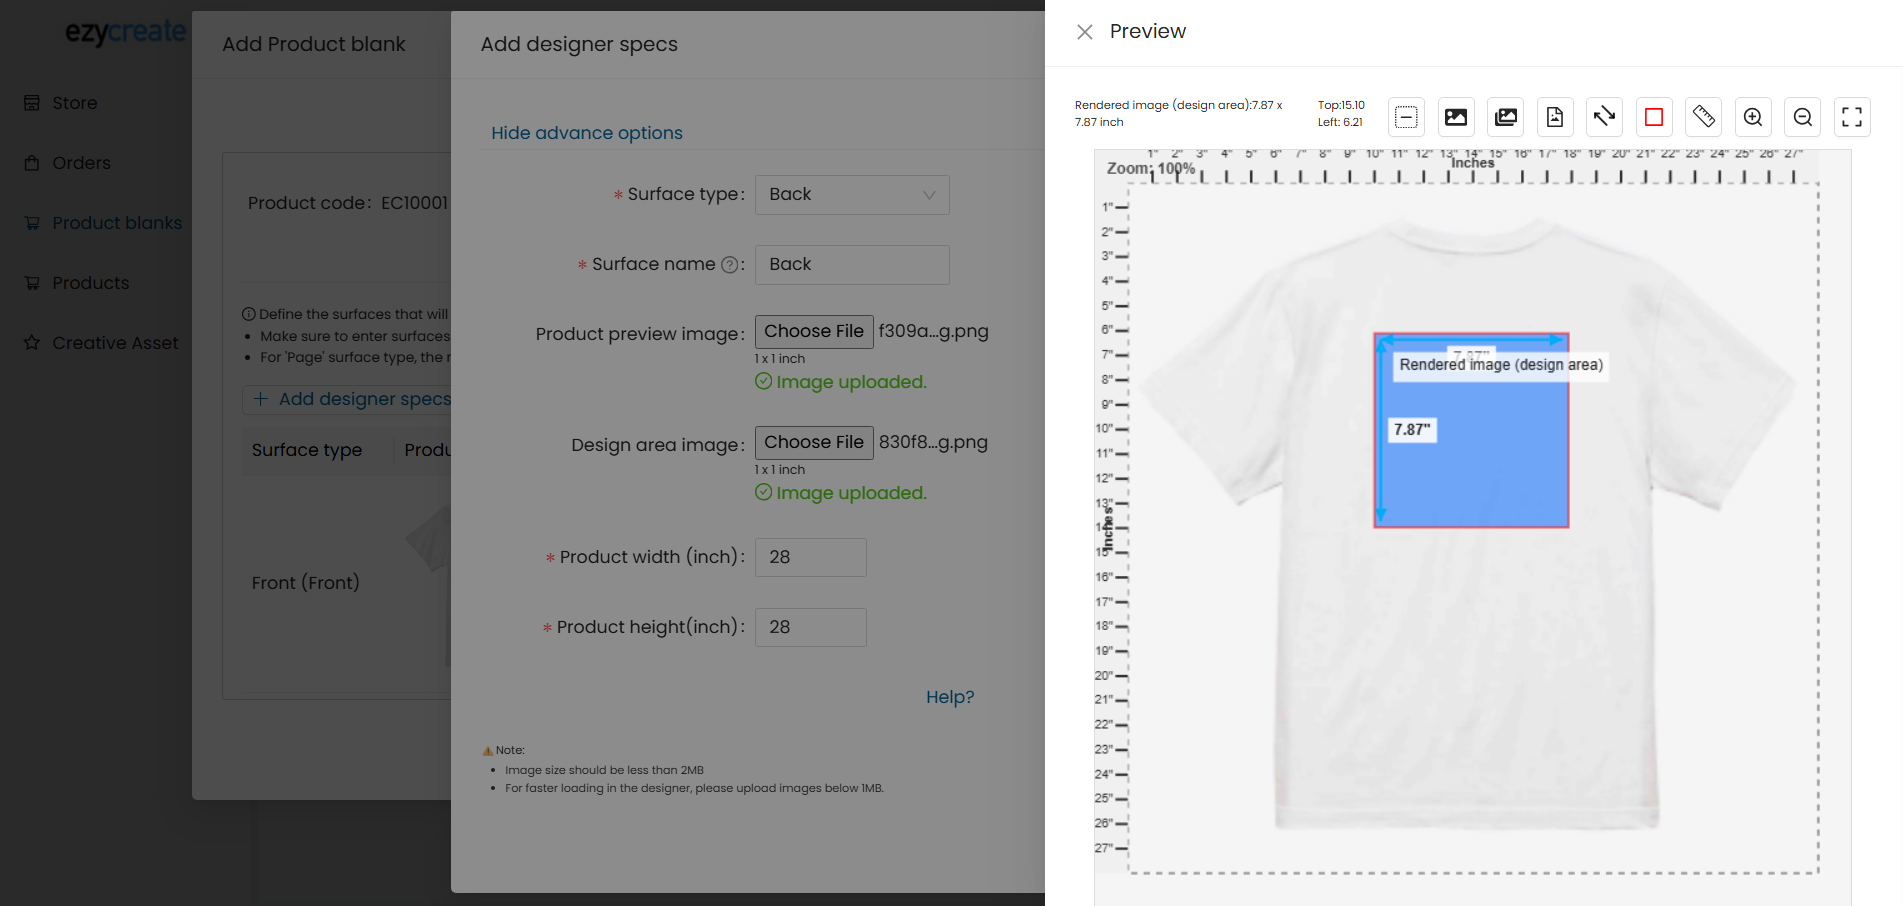
If everything looks correct, click Add to save the designer surface.
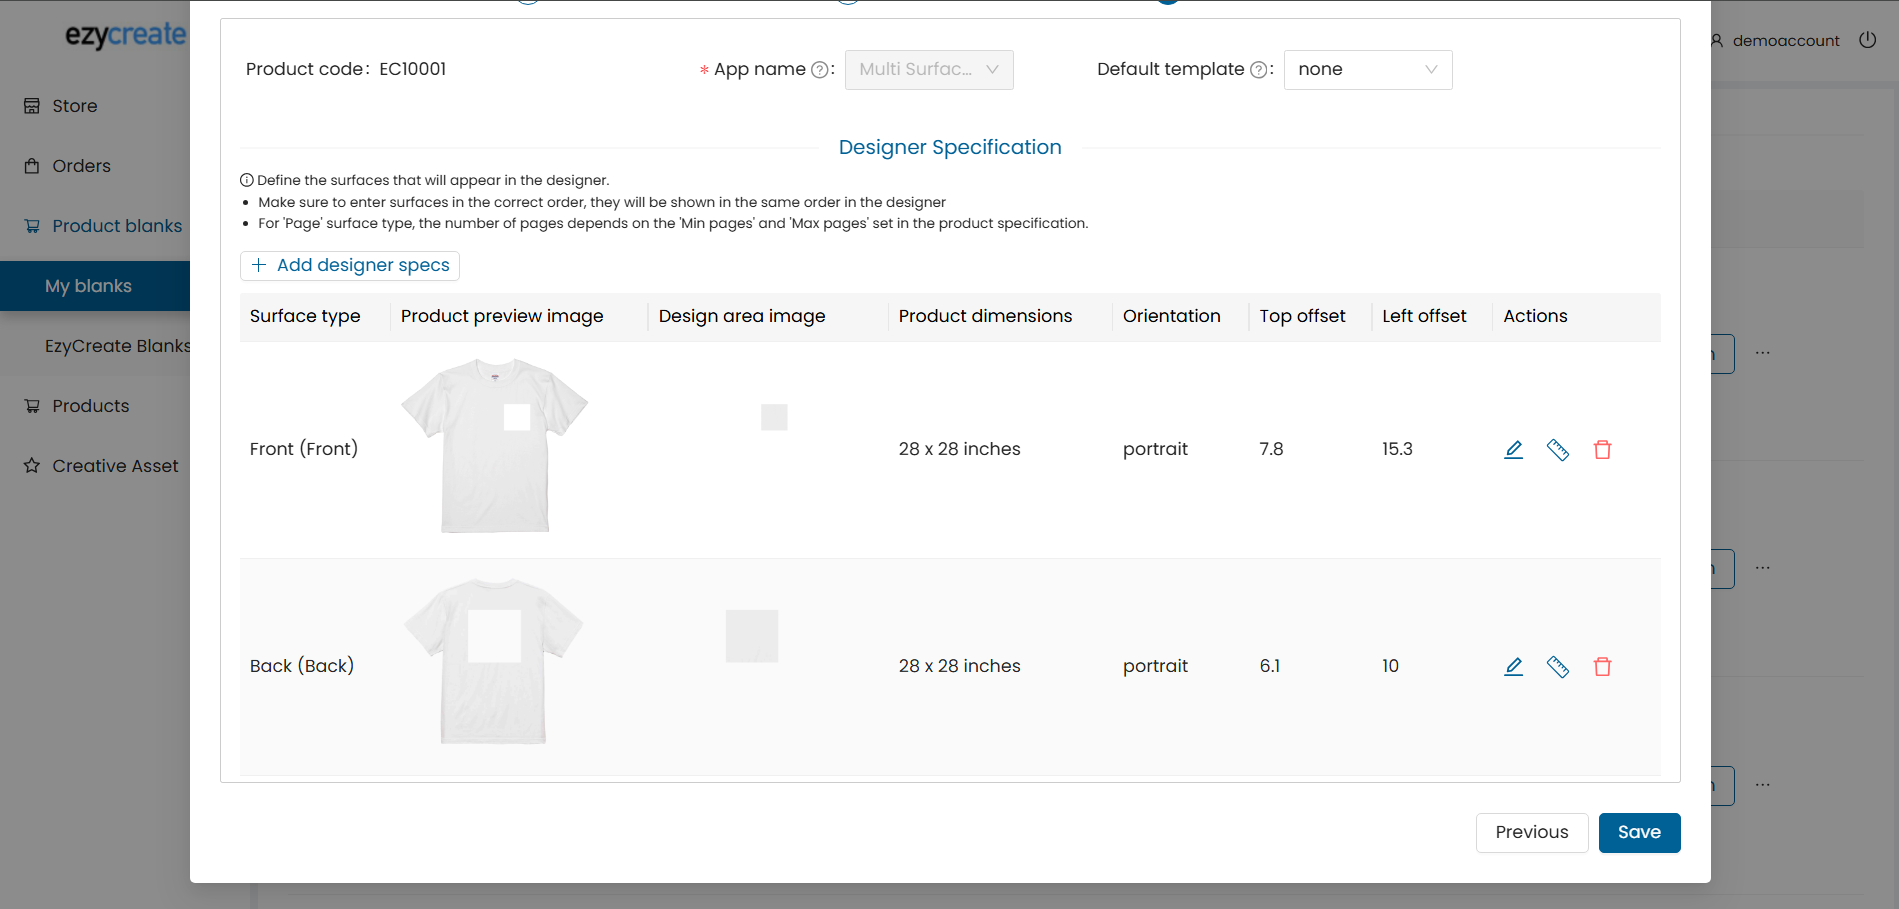
Final Step: Save and Verify
- Click Save Product Blank
- Click View in Designer
- Verify:
-
- Design area alignment
- Preview accuracy
- Place a test order to confirm everything works correctly
Steps to create a Merch Product :
Step 1
-
Go to "Products" tab select "My Products" and create a "Merch" product using the created T-shirt blank product.
Note: Create a album and add .png images for the merch product to be used for the T-shirts.
Step 2
- Once the product is created, open the My product dashboard and it will display the created product.
- Click on the “View in designer” button to preview the created product in the designer.
Step 3
- Once the product is opened in the designer, click on the "Merch" photos tab.
- Select a .png image from the merch album and apply it to the designer.
- click on the "Preview" button to view the product preview.
Step 4
- click on the "Test order" button to place the order
- Will display a message as “Order placed successfully”.
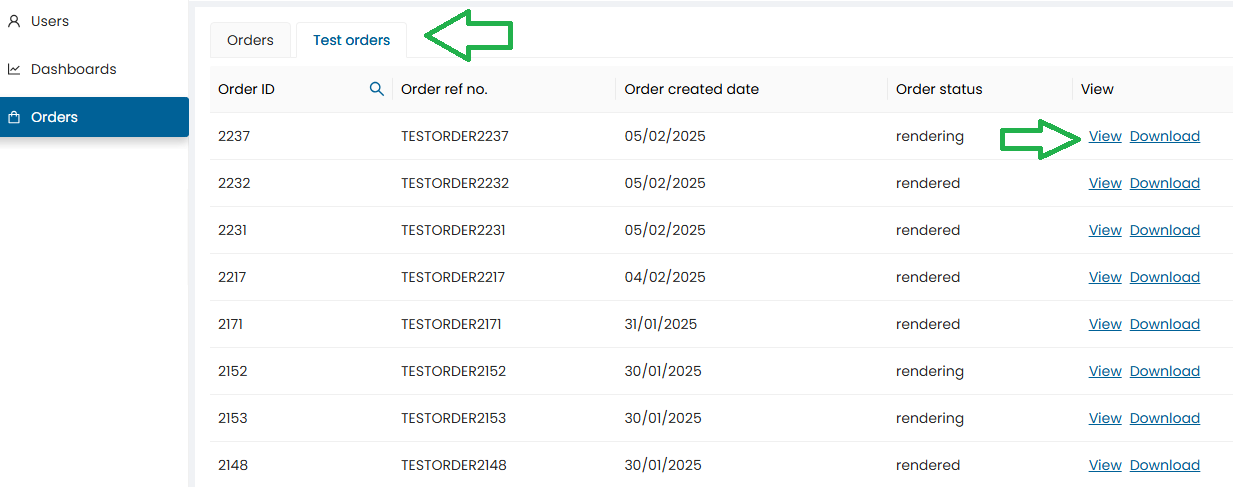
- The order tab will open displaying the recent order placed
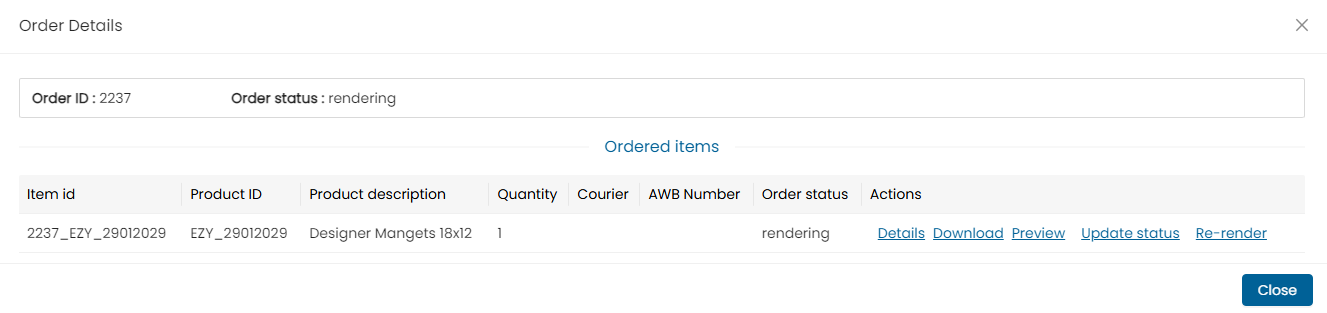
- Click on the ‘view” order details option
Step 5
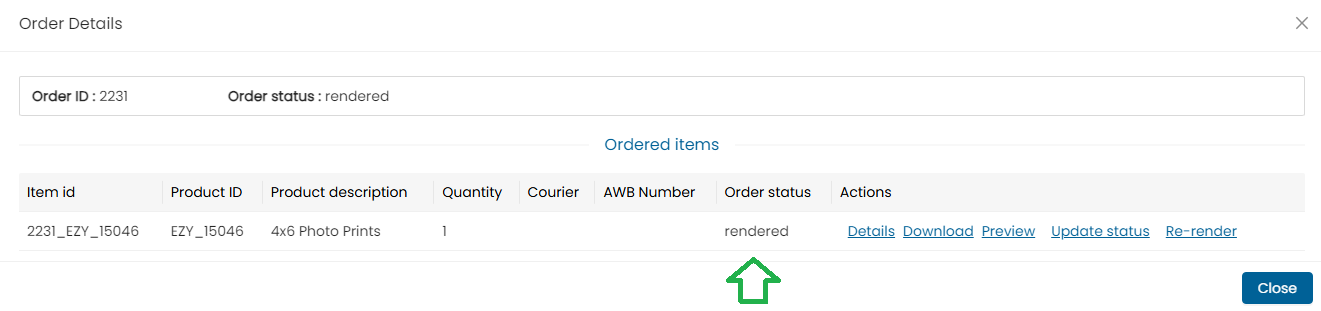
- Once the test order is placed the order will be rendered by the renderer application, and it will be available in the order screen
- Check the order status. Once the status is shown as rendered, you can download the order images.
- Orders can be downloaded using the “Download all” button or you can individually also download single images.
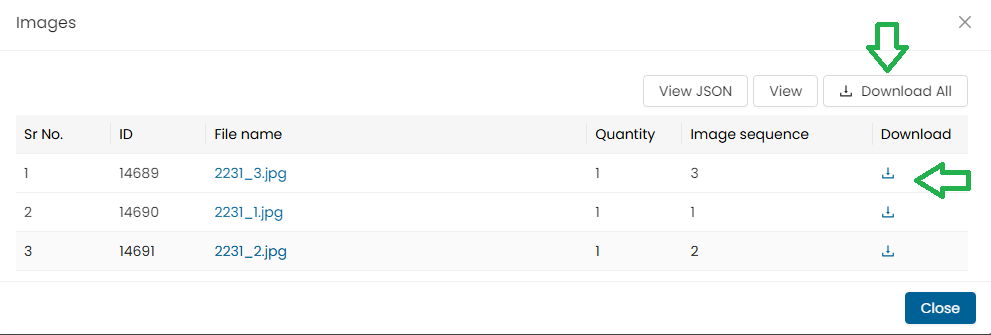
Note : In case of multiple images, users can either download a single image or click on the “Download All” button to download all the images at once.
Step 6
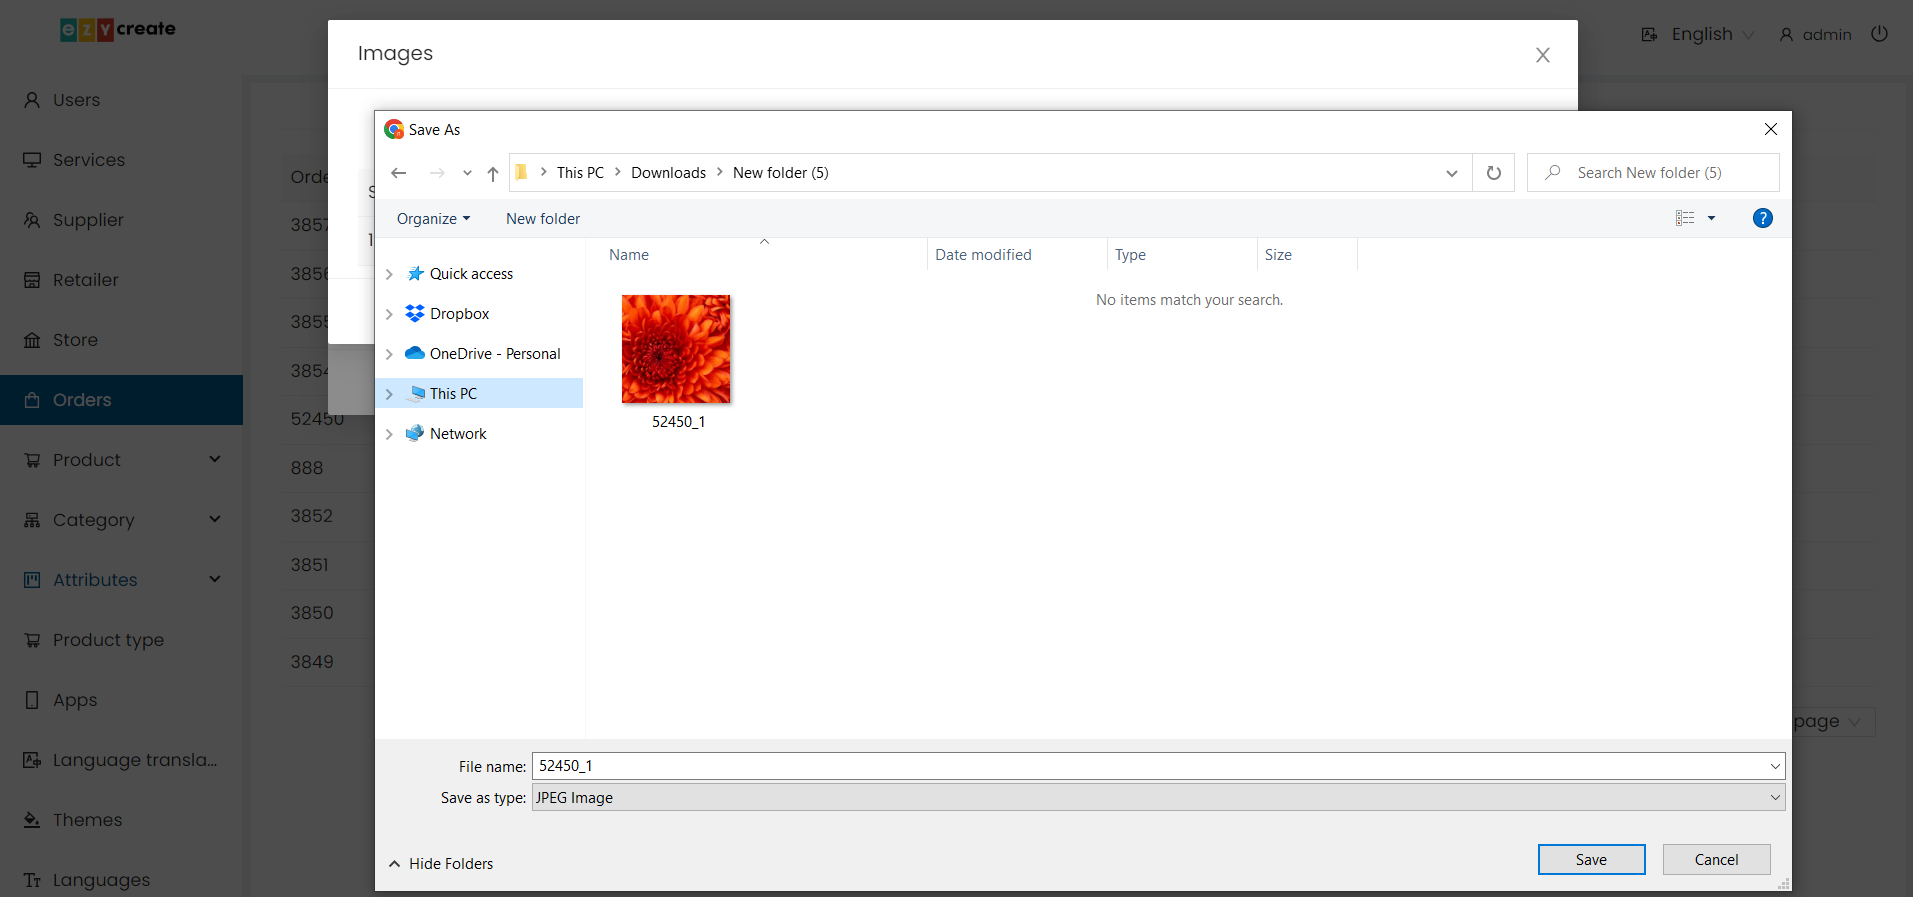
- Select a path to save the test order image.
- Click on the save button.
- The image will get downloaded to the selected location.
- If the order is downloaded using the “Download all” button than a zip file will be downloaded.
- Once the opstest is passed : Set a default template for the T-shirt with transparent background.
The downloaded image can be either sent to the printer for printing or it can be mailed to anyone who can print it.
Step 7
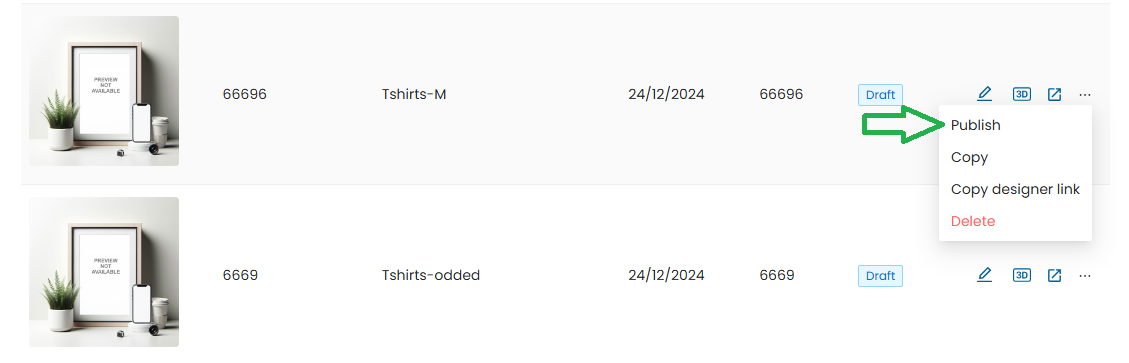
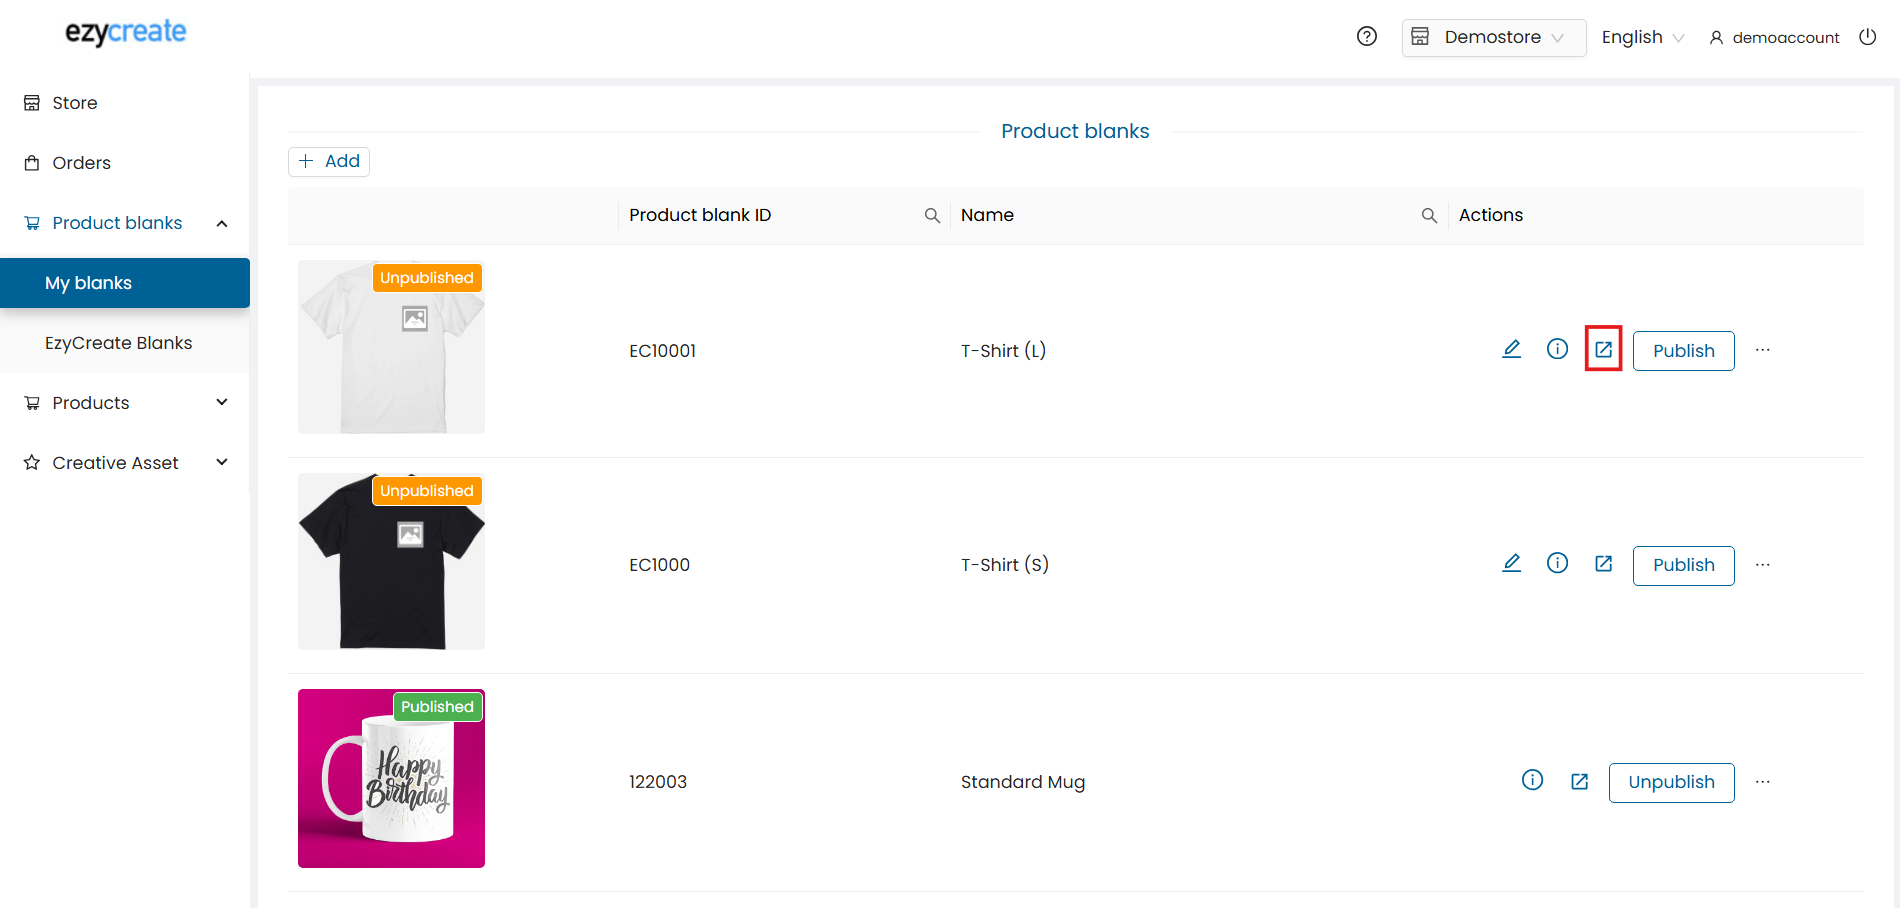
- Now the product is ready to be published.
- Go to the product blank dashboard.
- Click on the “Publish” button.
- Once the Product is Published & the product Templates are Published, Product Blank Specs Cannot be Changed. Only need formatting dnt change the text, dnt short , dnt do any thing on text keep it as it just make step by step