Print Designer
How to Create a Print Product
📩 Feedback Email: support@ezycreate.com
Glossary
- Product Blank: A basic product setup used to define how a product works in the design and order system, before adding visuals or final templates.
- Product Code: A unique code required for every product definition.
- SKU ID: A unique ID assigned to each product or product variant in the product fulfillment process.
- Safe Area: An outline marking on the product designer indicating the area that may get cropped/cut during fulfillment.
- Bleed Area: A portion of a design that extends beyond the final trim size to prevent white edges.
- Trim Area: The space around the product where excess material is cut away.
- Substrate / Attributes: The paper or material used for a product (e.g., Artpaper, Silky, Lustre).
- Lamination: A surface layer added to enhance durability or visual appeal.
- Image Size: Size of the image used in the designer.
- Photo Width: The size of the photo set to fill the designer area.
- Binding: The process to attach pages and create a book structure.
- Display Mask Image: An overlay mask displayed in the designer.
- Clippath Mask Image: The mask area used for designing.
- Offset Value: Used to set mask position in the designer.
- Category / Sub Category: Used to organize products under specific sections.
- App Name: Type of designer used (e.g., prints designer, photobook designer).
- Printable Surfaces: Designer surface where designing is done.
- Output Type: Output file format generated post-order (JPEG or PDF).
- Min Pages / Max Pages: Minimum and maximum number of pages a product can have.
Steps
Step 1: Login
- Open: EC admin
- Enter login details and submit.
Step 2: Navigate to "My Blanks"
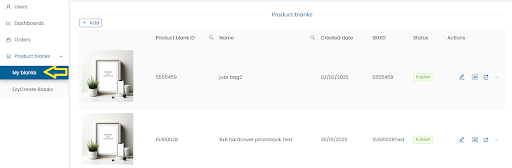
- Click on My Blanks to see defined product blanks.
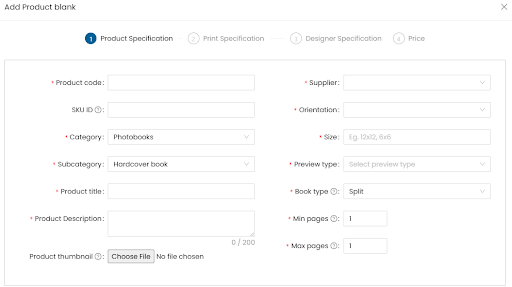
Step 3: Create a New Product Blank

-
Click on Add.
-
Product Code: Enter unique code.
-
SKU ID: Same as Product Code or enter different ID.
-
Product Type: Choose from the dropdown.
-
Category / Subcategory: Select as required.
-
Product Title: Enter name.
-
Product Description: Max 200 characters, internal use.
-
Thumbnail: Upload JPG image.
-
Supplier: Select supplier.
-
Orientation: Portrait, Landscape, or Square.
-
Size: e.g., 4x6, 5x7.
-
Preview Type:
- Photobooks: 3D
- Mini book: 2D
- Calendar: 2D
- Canvas prints: 3D
- Mounted prints: 3D
- Frames: 3D
- Mug: 3D
- Prints: Image
-
Min / Max Pages: As per product specs.
-
Click Next.
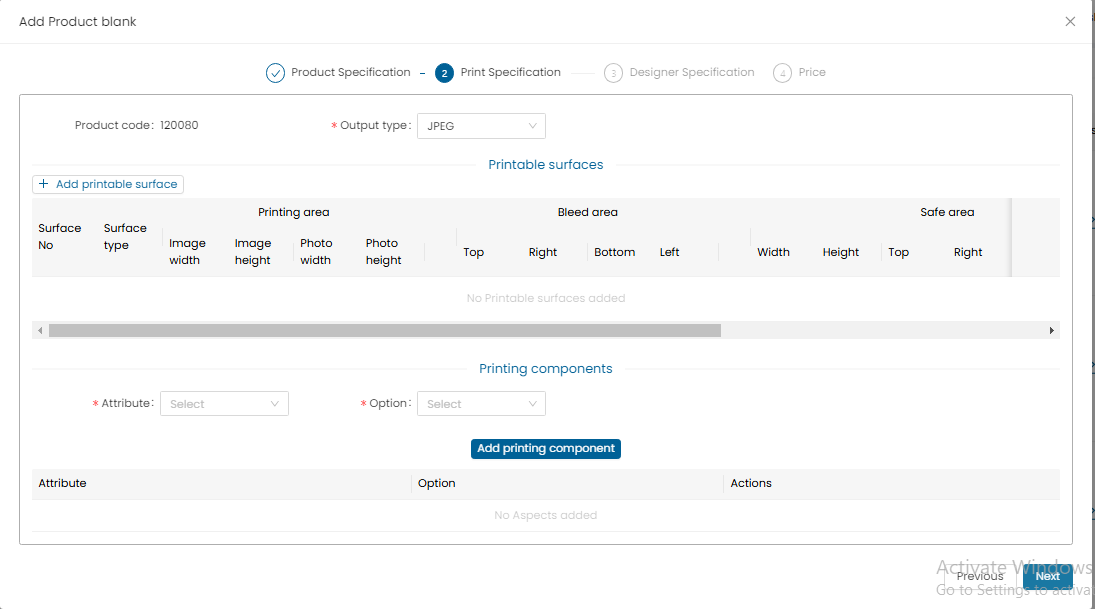
Step 4: Set Output Type & Printable Surface
-
Output Type: JPEG or PDF
-
Click Add Printable Surfaces
-
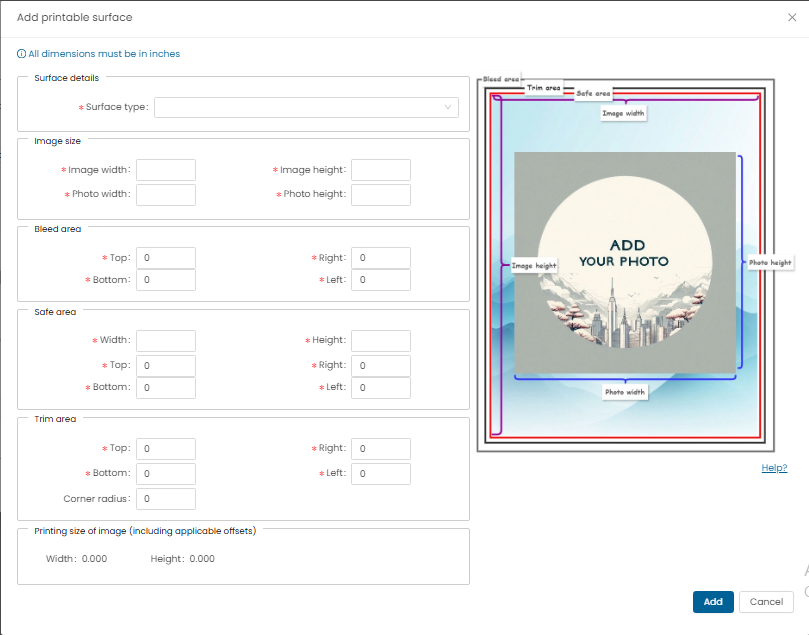
Enter all specs in inches:
- Surface Type: Choose from dropdown
- Image Size: Printable output image size
- Photo Width / Height
- Bleed Area
- Safe Area
- Trim Area (enter corner radius if rounded corners)
-
Click Add.
Step 5: Add Printing Components

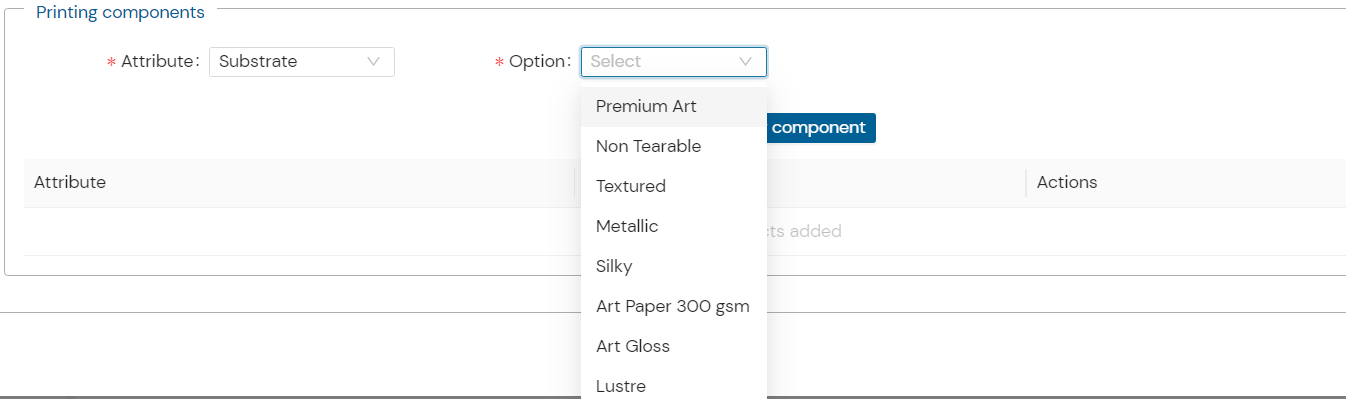
- Define Substrate, Lamination, Binding, Cover etc.
- If needed, add new attributes under Admin > Attributes > Laminations
- Select and set corresponding options for lamination/substrate.
Step 6: Designer Specs
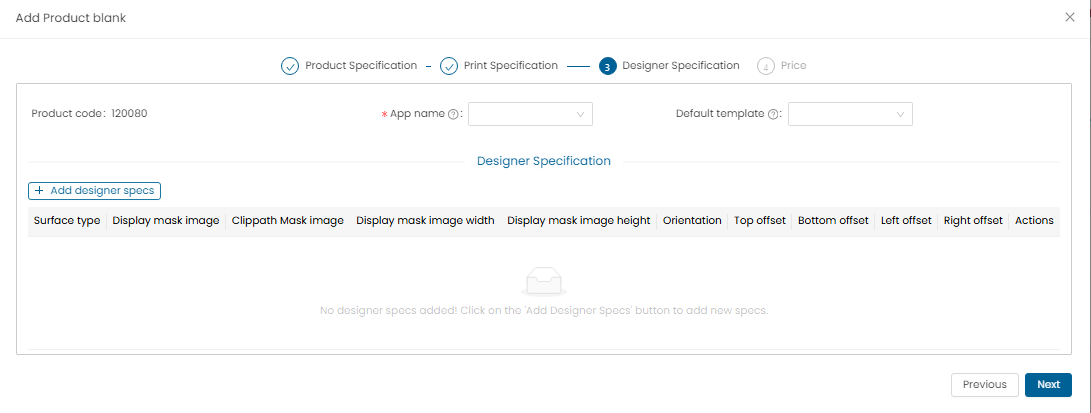
- All specs in inches.
- App Name: Select ezyprints product.
- Default Template: Optional customized template.
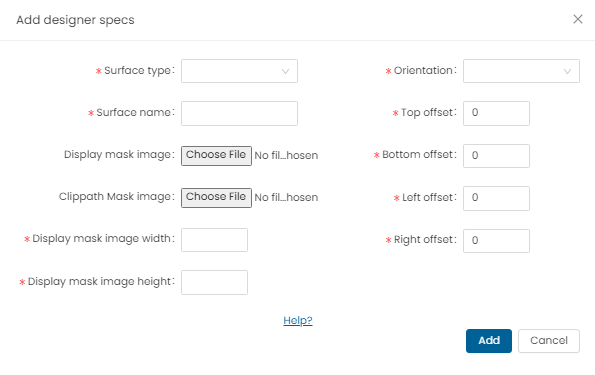
- Click Add Designer Specs
- Surface Type / Name: Select and name
- Display Mask Image: PNG format only
- Clippath Mask Image: PNG format only
- Display Mask Dimensions: Width and Height in inches
- Orientation: Select accordingly
- Mask Offsets: Top, Bottom, Left, Right (in inches)
- Important: Add both orientations (Portrait/Landscape) for print products
- In case of square orientation only square mask to be updated.
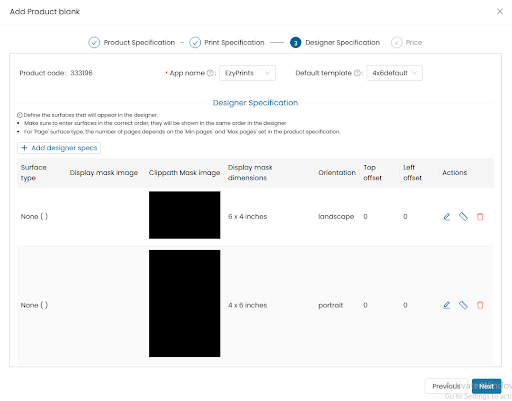
- Click Add, then Next
Step 7: Pricing
Option 1: Single Quantity Pricing
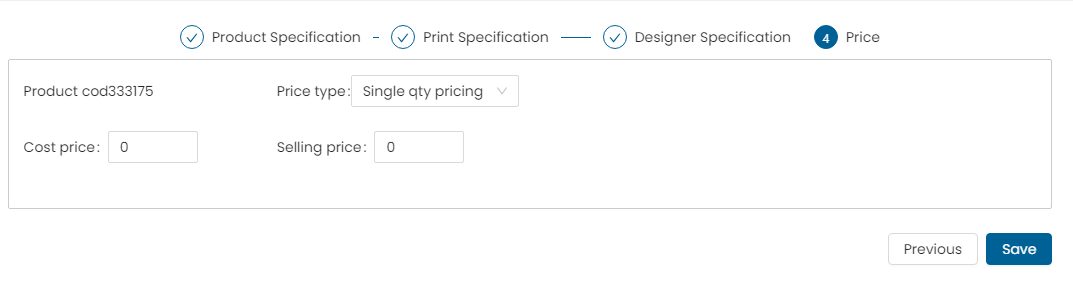
- Price Type: Single Qty
- Cost Price / Selling Price
- Click Add Price, then Save
Option 2: Volume Pricing
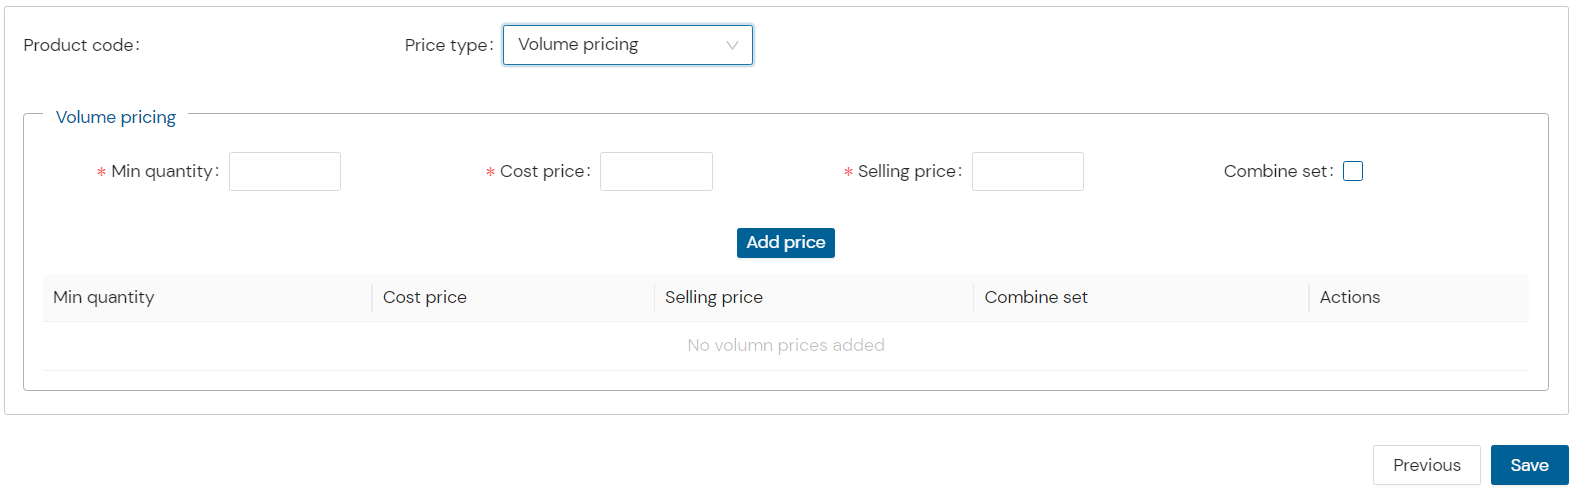
- Min Quantity
- Cost / Selling Price
- Combine Set (if required)
- Click Add Price, then Save
Option 3: Attribute Level Pricing
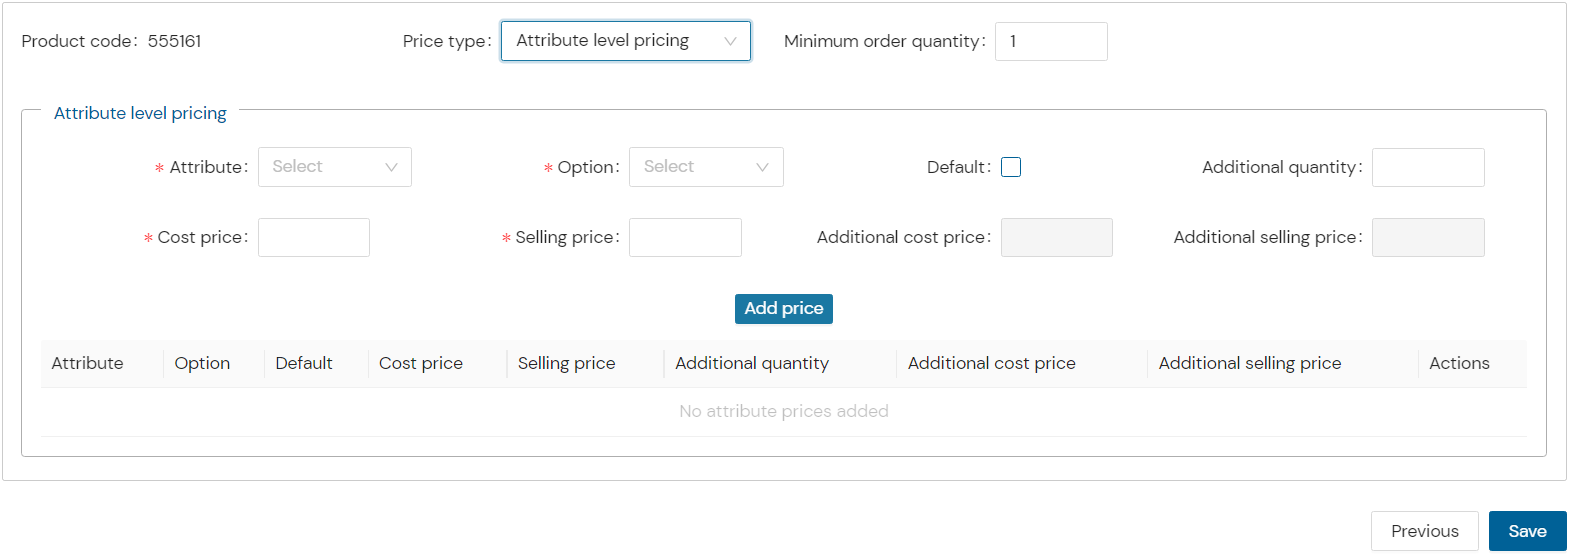
- Set pricing for each attribute (e.g., substrate)
- Click Add Price, then Save
Note:
- No attribute: Use Single Qty
- Bulk orders: Use Volume Pricing
- Attribute-specific rates: Use Attribute Pricing
Step 8: View Created Product
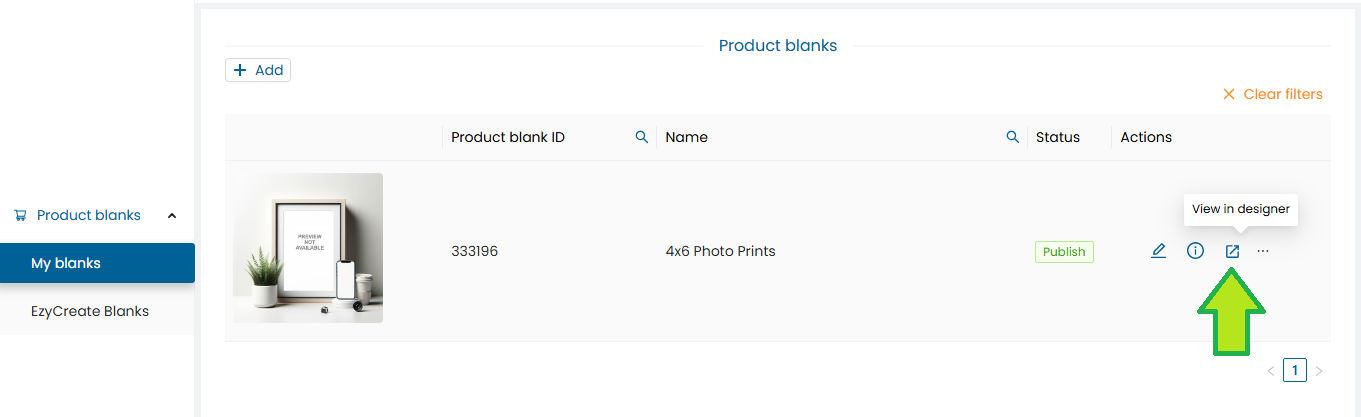
- Go to Product Wizard List
- Click View in Designer
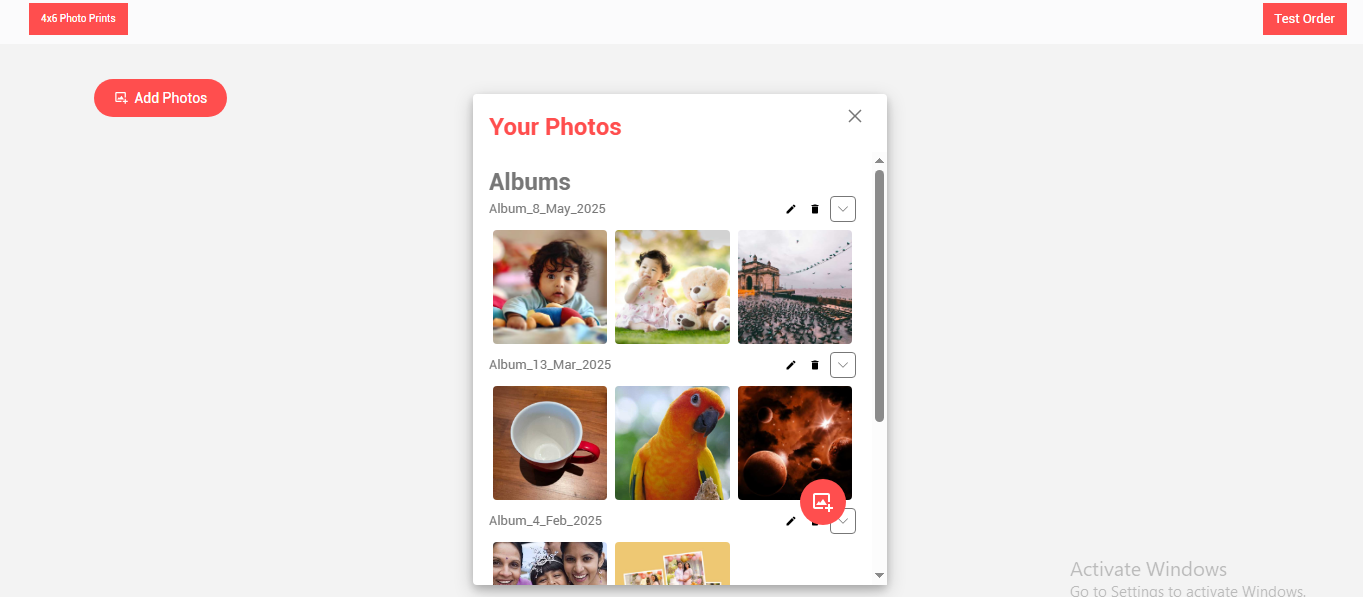
Step 9: Upload & Edit Photos
-
Click Add Photo
-
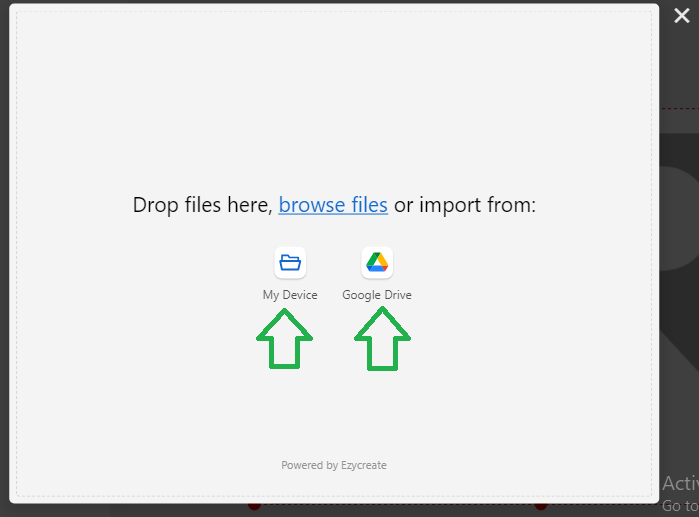
Upload via Upload Photos

-
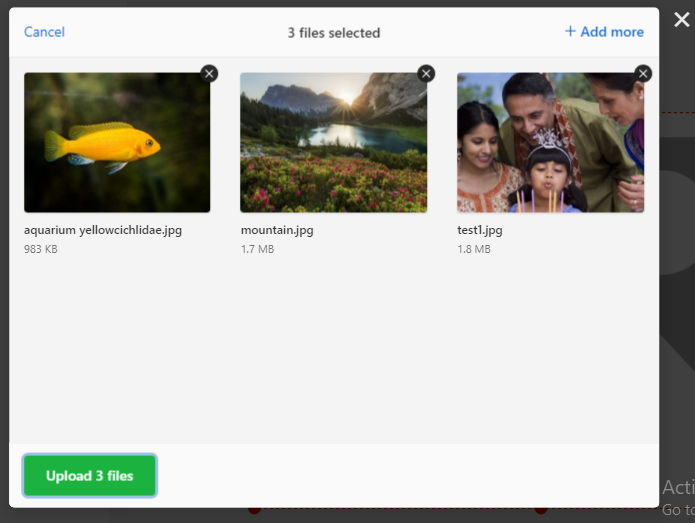
Select files or drag-and-drop
-
Click Upload
-
Select uploaded photo to open in designer
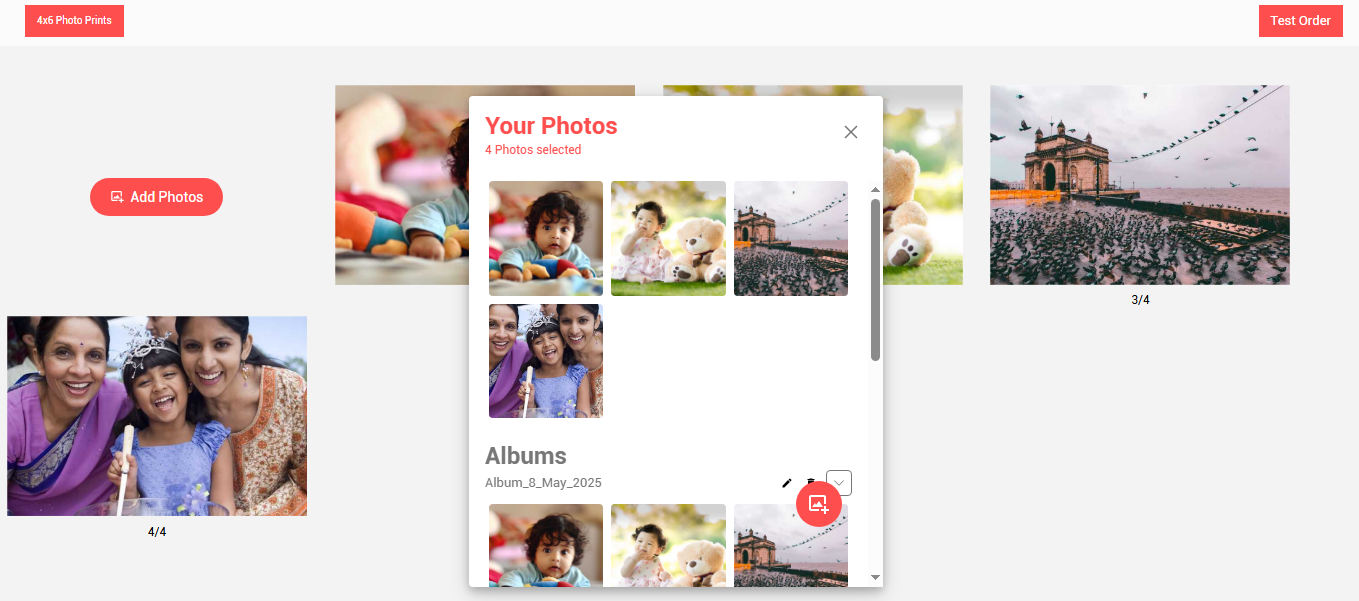
Photo preview will be displayed, now click on the photo to edit
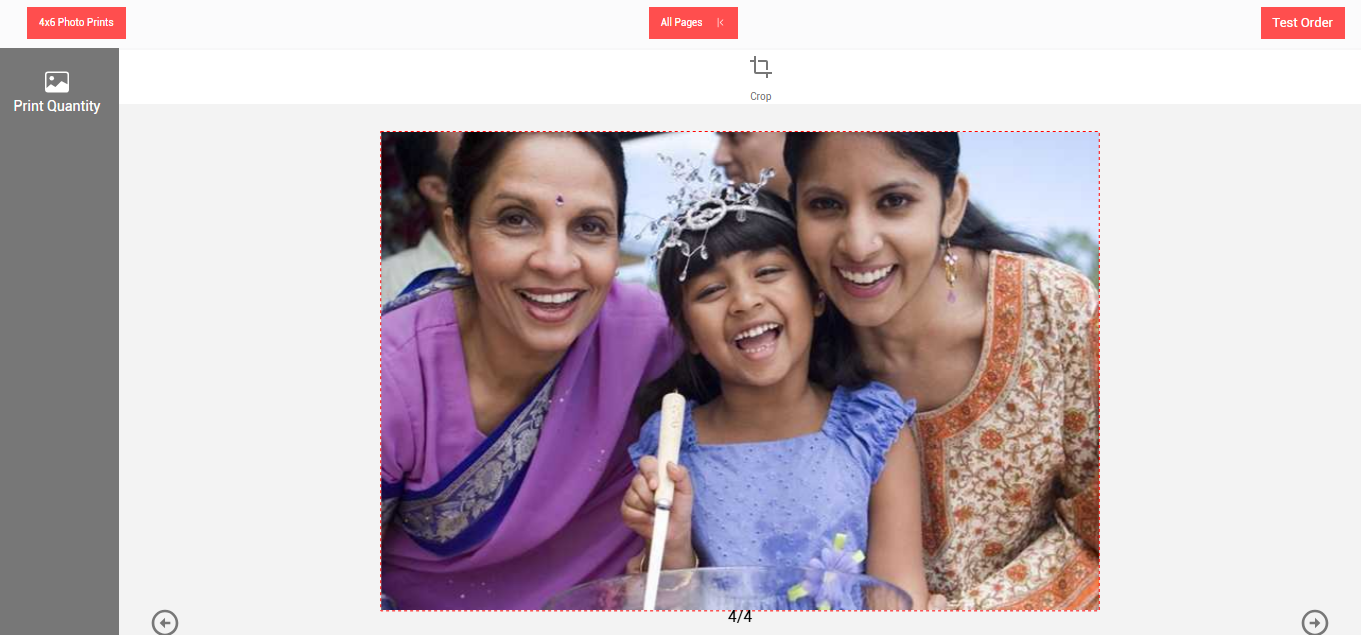
The photo edit menu will be displayed.
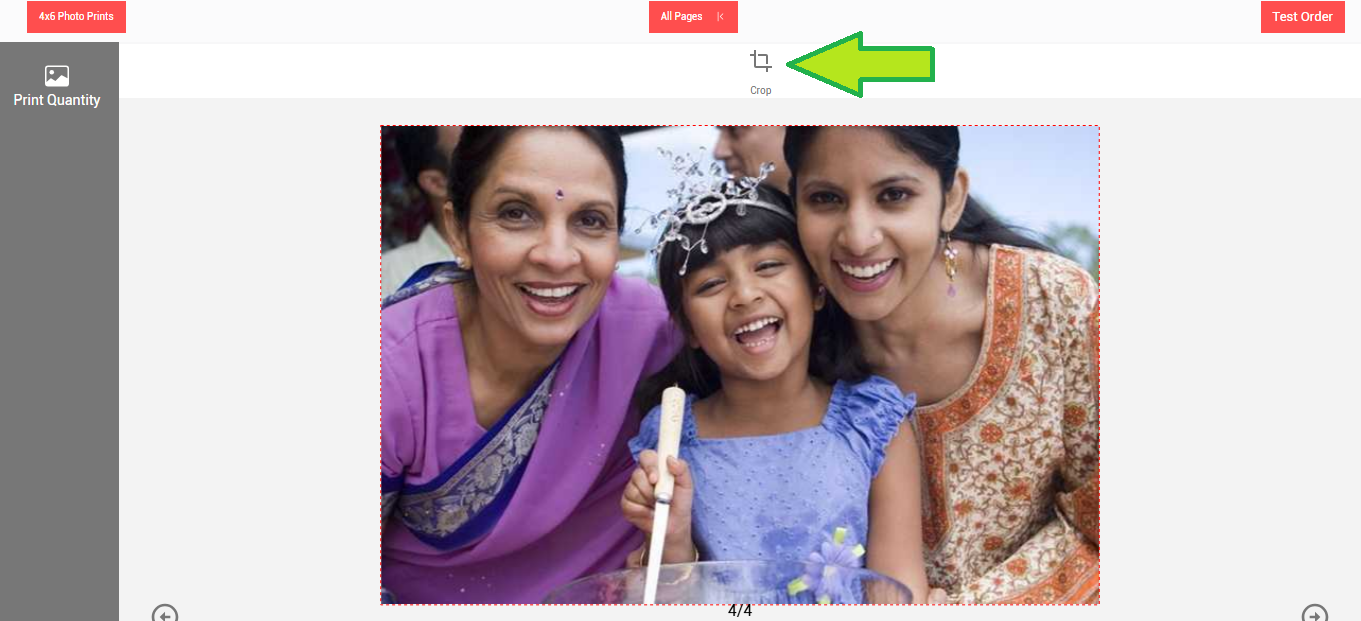
Click on the crop button. Use crop button to crop a photo, you can crop a portion and remove unnecessary parts of the photo.
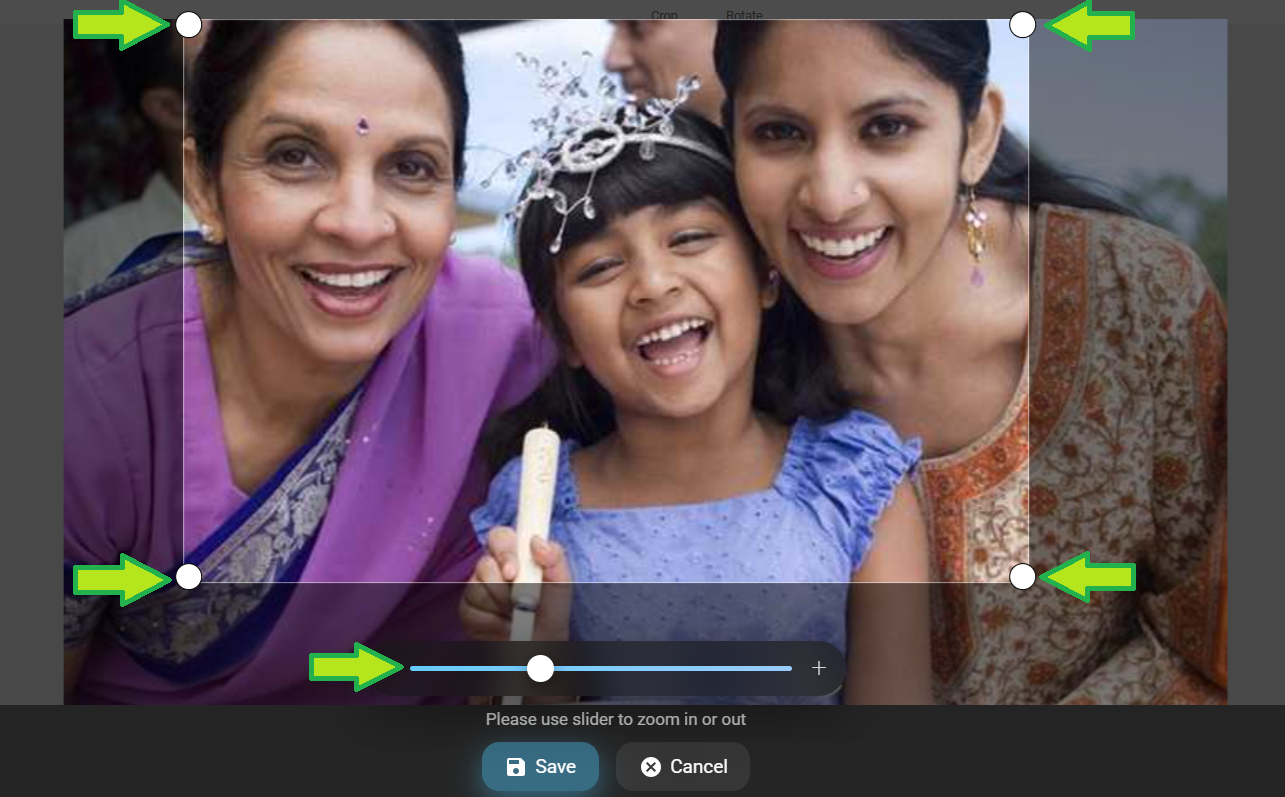
Using the crop slider and using the photo corner crop handles adjust the image crop.
Click on “Save” button once done.
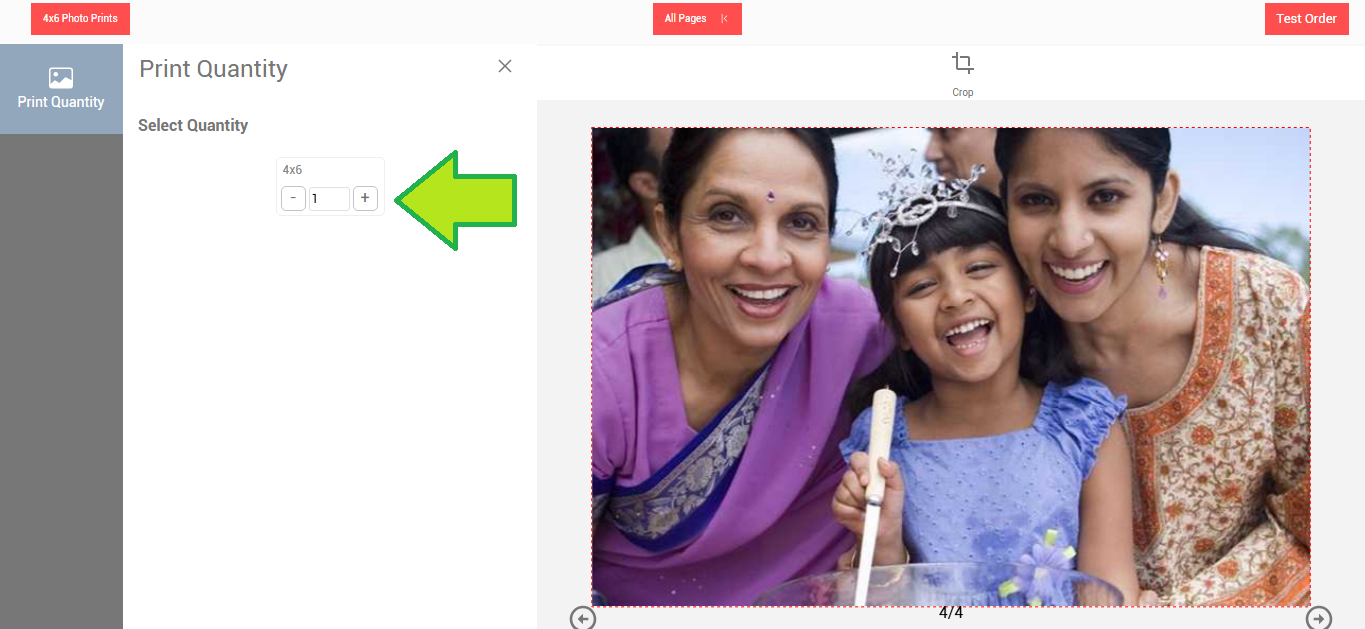
- Increase the photo quantity if required
- Once the editing is done click on the “Test Order” button.
Step 10: Confirm Test Order
-
Message: “Order placed successfully”
-
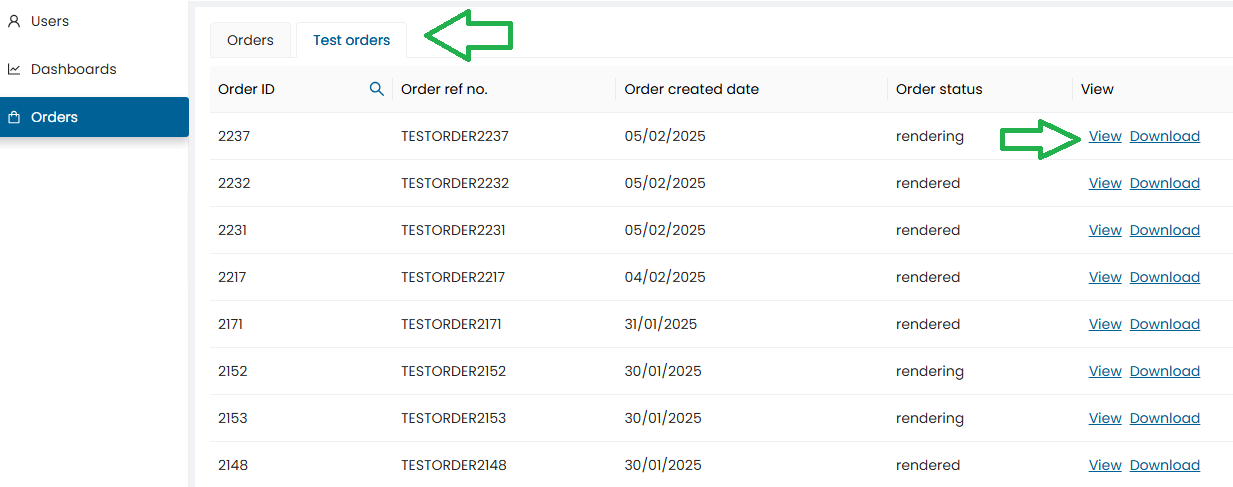
Navigate to Order Tab
-
Click View to see order details

-
Wait for status to show Rendered
-
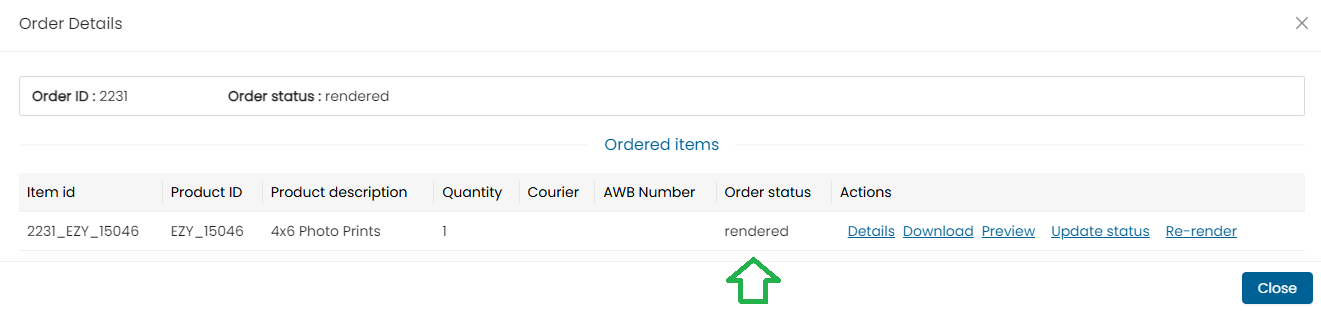
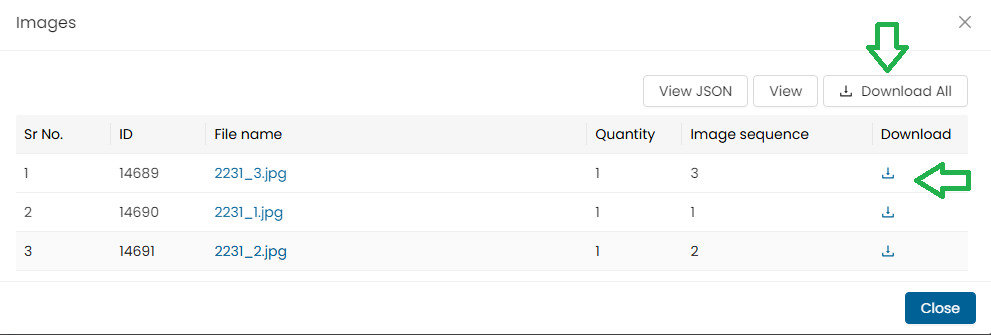
Orders can be downloaded using the “Download all” button or you can individually also download single images.
-
Note : In case of multiple images, users can either download a single image or click on the “Download All” button to download all the images at once.
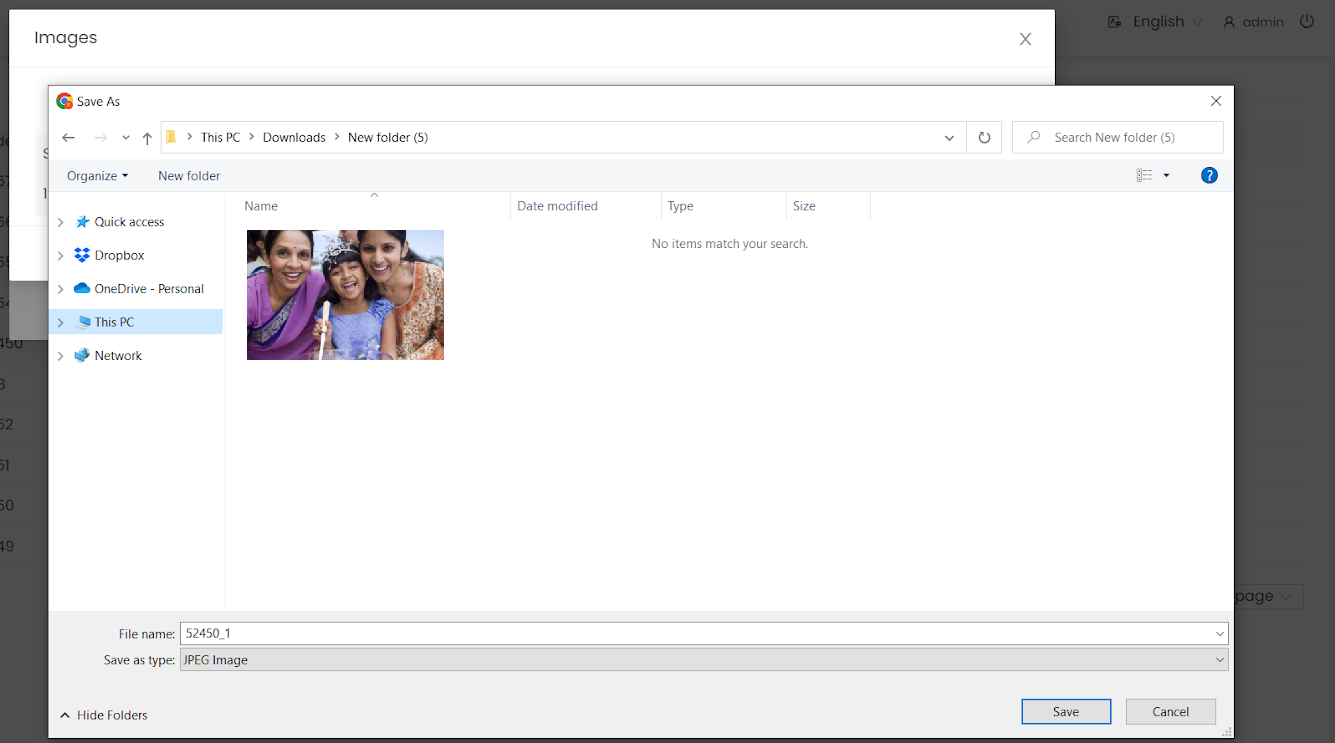
Step 11: Download Test Output
-
Use Download All for ZIP or download images individually
-
Select path and click Save
Step 12: Publish the Product
-
Go to Product Blank Dashboard
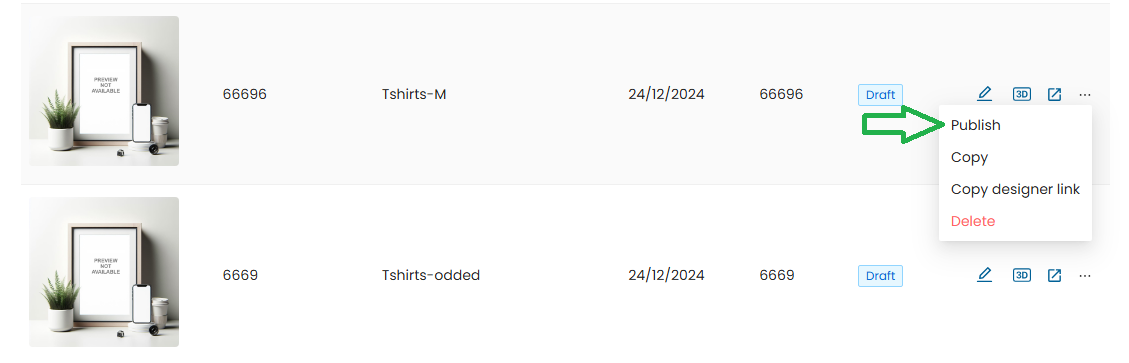
-
Click Product Settings
-
Click Publish

-
Status will update to Publish
Once Published, the Product Blank Specs Cannot Be Changed.